Coming up with compelling content that readers will come back for is only half the battle of a great blog. The other half is all in the presentation and style. For a unique design, avoid the pre-made themes for your blog platform and instead customize your own theme.
There are tools that help generate custom themes and that require very little understanding of HTML, JavaScript, PHP and CSS. And even the most inexperienced merchant can use them.
Consider the following tools to help generate your own customized blog theme for two top blogging platforms: WordPress and Blogger.
WordPress Theme Generators
There are thousands of pre-made themes on the web for WordPress. Some are free at sites like WordPress Themes, and some charge a one-time fee, at sites like iThemes. Both of these can be effective options.
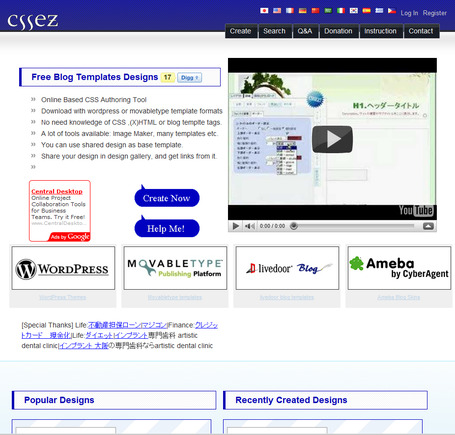
CSSEZ.com Generator
But a custom theme can add that extra spark to your blog and generating one for WordPress is simple with CSSEZ. Here’s an overview of the process.
- Begin by going to the CSSEZ website and registering a free account. You’ll need this account to save and download your created theme.
- Click the “Create Now” button mid-page or the “Create” tab at the top of the page; they both go to the theme creation process.
- You’ll be taken to a template shell with placeholder text for the various sidebars, body, buttons and tabs for your blog.
- To change the layout, move your mouse cursor over the blue “CSSEZ!” icon and an edit menu overlay will appear.
-
From the CSSEZ edit sub-menu, you can alter the layout, column width and general appearance, color, style, font, text size and more. It’s all very customizable.
To get started with an actual customized theme, follow these steps.
- Layout Tab. Start with the layout. Choose between one and four columns and choose the appearance of those columns on your page. Then adjust the top menu tabs and bottom footer settings; simply click “Hide” if you don’t want either.
- Detail Tab. Next, you can alter the contents of each column, tab, sidebar, header and footer from here. Change fonts, colors, text sizes and other presentation settings.
- Save and Download. When you are done, click the “Save and Download.” CSSEZ WordPress will then automatically generate a .zip file. Click the “Download theme ZIP file” button and download your file. Extract the files on your computer and name the folder something you will remember. For this example, we’ll call it “CSSEZ Theme 1.” Then on the backend of your site, use an FTP client to access your blog’s web server. Find the directory folder titled “wp-content/themes” — created by WordPress — and upload the file folder there. Once uploaded, to install your theme (a) go to your WordPress admin, (b) click the “Presentation” tab, and (c) select “CSS Theme 1”.
WordPress Theme Generator
If CSSEZ.com is too much detail and you want a very bare-bones approach, try WordPress Theme Generator. It supports WordPress 2.1 to 3.1 themes and is compatible with all the major browsers. It can help you make a simple WordPress theme in minutes.
WordPress Theme Generator home page.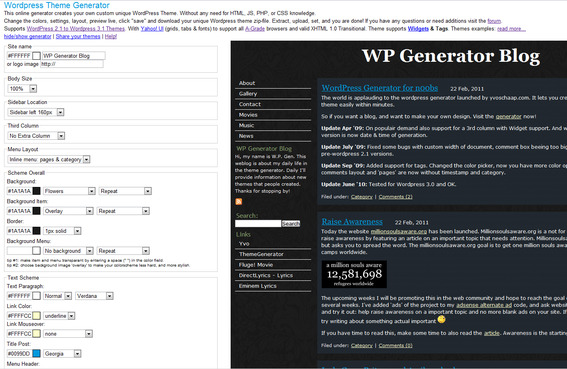
- Go to WordPress Theme Generator.
- Site Name. There are several simple drop downs with limited options in each, start with the site name at the top and enter in the name of your website that you want to appear on the blog. For this example, I chose “Test Blog.”
- Text Color for Title. Then choose from the drop down the color you would like the text to appear in. Click “Save” when you are done selecting the color. Or choose an image rather than text for your blog by entering in the URL address for the image.
- Text Body Size. Next, choose from one of the text-size presets or enter in a custom size.
- Sidebar Left and Third Column. If you want a sidebar on the left and right of your main body text, select the size of the columns here, measured in pixels. Select “No Sidebar” if you don’t want a left sidebar and select “No Extra Column” if you don’t want a column on the right at all.
- Menu Layout. If you have left sidebar, you can customize how the categories and tabs display on the screen and add tabs at the top of your page, as well.
- Scheme Overall. Here you select the background imagery, the background of the body of each post, border size, and color. You can select custom imagery by entering in your own URL address where the image is stored. For this example, I’ve used a stock image of wrinkled paper and set it to the “Background.”
- Text Scheme. With more than a dozen drop-down menus, you can customize the color of fonts, font styles and how the page behaves with mouse hovers and more.
- Tag Cloud, Archives, Search and Distribution. Add a tag cloud if you are still using WP 2.3 or just leave it set to “No tags.” Set the search parameters for how previous posts display when searched out and then set the copyright.
- Once you’ve set up your theme, you can preview it by clicking the “Preview” button at the bottom of the page. When satisfied with your theme, click “Save.”
- WordPress Theme Generator will automatically generate a .zip file. Then click the “Download theme ZIP file” button and download your file. Extract the files on your computer and name the folder something you will remember. For this example, we’ll call it “Test Theme.” Then on the backend of your site, use an FTP client to access your host web server. Find the directory folder titled “wp-content/themes” — created by WordPress — and upload the file folder there. Once uploaded, go to your WordPress Admin, click the “Presentation” tab and select “Test Theme” to install your theme.
Blogger Theme Generator
Like WordPress themes, there are thousands of free and premium pre-made Blogger templates at shops like Blog Themes Plus, which carry both free and one-time fee-based themes, or BloggerTemplatesFree, which focuses on free Blogger templates.
But, with a tool like doTemplate, you can create a relatively custom blog look for free and without any knowledge of code, script or CSS. Here are the steps.
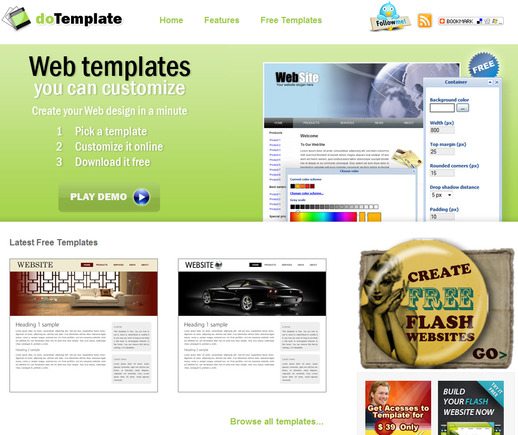
- Go to doTemplate.
- Browse the selection of pre-made templates and find one that is generally close to the layout you prefer. Click the thumbnail of that template. You can only customize the final details of your blog from this tool. The layout is set, so it’s important to find one that is relatively close to what you imagined.
- Next, click the “Customize and download” button at the top of the larger screenshot of your template.
- You’ll be taken to a customize page, where you simply click the area that is highlighted in red and alter the elements within. The customizer allows for alteration of backgrounds, banner, header, footer, tabs, buttons, text content, font styles, colors and more.
- Banner. Click the header and you can customize this area with the more flexibility than any other sub-section of your page. Upload custom graphics, change opacity, and fade and text position in the header.
- Navigation. Click the overhead menu bar and change the color, size and text to your desired look.
- Container and Layout. Change the overall width of the center column where the body of your text appears when clicking “Container.” Then click “Layout” and customize the fonts, and the text color, links and headings.
- Background. Click to the side of the center body column and alter the background color.
- Bottom. Change the background color, size, link behavior and much more when you click the bottom of your template.
- Download. You’ll notice a green download button on the far left of the screen. Click this button when you are ready to download and save your new template. After you click the green button, the service will ask what format you are using – select “Blogger.”
- Once the template is ready, you’ll be presented with a new button that reads “Download your template.” Click this button and the download will begin automatically. DoTemplate creates a .zip folder with all the details of your template stored within the .zip folder.
- Next, you’ll extract the files from the .zip folder and save them.
To install the new theme on your Blogger account, follow the following steps.
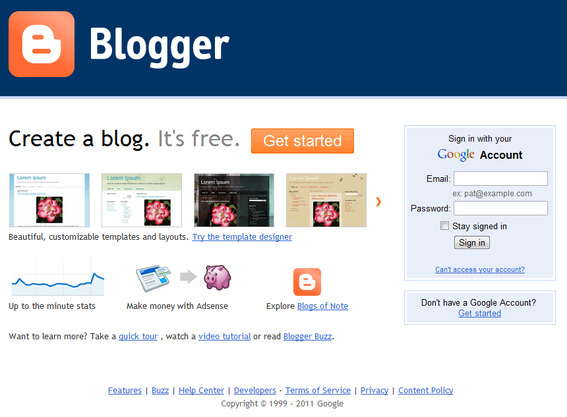
- Log on to your Blogger account.
- Go to the Dashboard, click the “Layout” tab and then the “Edit HTML” button.
- Upload the “blogger.xml” file from the extracted folder you saved from the unzip process.
- Next, you’ll need to host your template’s imagery somewhere else, because doTemplate.com will only host the images for a short amount of time and then delete them. DoTemplate suggests using Picasa, so we’ll discuss that here.
- Log on to Picasa.
- Upload all images to Picasa from the “css” folder in the extracted folder that you created from the unzip process. The “css” folder is within the main “images” folder.
- Once all the images are uploaded, copy the URL of the actual size of the image. To obtain the actual size URL, click the “magnified view” icon and right click on the image and copy the URL from there.
- Now return to Blogger, and in the “Edit HTML” page in your Dashboard that you were just in previously, locate the URL for each image and replace it with your newly created Picasa URL. The HTML code will clearly indicate which URL is assigned to which part of the blog, with lines like “background-image url.” Replace all the image URLs with your Picasa URLs, and you are done.