We live in a multi-device world. Ecommerce marketers need a clearer understanding of device paths that drive revenue, devices your shoppers use to browse your store, and devices they use to make purchases.
For example, a user may find your product through an organic search on a laptop, then look up its details on a smartphone and, finally, buy online on a tablet. By default, Google Analytics counts these three sessions as unique visitors.
Multi-device (cross-device) tracking helps identify these seemingly independent data points on unrelated devices as three related actions. This gives context to your analysis and provides an integrated view of your users and their behavior.
1. User ID vs. Client ID
Universal Analytics’ User ID feature solves the device attribution problem. It works in conjunction with Client ID to paint a much clearer picture of your shoppers’ activities across all their devices, as follows.
Client ID. This is the unique ID that Google Analytics generates from a web browser and device combination. The Client ID changes as a user switches a browser, device, or deletes browser cookies: Google Analytics creates a new Client ID counts a new user. Here’s what the problem looks like.
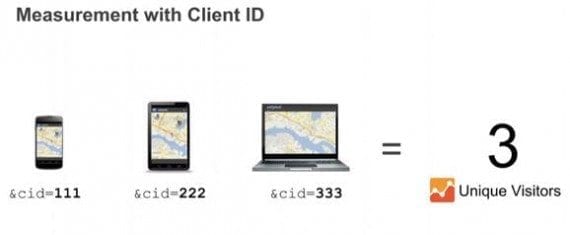
A Client ID changes as a user switches a browser, device, or deletes browser cookies.
User ID. This is the value a shopper sends to Google Analytics, which identifies the shopper as an authenticated user — “authenticated” means that the shopper been identified as a user on a website or app.
Through the User ID feature, you can create and assign your own IDs to track unique users, instead of using the Client IDs generated by the Google Analytics tracking code. User ID represents unique users; it is assigned only to logged-in users. It helps to measure across devices and browsers.
In other words, User ID counts the number of the unique users more accurately.
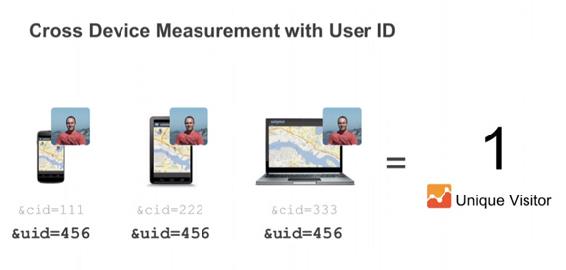
With User IDs, you can create and assign your own IDs to track unique users.
As illustrated above, the biggest benefit of User ID tracking is making possible cross-device measurement in Google Analytics. In addition, User ID tracking provides a top-level view of the customer purchase journey, to enable you connect different sessions and devices into a single path towards each conversion.
2. Session Unification
Session unification is a User ID setting that enables the collection of hits before a User ID is assigned or automatically associated with a User ID. Session unification is turned on by default.
If session unification is turned off, then only hits collected within a user login session will be associated with the User ID. The image below illustrates the principle of the session unification process.
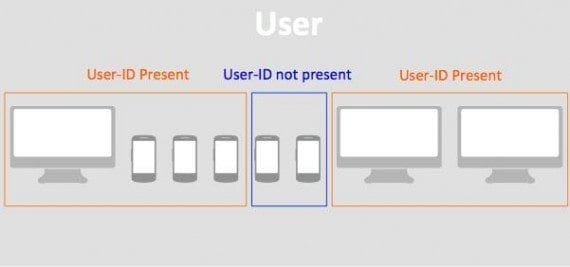
Session unification is a User ID setting that enables the collection of hits before a User ID is assigned.
3. Implementing Cross-device Measurement
The implementation of cross-device measurement can be done in three steps:
- Enable User ID feature;
- Add User ID value to data collection;
- Create User ID reporting view.
Let’s walk through this process.
Enable User ID feature. The User ID feature is only available in Universal Analytics and is set at the property level. Take the following steps to set up User ID.
Go to the Admin section; select an account and a property. From the Property column, click Tracking Info, then User ID.
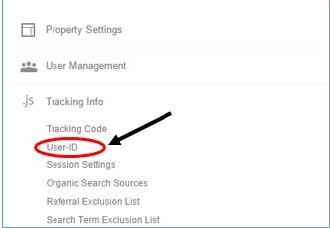
The User ID feature is only available in Universal Analytics.
Then follow the step-by-step flow.
Click the blue button to switch it on and move on to “Next step.”
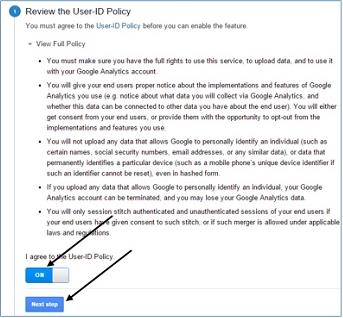
Click the blue button to switch on User ID.
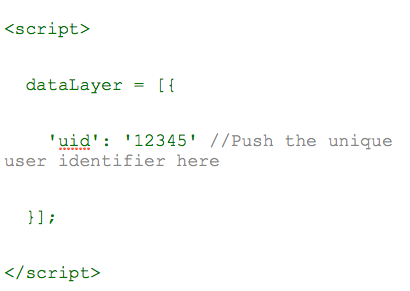
Add User ID value to data collection. After you enable the User ID by agreeing to the policy, you must implement the User ID in your tracking code. Add the following line of code to your Google Analytics tracking code on each page of your website before any data hit is sent.

Add this code to Google Analytics tracking code on each page.
Switch the session unification toggle button on.
Create User ID reporting view. Click “Create” to create a User ID view. Enter a Reporting View name. You might want to include the term “User ID” in the name to help you remember this is a special User ID view.

Click “Create” for a User ID view.
Select a Reporting Time Zone.
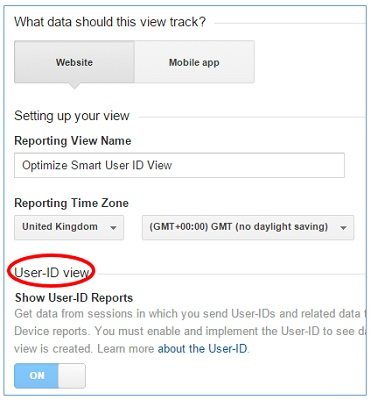
Select a Reporting Time Zone.
User ID views cannot be converted to standard views, and standard views cannot be converted to User ID views. Only new views added to a User ID enabled property can be designated as User ID views.
Adding User ID in Google Tag Manager
You can also add the User ID feature via Google Tag Manager, as follows.
First, click “More settings” and “Fields to Set.” Then create a macro to pull the actual User ID value from a cookie or the data layer.

To add the User ID feature via Google Tag Manager, click “More settings” and “Fields to Set.” Then create a macro to pull the actual User ID value.
Second, define the dataLayer variable on the site (on all pages after a user signs in) to the unique user identifier variable.
Define the dataLayer variable on the site to the unique user identifier variable.
The unique user identifier should be a non-PII (Personally Identifiable Information) value according to the Google Analytics policy.
4. Cross-device Reports
Cross-device reports help you connect data from unrelated devices and sessions, to obtain a better understanding of the customer purchase journey, such as how users engage and convert on your website across different devices and over the course of multiple sessions. Cross-device reports are only available in User ID views.
There are three cross-device reports in the Audience tab:
- Device Overlap;
- Device Paths;
- Acquisition Device.
Device Overlap. This report shows the percentage of visitors on certain device combinations and the revenue generated from each combination.
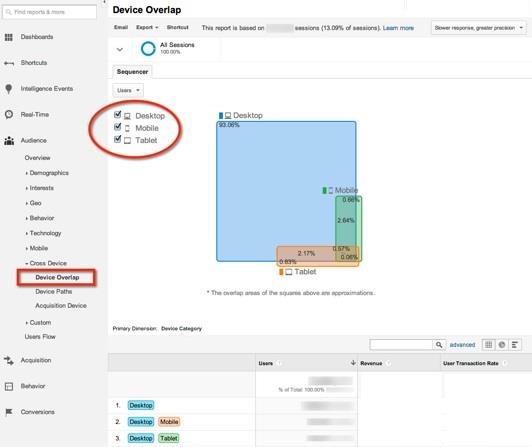
Device Overlap report should help understand user-behavior patterns across devices based on device combinations.
This report should help understand user-behavior patterns, so that your marketing decisions can be more focused on device combinations that will yield the highest results.
To access the Device Overlap report, go to Audience > Overview > Cross Device > Device Overlap.
Device Paths. The Device Paths report reveals the order of varied devices by users that engage with your website and eventually convert. This report shows, by default, the last five device interactions with at least one transition (switch from one device to another) in the column “Steps in path.”
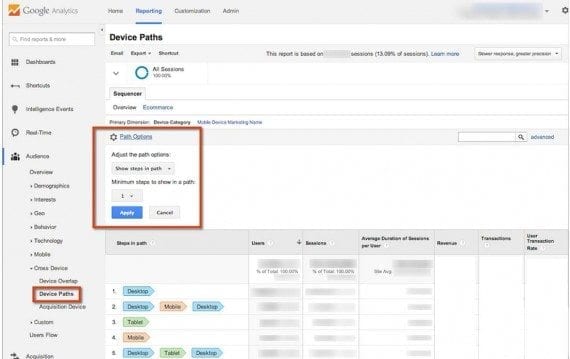
The Device Paths report reveals the order of varied devices by users to engage with your website and eventually convert.
In the lower portion of the screenshot above, the first device path is a transition from one desktop to another desktop device.
To see up to 50 last-device interactions in this report, click the “Path Options” link and select the number of interactions from the drop-down menu “Minimum steps to show in a path” (in a red box on the screenshot above) and then click “Apply” button.
To access the Device Paths report, go to Audience > Overview > Cross Device > Device Paths.
Acquisition Device. This report helps you determine if a user converted on the originating device (the first device used to interact with the website) or on another device.
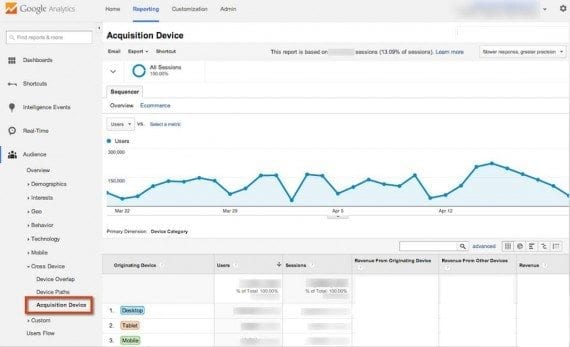
The Acquisition Device report helps determine if a user converted on the originating device.
By analyzing this report, you should have a better understanding as to whether users from a certain device generate more revenue than on other devices.
Finally, there is helpful report that is still available in the standard reporting view: the User ID Coverage report. It’s grouped with the Audience > Behavior reports in a web view, and with the Behavior > Behavior reports in an app view.
The User ID Coverage report help you determine the percentage of sessions and activity from logged-in users.

The User ID Coverage report is grouped with the Audience > Behavior reports in the standard web view.
Logged-in users (likely repeat customers) typically behave differently from non-logged in users. This report shows the User ID status in two ways.
- Assigned. The number and percentage of sessions whereby users have assigned User IDs.
- Unassigned. The number and percentage of sessions with users not assigned a User ID.
Wrapping Up
Cross-device reports provide insights to organize user-behavior data across multiple devices, for marketing analysis. You can see how many seemingly unrelated touch points, sessions, and interactions are, in fact, connected. You can track how logged-in users make purchases: the combination of devices they use, where they started their journeys, and the revenue they’ve generated.
In short, cross-device reports can make you a better marketer.