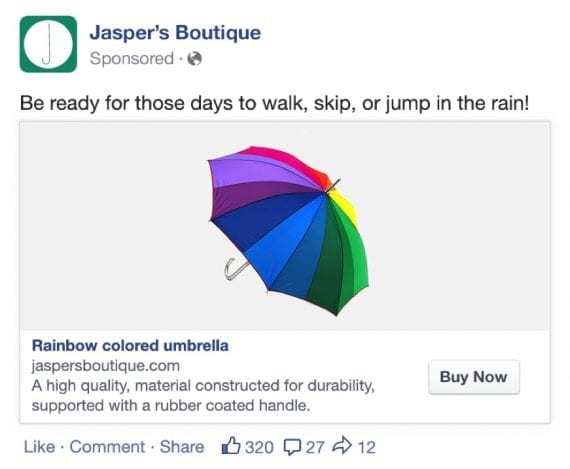
With Facebook’s Dynamic Product Ads, merchants can remarket to consumers who visited their website but did not purchase products.
The holiday season is here. For many retailers, it’s the home stretch for selling inventory. Retailers that sell more than one product are often put in a tight spot: How to create a unique ad for every single product, or even an ad that shows just a few products at once?
Is it easier for you to create 25 ads on Facebook that feature four products at once? Maybe, but you’d still need to create targeting sets for each product, set up bids, run an analysis on who best to target, and when to show them.
But it’s possible to automate nearly all of that work using Facebook’s Dynamic Product Ads. Facebook can pull in the products, determine the targeting, and create the shell of an ad. All you need to do is write some overarching ad text, determine the budget, and do a bit of optimization.
Facebook’s Dynamic Product Ads let you promote your entire product inventory — no matter how many products you have — quickly and easily. It’s a form of remarketing. As consumers browse products on your site, Facebook will determine the products to remarket to them once they get to Facebook.
There is a bit of setup involved. It may require a developer if you’re not using a popular ecommerce platform. However, once it’s set up, all you need to do is make sure your ads are performing well.
So let’s get started. First, I will cover the basics. I’ll make a few assumptions to speed this process along. To run product ads, you’ll need to install the Facebook pixel. I’ll also assume you use a popular platform, such as Shopify or WordPress, as they have plugins to make part of the process easier.
Step 1: Set Up Your Product Feed and Product Catalog
The most complex part of Dynamic Product Ads is setting up your product feed and catalog. The product feed is a CSV or TSV file — comma separated value or tab separated value — of your products. It contains information such as manufacturer suggested retail price (MSRP), sale price, link, image links, and so on. The product catalog is the Facebook-friendly version of the product feed — the container for your specific feed.
Creating the product feed. Facebook has a user-friendly reference to create a dynamic feed. If you don’t plan on updating your inventory, you can manually create a feed and upload it. Just create a file in Excel that includes all of the required columns listed on the link above.
Creating the product catalog. Creating a product catalog is simple. From the Facebook Ads Manager, navigate to “Product Catalogs” under “Assets.” From there, give your product catalog a name and assign it to your page.
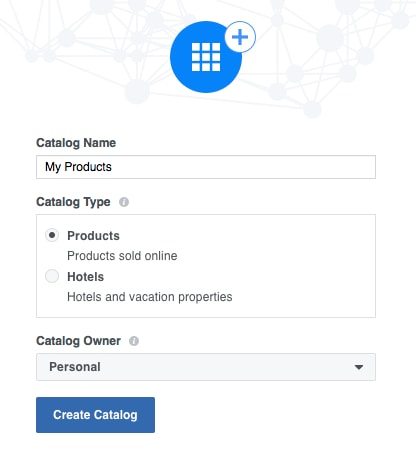
To create a product catalog, go to the Facebook ads manager and navigate to “Assets” > “Product Catalogs.”
—
After that, you’ll see the blank feed page.
Adding your feed to your catalog. After you’ve created your one-time product feed, navigate back to your product catalog and click “+ Add Product Feed.”
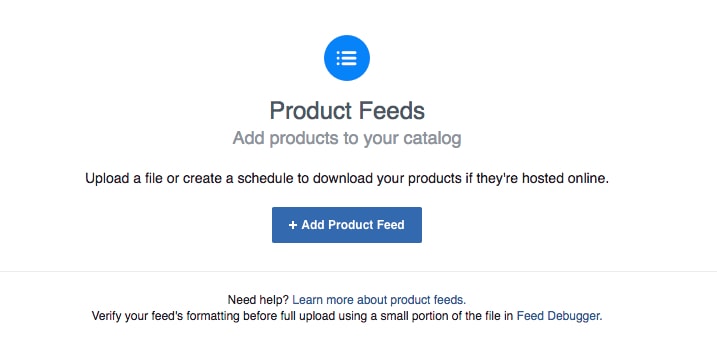
Click “+ Add Product Feed.”
—
From here, click “Single Upload” and add your feed.
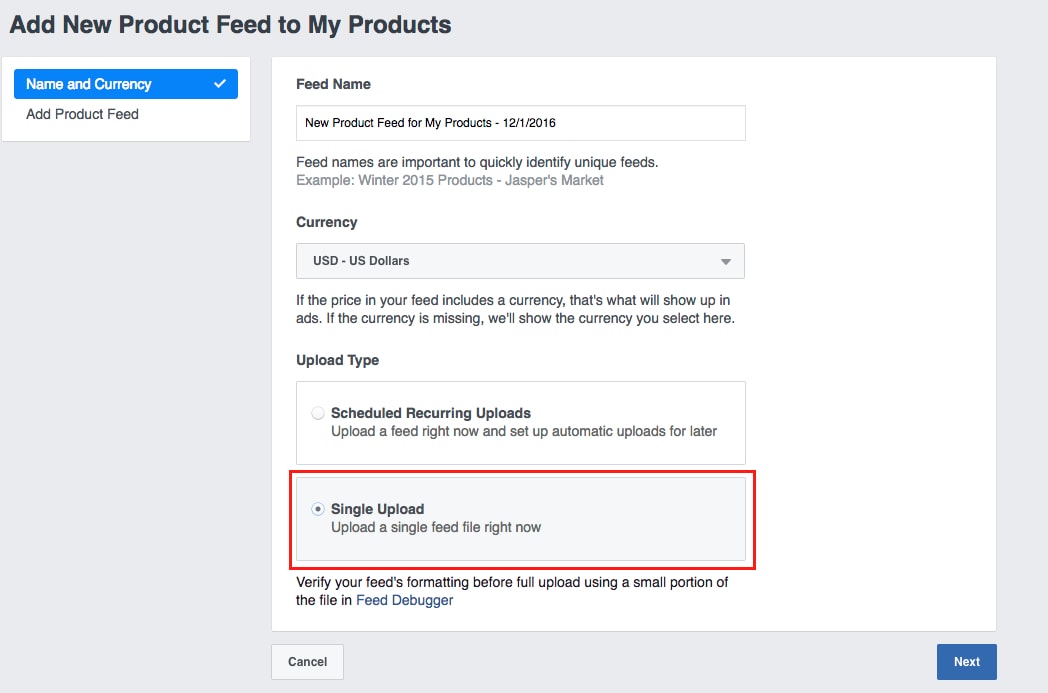
Click “Single Upload” and add your feed.
Add your feed and click “Create Feed.”
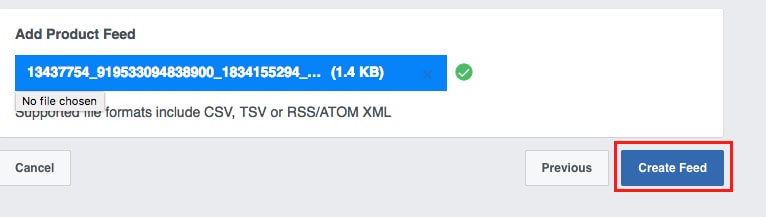
Add your feed and click “Create Feed.”
Your feed will start uploading. Assuming everything is set up correctly, you’ll see the number of products uploaded, and warnings, if any. If there are errors, Facebook will show you what’s wrong and how to fix them. Since I uploaded a dummy feed, I have a few image link warnings, as shown below.
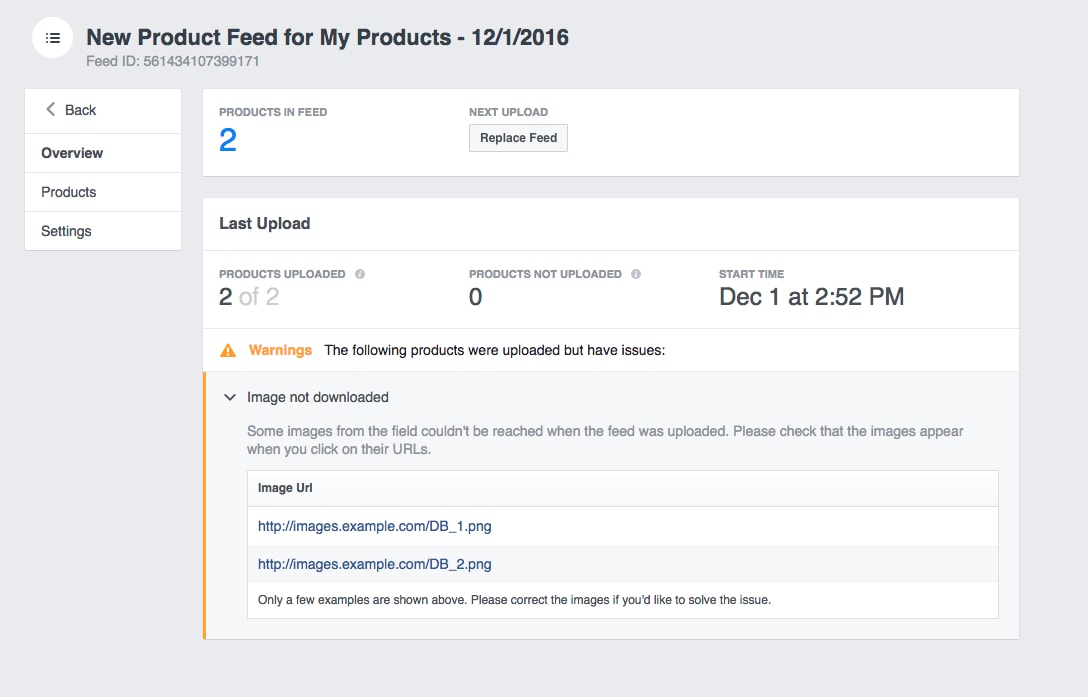
Feed upload status and warnings.
On the “Products” button, Facebook shows how your products will load. This is a good way to spot check for text or image errors.
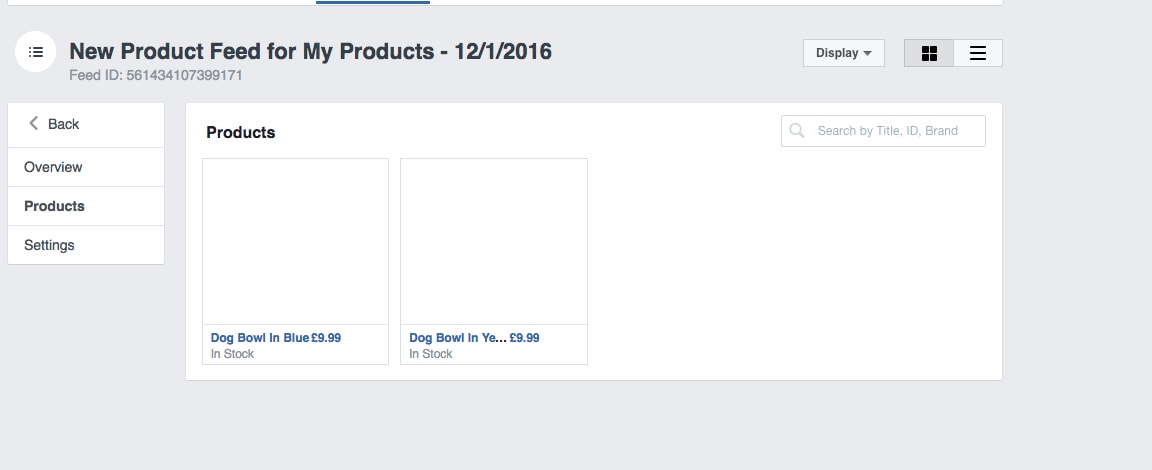
Product preview is a good way to spot check for text or image errors.
After addressing warnings, if any, it’s time to move to the next phase.
Note that if you’re going to manually upload your feed, make sure to give Facebook new versions every few days to account for stock and pricing changes. You don’t want to promote products that are sold out, or aren’t on sale anymore. You can do this by going the product feeds section and clicking on “Replace Feed.”

Update your manual feed every few days to account for price changes and out-of-stock items.
Step 2: Set Up Your Campaign and Ad Set
This will be one of the easier campaign setups. Navigate to the “+ Create Campaign” button in Facebook Ads Manager and select “Promote a product catalog.”
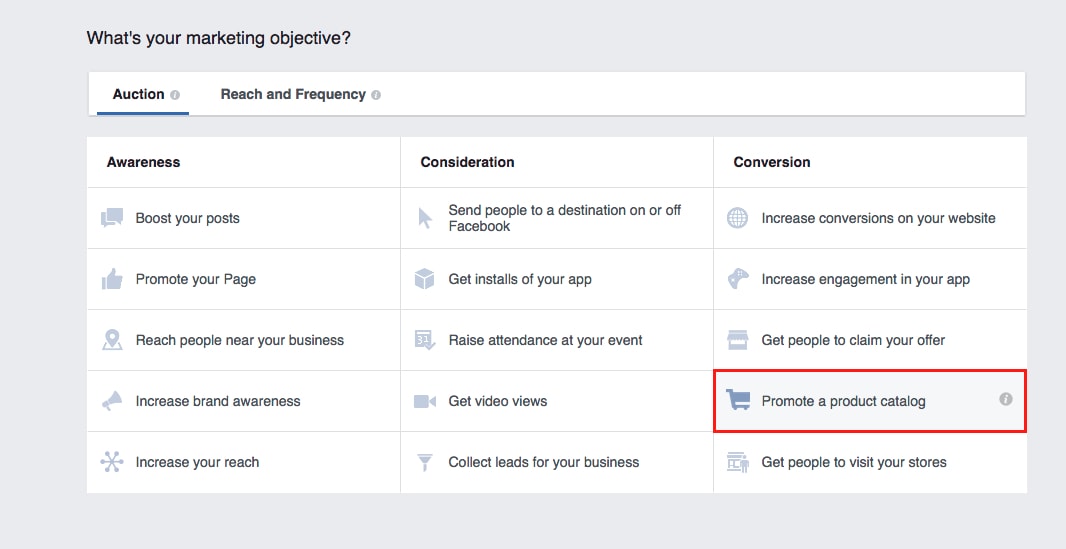
Navigate to the “+ Create Campaign” button and select “Promote a product catalog.”
From there, choose your product catalog and give your campaign a name. Given that you’ll only have one product catalog, it should be your only option.
Now you’ll see the products to promote and the audience. The products to promote let you choose to include all products or a specific group.
For example, say I have a surplus of sunglasses that I want to sell. I only want to run ads for those. To do that, I could filter my product set for Brands that only contain, for example, “Ray Ban.” I would then only be showing ads with Ray Ban products.
This is helpful if you want to run ads for specific products. I recommend it because it helps view product performance quickly in Ad Manager by just looking at that product-specific ad set. If I let all my products run, reporting would be much more complex.
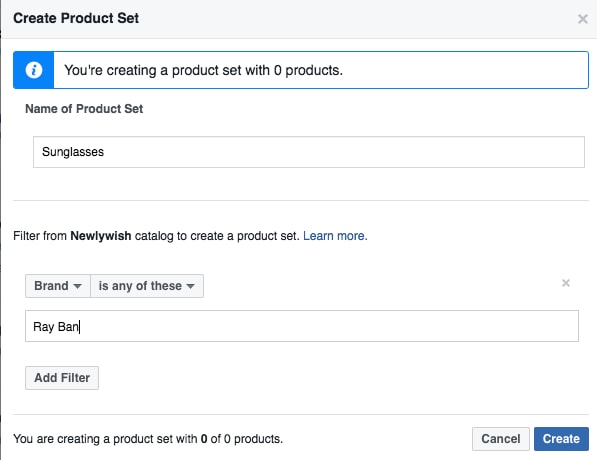
Creating specific product sets can help with reporting.
Now it’s time to set up your audience. There are several pre-built options that work well. The default of “Viewed or Added to Cart But Not Purchased” will work well as a standard remarketing option for your abandon cart group. I’ll do that here. When someone views a product or adds it to the cart but doesn’t purchase within 14 days, she is eligible to see my ads.
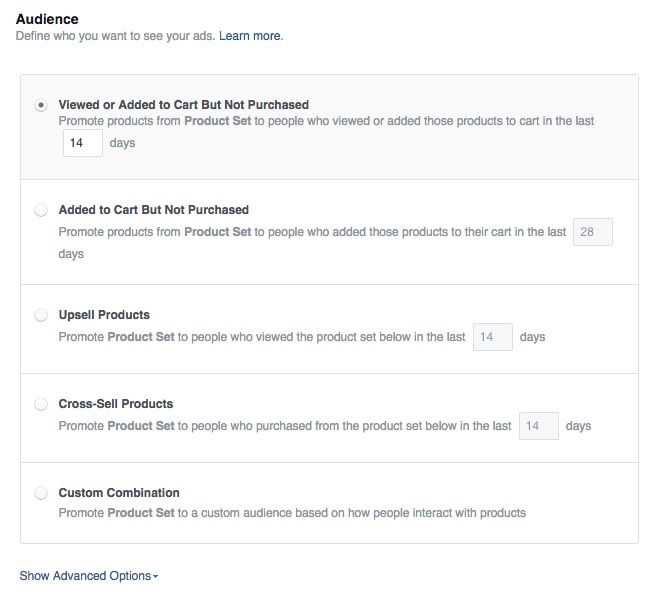
The default of “Viewed or Added to Cart But Not Purchased” will work good as a standard remarketing option for your abandon cart group.
There’s also a “Show Advanced Options” link, at the base of the Audience screen, which is just standard demographic targeting. Don’t change too many things here. Just add the non-purchasing website visitors.
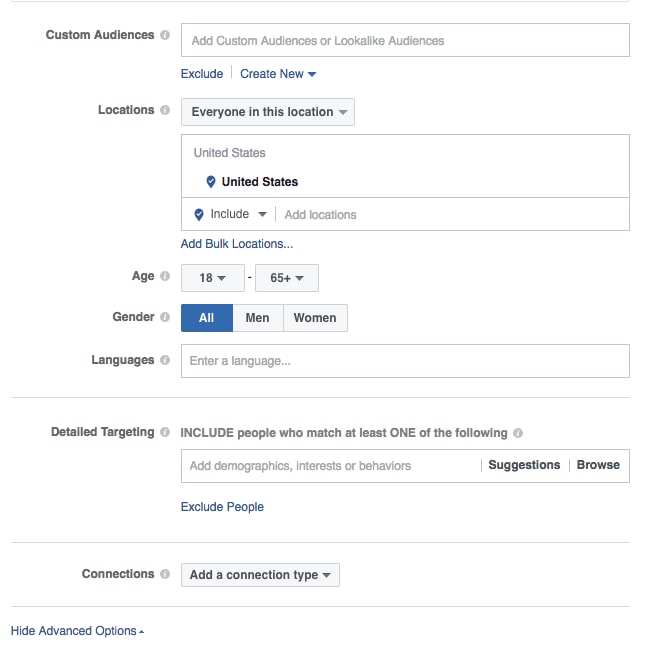
Add non-purchasing website visitors on the “Advanced Options” screen.
Step 3: Set Up Your Ad Template
Since many products could presumably be shown to users based on their browsing history, Facebook lets you create ad templates, which use variables from your product feed, like the product name and brand, to create ads that will automatically update based on this information.
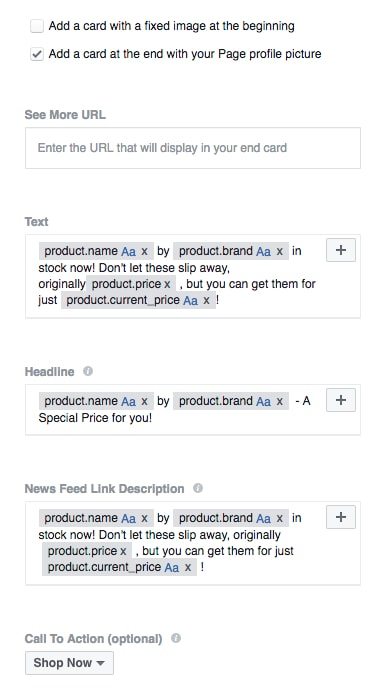
The main part of a Dynamic Product Ad template: the dynamic text.
I’m using, above, the product name, product brand, product price (MSRP), and product current price (sale price) to convey to the user that we’re offering an exclusive price just for him. This assumes that I have a sale going on — if I do, Facebook will automatically pull that lower price. As for the images, those will be pulled from my feed, and they’ll match the products mentioned in the ad text.
Step 4: Launching Your Campaign and Reviewing Performance
Once you’ve set up your different ad templates and ad sets for specific product categories, it’s time to launch your campaign. This is similar to any other Facebook advertising campaign, with the difference that Facebook will compare your product feed against your ad filters and pixel to determine who sees the ads.
There’s not much else to do once you’ve launched your campaign. Give it at least two weeks to gather data. However, it’s wise to check in after the first few days and make sure you’re driving clicks and impressions, just to confirm the setup.
Remember not to over-filter your audience, as that may cause delivery issues. However, after the two weeks is up, compare how many versions of your templates are active. If you’ve launched multiple ad sets to target different sections of your product catalog, review how each one is performing. Generally, the only metric that matters is sales of these products.
Have you used Dynamic Product Ads on Facebook? Are they helping?