The standard reporting in Google Analytics works well for many ecommerce sites. But there are opportunities to enhance the default dimensions and metrics in Google Analytics, to empower online merchants even more.
In this article, I’ll review three ways to customize Google Analytics reports, to help merchants track key metrics and make critical decisions. I’ll address:
- Custom Dimensions,
- Custom Metrics,
- Calculated Metrics.
Custom Dimensions
Custom Dimensions add a layer of information at the “Hit,” “Session,” “User,” and “Product” level. This data can be captured in the Google Analytics tracking code or via a data import. Examples include:
- Identifying if someone is a repeat customer.
- Identifying if a service representative placed the order on behalf of a customer, such as via the phone, chat, or email.
- For replatforms and redesigns, mapping old URLs to the new ones to monitor traffic to those pages afterward.
- Product detail enhancement — such as a category, subcategory, style, color, size, or other information — when a product is viewed, added to cart, or purchased.
Setting up Custom Dimensions requires two configurations.
First, go to Admin > Property > Custom Definitions.
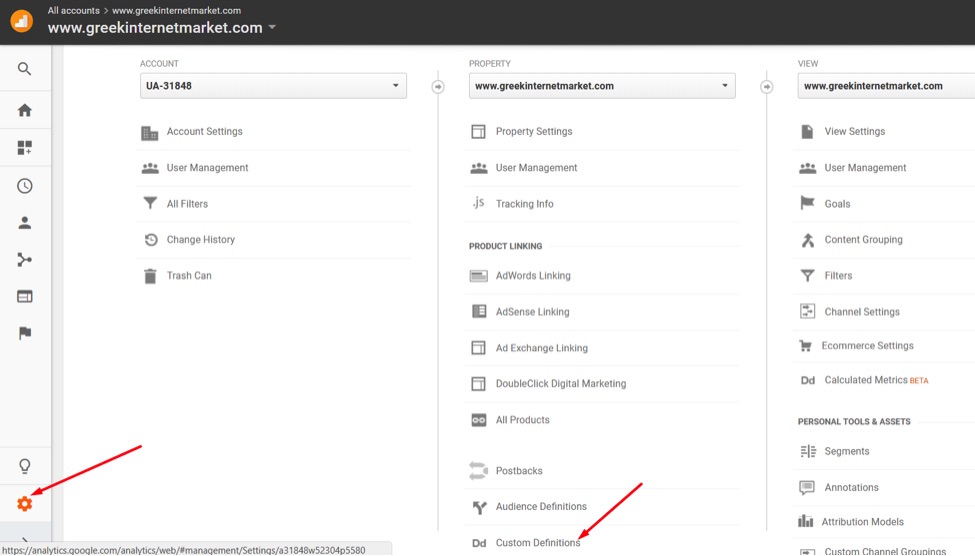
Go to Admin, then “Custom Definitions” under “Property.”
Then, go to Custom Dimensions > New Custom Dimension.
Then name the Custom Dimension and select the scope: Hit, Session, User, or Product.
- For the Custom Dimension to be available in user-level reports, select the User level. An example is setting a Custom Dimension to track when someone logs into her account or if she completes a purchase.
- For the Custom Dimension to be available in session reporting, assign it at the Session level. An example is setting a Custom Dimension when someone views a product page or if he adds to cart.
- For the Custom Dimension to be available for a page or other event that is not tied to a session, assign it to the Hit level. An example is setting a Custom Dimension for the previous URL of a page before a replatform. The screenshot below is a Hit level Custom Dimension to map an old URL to a new one.
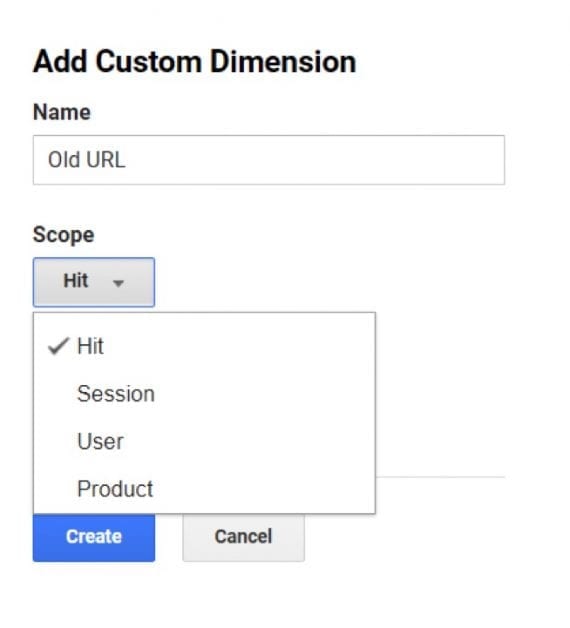
This Hit-level Custom Dimension tracks the activity of a previous URL, before a replatform, for example.
- To append additional information about products purchased on your website, use a Product Level Custom Dimension. An example is importing the product category or the cost of goods sold.
Second, send the data to Google Analytics that accompany the Custom Dimension you created. Send this data via your tracking code or via a data upload. For sending with your tracking code, follow Google’s instructions.
To upload data, an additional step is needed. Using the example of a Hit-level Custom Dimension for a previous URL, import the previous URLs into Google Analytics to map them to the new URLs. To make the previous URLs available at the Hit level, create a data import, as follows.
- Go to Admin > Property > Data Import.
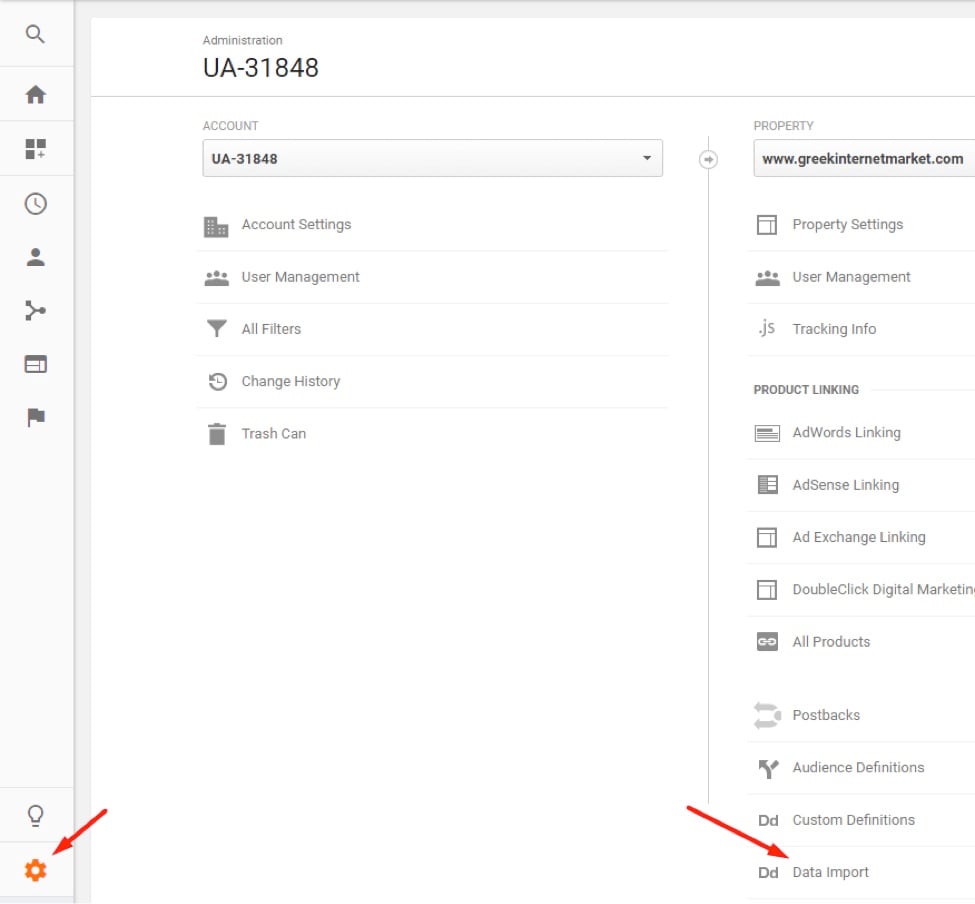
To upload data, go to Admin > Property > Data Import.
—
- Then go to Create > Content Data > Continue.
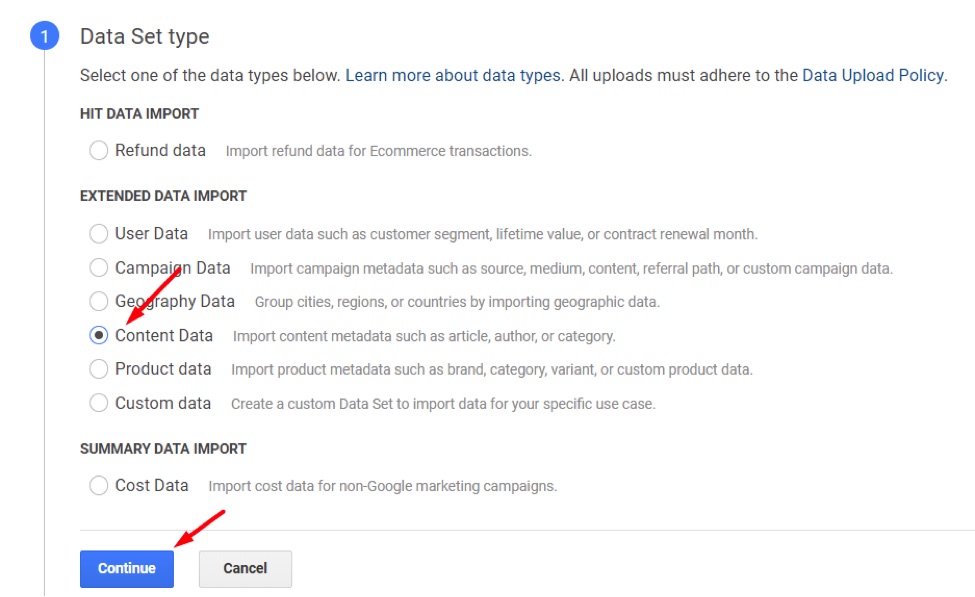
Go to “Content Data” and click “Continue.”
—
- Name the Data Set — for example, “Old URL” — and select which Views to include in the reporting.
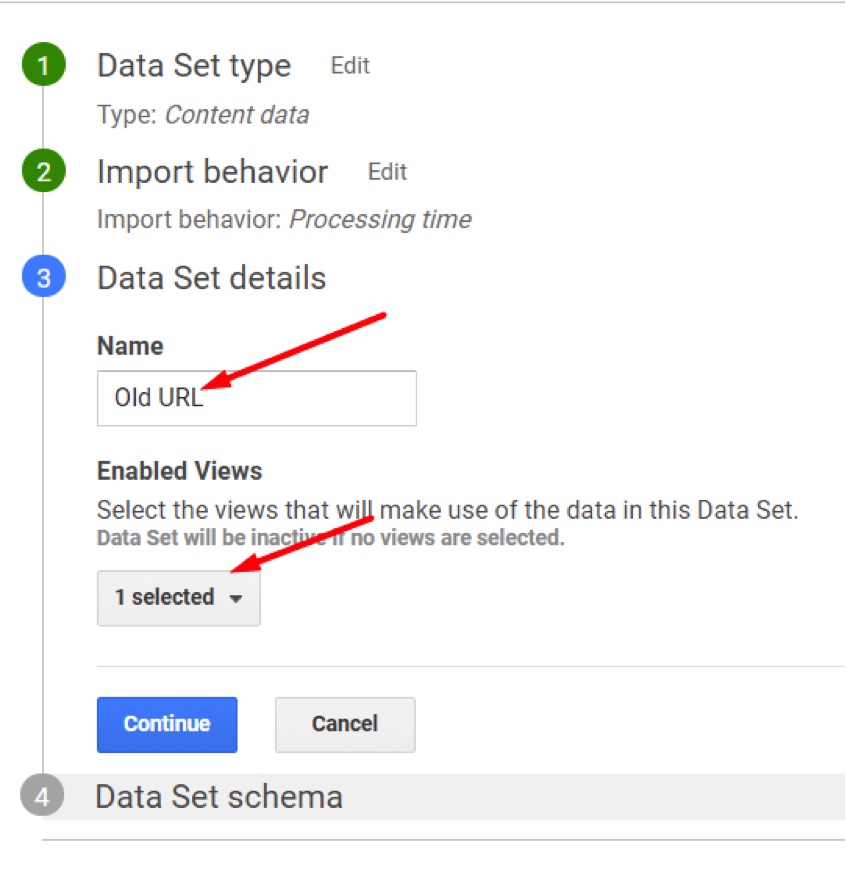
Name the Data Set “Old URL” and select which Views to include in the reporting.
—
- Select “Page” for the key.

Select “Page” for the key.
—
- Then select “Old URL” — or whatever you named the Custom Dimension — for the “Imported Data.”
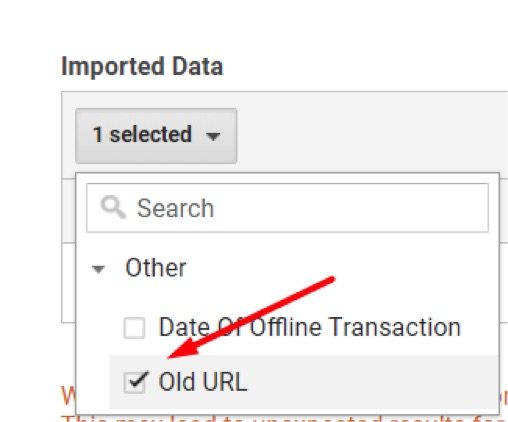
Select “Old URL” — or whatever you named the Custom Dimension — for the “Imported Data.”
—
- Then select if you want to overwrite hit data — I typically choose “No.” Then click “Save.”
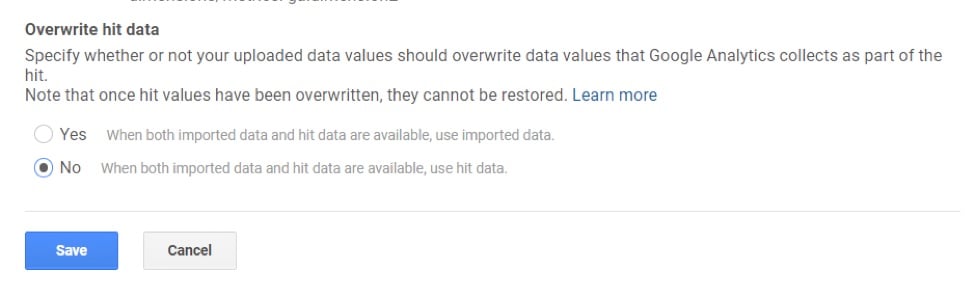
Select if you want to overwrite hit data.
—
- Create a data import file to map the old and new URLs. You can get the schema — i.e., import file structure — by clicking on “Get schema” after completing the Data Import setup.
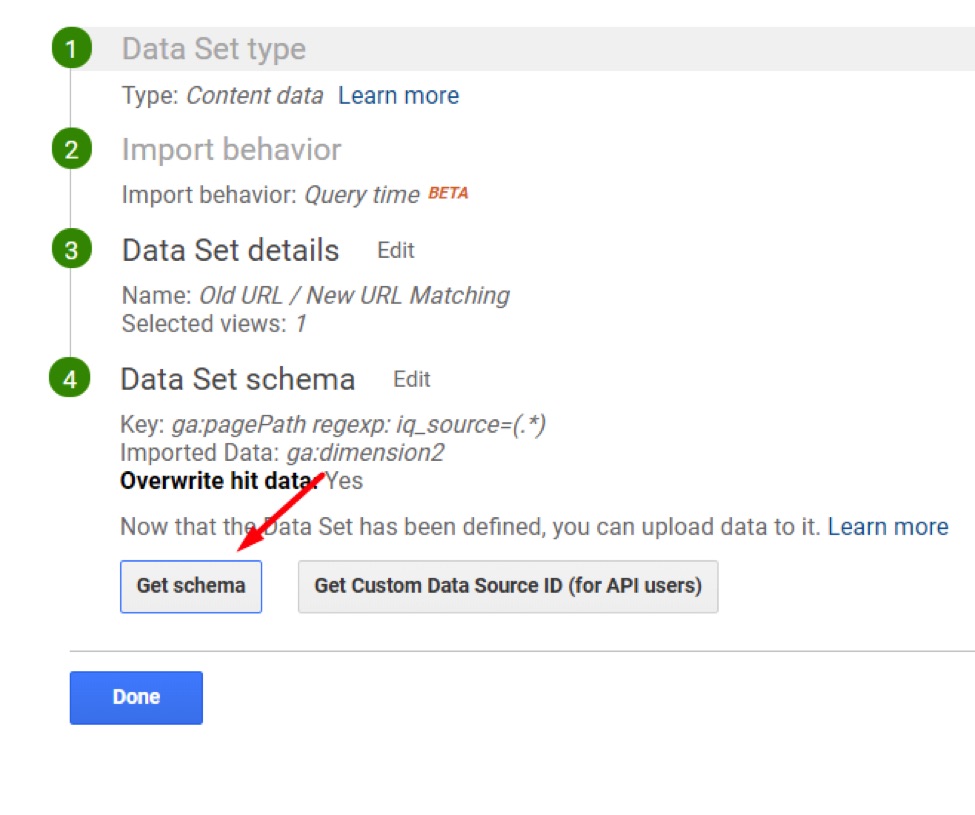
Get the Schema — i.e., import file structure — by clicking on “Get schema.”
—
- Then click “Download schema template” to get the template, to populate it.
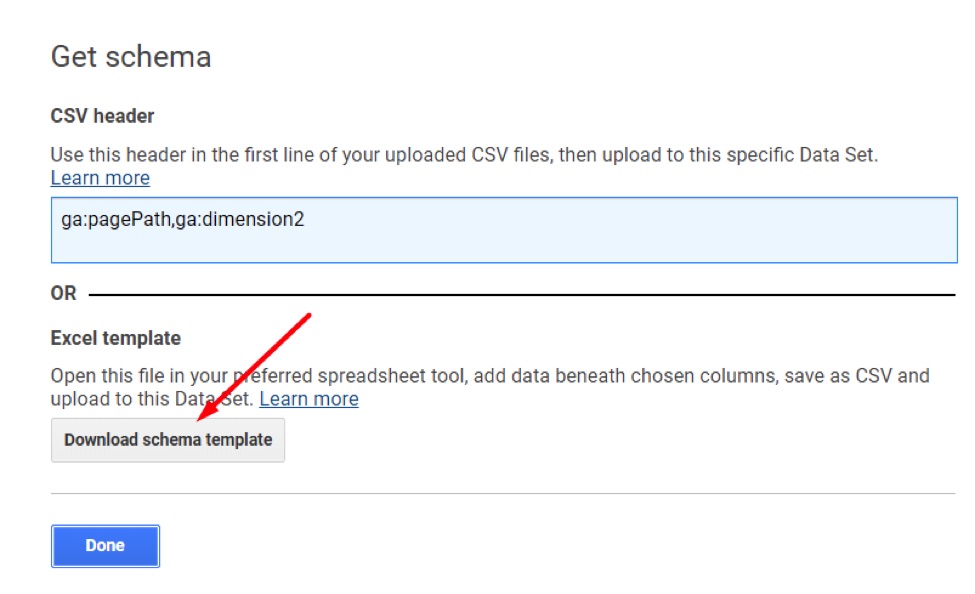
Click “Download schema template.”
—
- Fill out the template with the new URL in the first column and old URL in the second. Then save to your computer.

Fill out the template with the new URL in the first column and Old URL in the second.
—
- Finally, upload this file by going to Property > Data Import > Manage uploads, which is next to the Data Set you created.
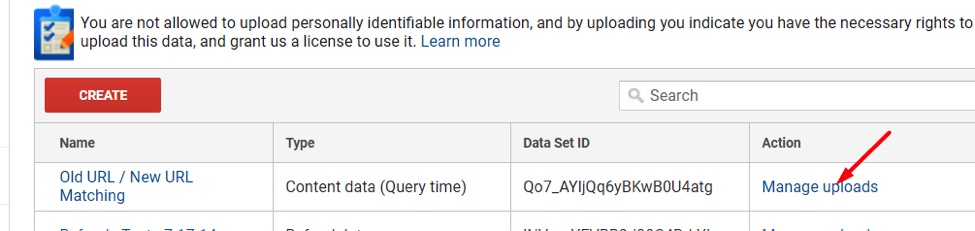
Upload the file by going to Property > Data Import > Manage uploads, which is next to the Data Set you created.
—
- Click “Upload File” and select the file you created.
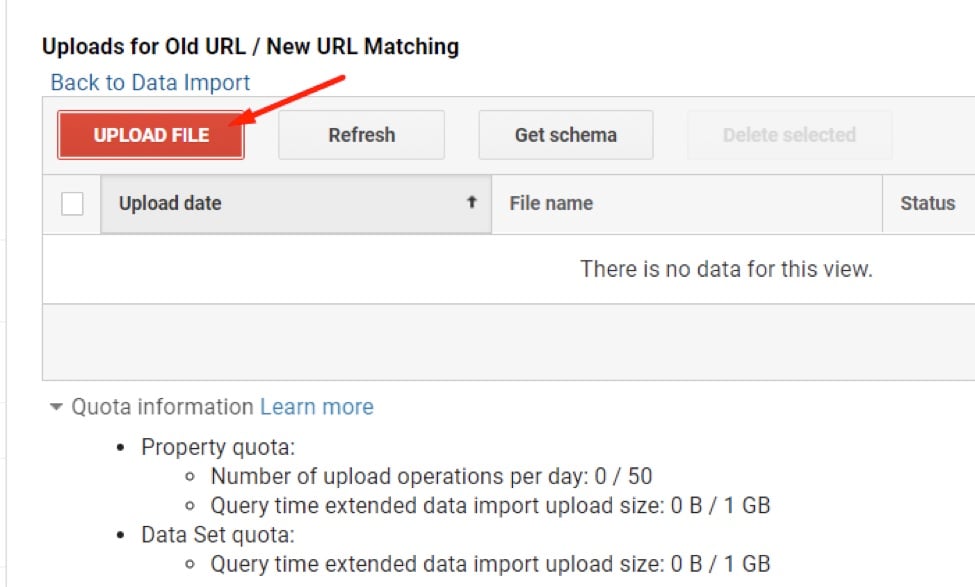
Click “Upload File” and select the file you created.
Make sure the file uploads successfully and then wait for the data to start populating. The data is not retroactive unless you are using Google Analytics 360. The imported data will populate after you successfully create the upload.
Custom Dimensions, once created, are available in most reports where the “Secondary Dimension” selector is available or in custom reports. For the “Old URL” example, go to Behavior > Site Content > All Pages then choose a Secondary Dimension of “Old URL” (or whatever name you gave the Custom Dimension).
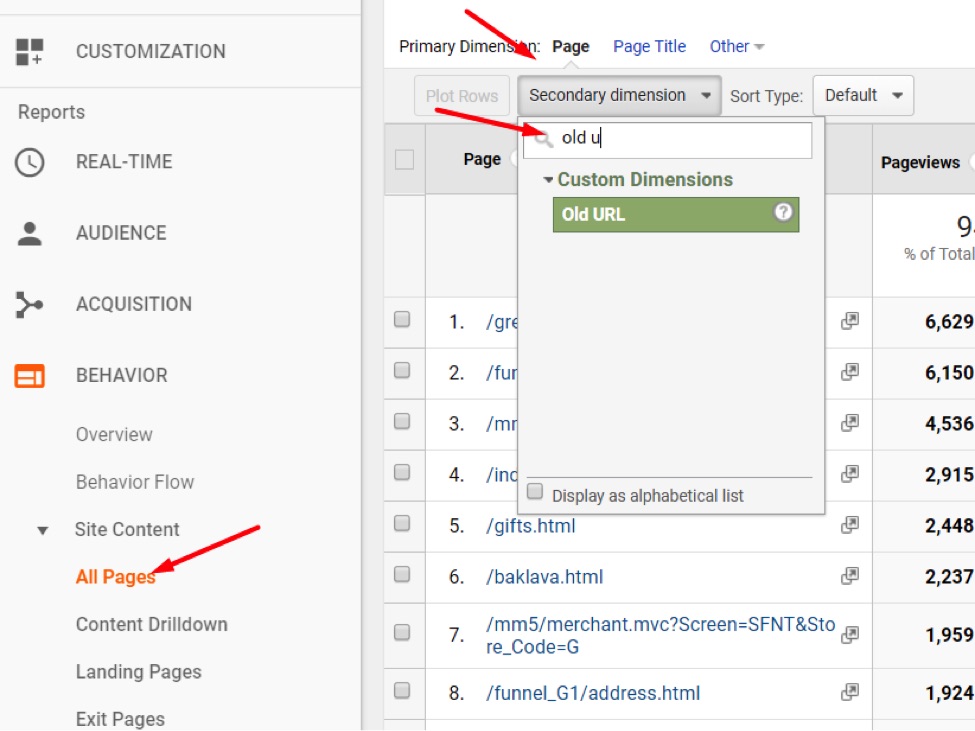
Go to Behavior > Site Content > All Pages then Secondary Dimension.
Custom Metrics
Custom Metrics are similar to Custom Dimensions. Create Custom Metrics by going to Admin > Property > Custom Definitions > Custom Metrics.

Create Custom Metrics by going to Admin > Property > Custom Definitions > Custom Metrics.
To report Custom Metrics, create a custom report. There is no way to report Custom Metrics in the standard reports. In the custom report sessions, you have an option to select the Custom Metrics.
There are limited examples of using Custom Metrics. One example, however, is to import cost of goods sold data into Google Analytics to report the gross profit after, say, cost of goods sold and advertising. I addressed that topic last year, at “Using Google Analytics to Track Profitability by Product.”
To set up Custom Metrics, follow the steps above for setting up Custom Dimensions. The process is similar for both.
Calculated Metrics
Calculated Metrics are derived from existing metrics in Google Analytics. I use them to customize certain Events, such as phone calls, video plays, and outbound clicks. Create a Calculated Metric for phone calls — assuming your phone call tracking solution sends Event data to Google Analytics — as follows.
- Go to Admin > View > Calculated Metrics.
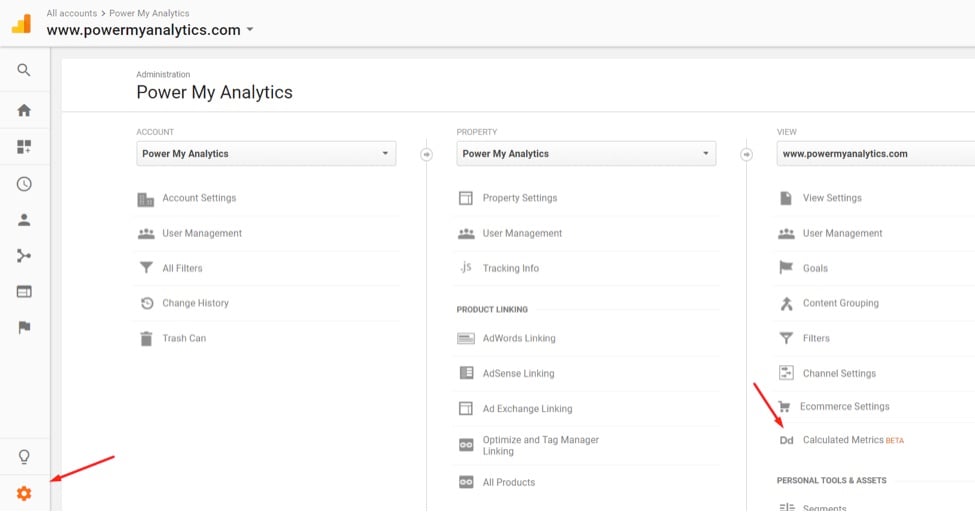
Go to Admin > View > Calculated Metrics.
—
- Name the Calculated Metric — I’ll use “Total Calls.” For the Formatting Type, use “Integer” because a call can be only a whole number without decimal places. For the Formula, enter “{{Total Events}}.”
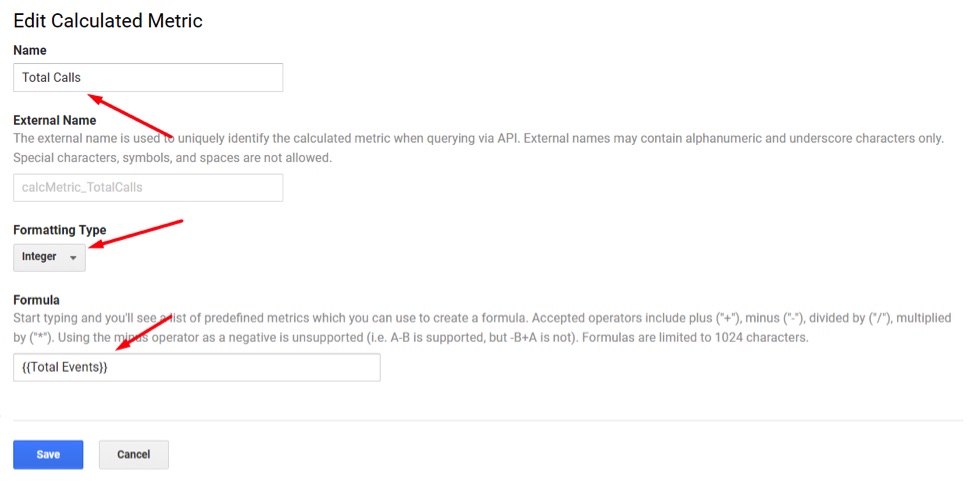
Give the Calculated Metric a name, such as “Total Calls.” For the Formatting Type, use “Integer.” For the Formula, enter “{{Total Events}}.”
You can report “Total Calls” instead of “Total Events.” “Total Calls” is more user-friendly and more descriptive.
Calculated Metrics can be more sophisticated, such as the “Product Profit” Calculated Metric in the article I referenced above.
Reporting for Calculated Metrics, like Custom Metrics, appears only in Custom Reports. Go to Customization > Custom Reports > New Custom Report to create a custom report with your new Calculated Metric.
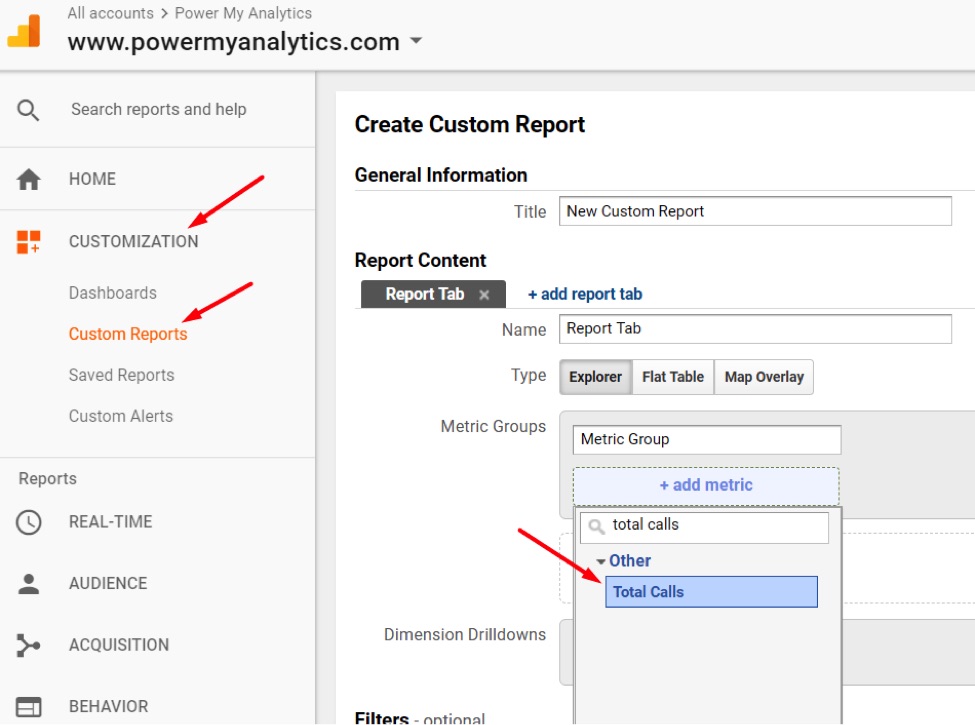
Go to Customization > Custom Reports > New Custom Report to create a custom report with your new Calculated Metric.