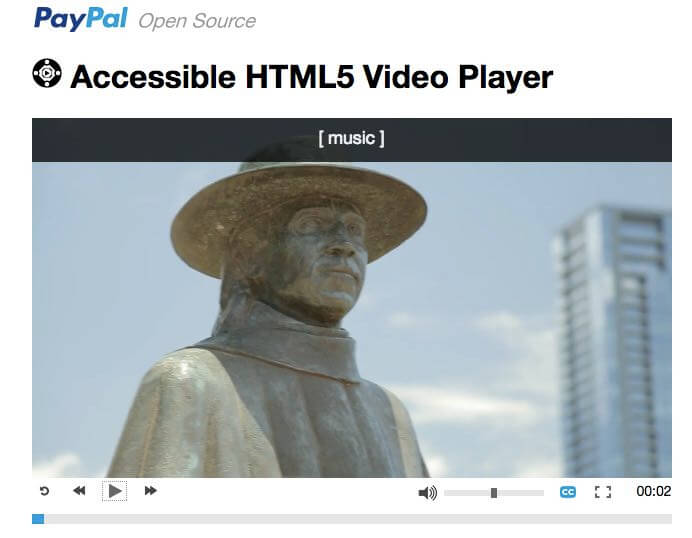
Making videos accessible for blind and disabled users involves three components: the visual content, the audio content, and the player itself. PayPal offers an accessible HTML5 video player, as does YouTube and several others.
A video is a compelling option when you want to demonstrate a product or show off its features. But a video can cause accessibility challenges. They aren’t insurmountable, by any means. Overcoming them requires planning, to ensure disabled shoppers can access.
You can break video accessibility issues into three categories.
- The movie’s visual content.
- The movie’s audio content.
- The player itself.
Making the Visual Content Accessible
We’ve addressed the importance of alternative text for images here before. The visual content of a movie is really an extended series of images. You can’t provide alt attributes for every frame of a movie — a single sentence for each frame is hardly going to suffice, anyway — so the thinking behind alternative text won’t really work. What does work is a technique called audio description.
Audio description is used to describe visual-only events that are not in the spoken text. If there’s a video clip of a machine running, the audio description could describe the machine and what it’s doing. But use your judgment. If you literally described every visual element in a movie, you could easily end up with three hours of description for a 15-minute movie. That’s not going to provide the user with a meaningful experience, either. It’s too much detail.
Ask yourself whether an event in the movie is significant. For example, imagine a scene where a vacuum salesman comes to the door to demonstrate the product. One response from the homeowner might be a dubious glance. The homeowner has responded, but not verbally. It’s important to convey this response to a blind observer. There are many events in movies that use purely visual experiences to create an environment or share a response; these kinds of scenes should be described in an audio track.
Traditional audio description is created as a closed track, wherein the description is a separate file from the primary track, as opposed to being a part of the primary file. This means that it can be turned off and on, so that a user only uses it when needed. The same is true for captioning; you can create video either with “open” or “closed” captions. Only closed captions can be turned off by the user.
Closed audio description is not, however, widely supported on the web. There are few players that can accommodate it. If you’re setting up a new site, choosing a player that supports audio description is an easy option. (I’ve provided a list, below.) But if you’re working on an established site, switching your player over can be a lot of work.
What do you do if you can’t use closed audio description? Do you need to provide extensive voiceover on every movie? Won’t sighted users get annoyed with that?
It depends on the movie. Each one needs to be considered independently. Some movies may not require any audio description. Others may benefit from just a few seconds of brief voiceover, which shouldn’t be a problem. But some movies end up needing extensive description; and it may be a challenge to fit that extra description into the timeline. In that case, you get to the point where you need to make two separate versions of the movie: one with audio description and one without.
Making the Audio Content Accessible
The first thing to understand about audio accessibility in a video is the difference between captions and subtitles.
Captions provide accessibility for people who are deaf or hard of hearing. Subtitles provide support for people who are generally able to hear, but may have limitations such as a lack of familiarity with the language, a low-level hearing impairment, or being in a noisy environment.
The key to this difference is that subtitles make the assumption that the listener recognizes and understands the non-spoken sounds in the movie. He’ll recognize a car horn blaring in the background, know that the stereo is on, and hear the knock at the door. If he is deaf, however, he will not be aware of these events.
The first thing to understand about audio accessibility in a video is the difference between captions and subtitles.
If you’re working on accessibility, think about significant sound events in the movie, like those I described above. It doesn’t mean that you need to describe every sound in the movie. It’s all about judgment. Watch the movie with the sound off. Do you see reactions that don’t make any sense? Something probably happened in the audio track that you need to know about.
Captions should also indicate who is speaking. If there’s only one speaker, that’s unnecessary. But in a crowded scene or if a character not on-screen is speaking, this is crucial information.
Accessibility of the Player
If you spent all your time on making sure that you have accessible content but aren’t using an accessible player, you’re going to be in trouble.
With the advent of HTML5 players and the decline of Flash, there’s much potential for improvement in the video experience. That said, almost all players today are JavaScript wrappers triggering events in the client’s native HTML5 player. There’s nothing wrong with using JavaScript to run your video player. But it means that every player is creating a new user experience, and not all of them work for everybody.
There are four practical tests for whether a player is accessible.
- Are all controls accessible using either a mouse or a keyboard?
- Can a user determine when keyboard navigation lands on a control?
- Can the user activate that control using a keyboard?
- Do the controls have labels that are accessible via a screen reader?
It’s not hard to test keyboard navigation. Use the tab key on your keyboard to move forward and shift+tab to move backwards. Activate controls with the space bar or the enter-return key. If a control is handled using a radio button or select list, use the arrow keys to switch between options in the list.
Thus, it takes only a couple minutes to discover if a video player works from the keyboard. On YouTube, for example, when you use the tab key you can see a clear visual focus on each control, and you can use either the space bar or the enter-return key to use the player.
Knowing whether a control — such as a play button — is labeled for a screen reader requires a bit more expertise. In my experience, if a player has already passed the first three tests, it’s likely to pass the last. In most cases, if somebody was conscientious in developing a player with keyboard accessibility, she’ll also have considered screen readers. But you can’t jump to that conclusion safely.
The only sure way to know whether the controls are accessible to screen readers is to test them with a screen reader. Fortunately, there are high-quality, free screen readers available for all major operating systems. VoiceOver is built into a Mac computer. For Windows, you can download the free, open-source NVDA screen reader. For Linux, you can use Orca.
Using a screen reader is complicated. Thankfully, you don’t really need to know much about it to test this issue. Once you install or enable your screen reader, simply repeat your tests using the tab key and listen carefully. When you reach the player, do the button labels make sense? Does it tell you that the “Play” button will play? That the pause button will pause? Would you be able to tell where you are without seeing the screen?
If so, you’re using an accessible video player.
Accessible Video Resources
Here is a short but useful list of accessible video players.
- YouTube.com embeddable player.
- Vimeo.com embeddable player.
- PayPal’s Accessible HTML 5 player.
- Able Player.
- OzPlayer.
Here are services for creating video captions.


