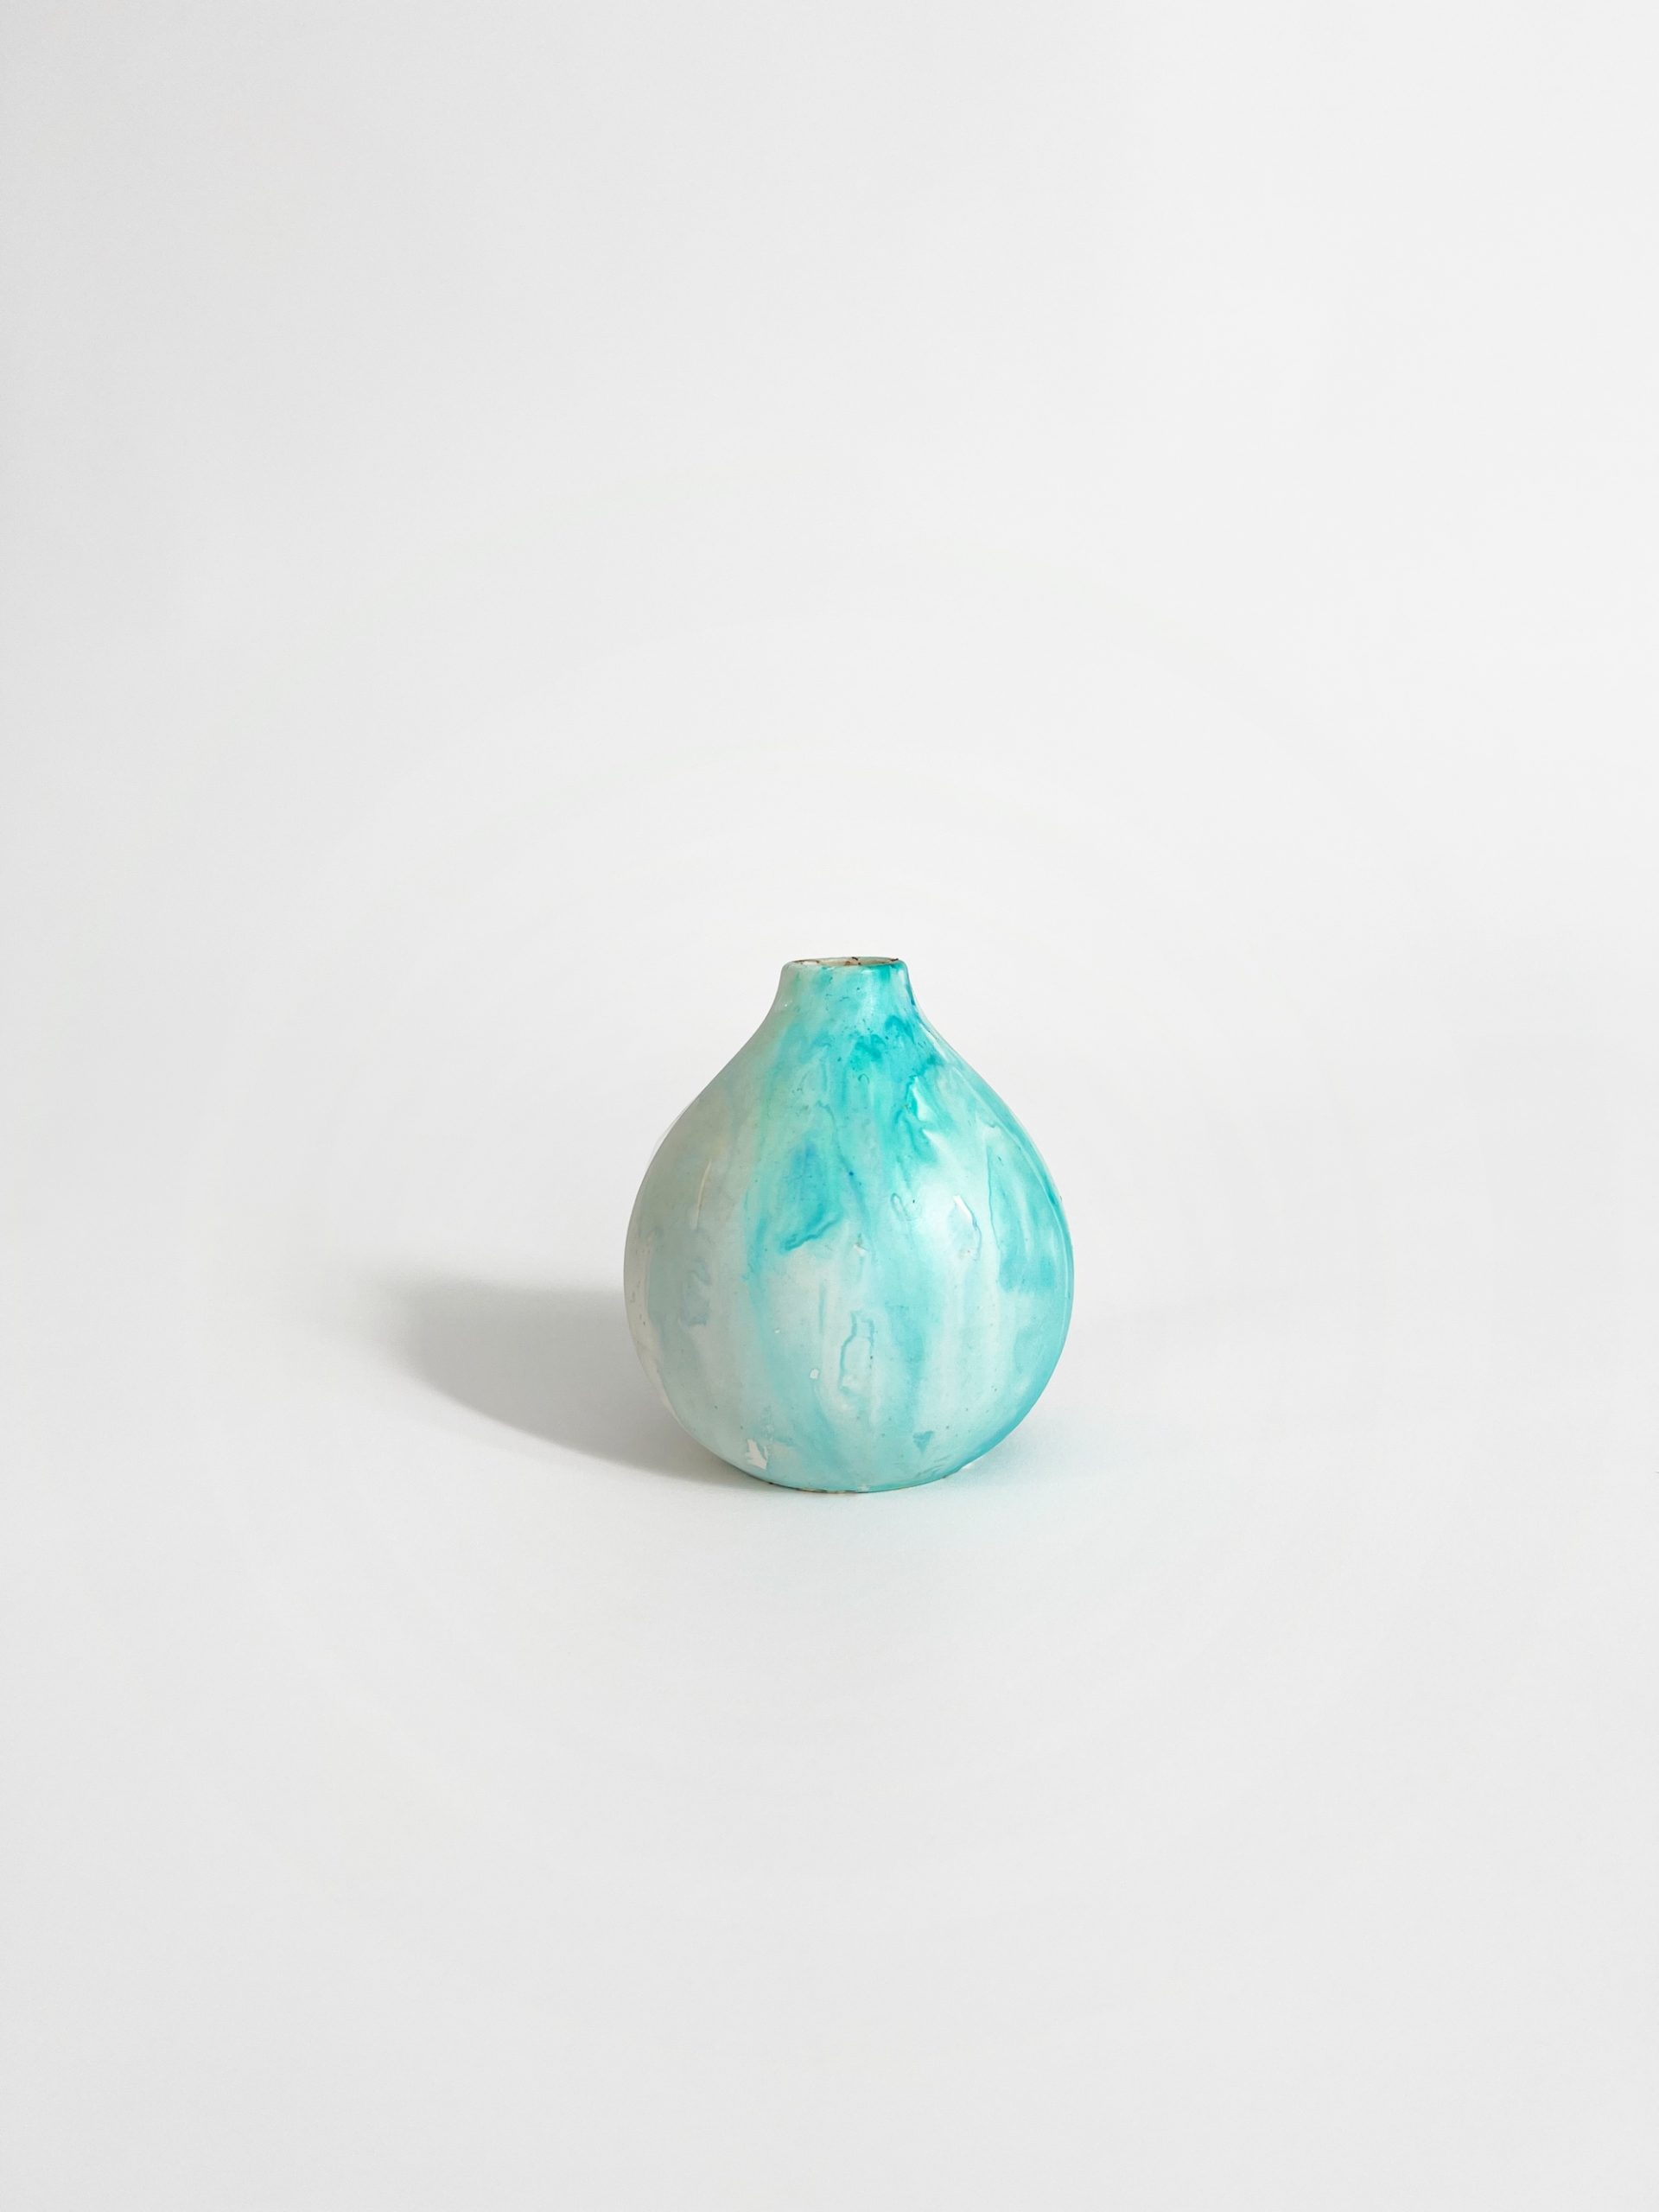
Throughout this series, I’ve explained how to shoot and edit product products that appeal to shoppers and drive conversions. This final installment is a wrap-up, applying all of the concepts I’ve addressed to a single image using only my iPhone and three editing tools.
To date I’ve covered all material aspects of selecting equipment, staging shoots, and improving the images afterward: “Part 1: Choosing Backdrops,” “Part 2: Selecting Tripods,” “Part 3: Artificial Lighting Basics,” “Part 4: Angles and Viewpoints,” “Part 5: Choosing a Camera,” “Part 6: Selecting a Lens,” “Part 7: Magnification and Close-ups,” “Part 8: Composition Essentials,” “Part 9: Advanced Composition,” “Part 10: Lines as Design Elements,” “Part 11: Image Editing,” “Part 12: Color Correction and Presets,” “Part 13: Special Edits,” and “Part 14: Optimizing for Speed, Search.”
Image Start to Finish
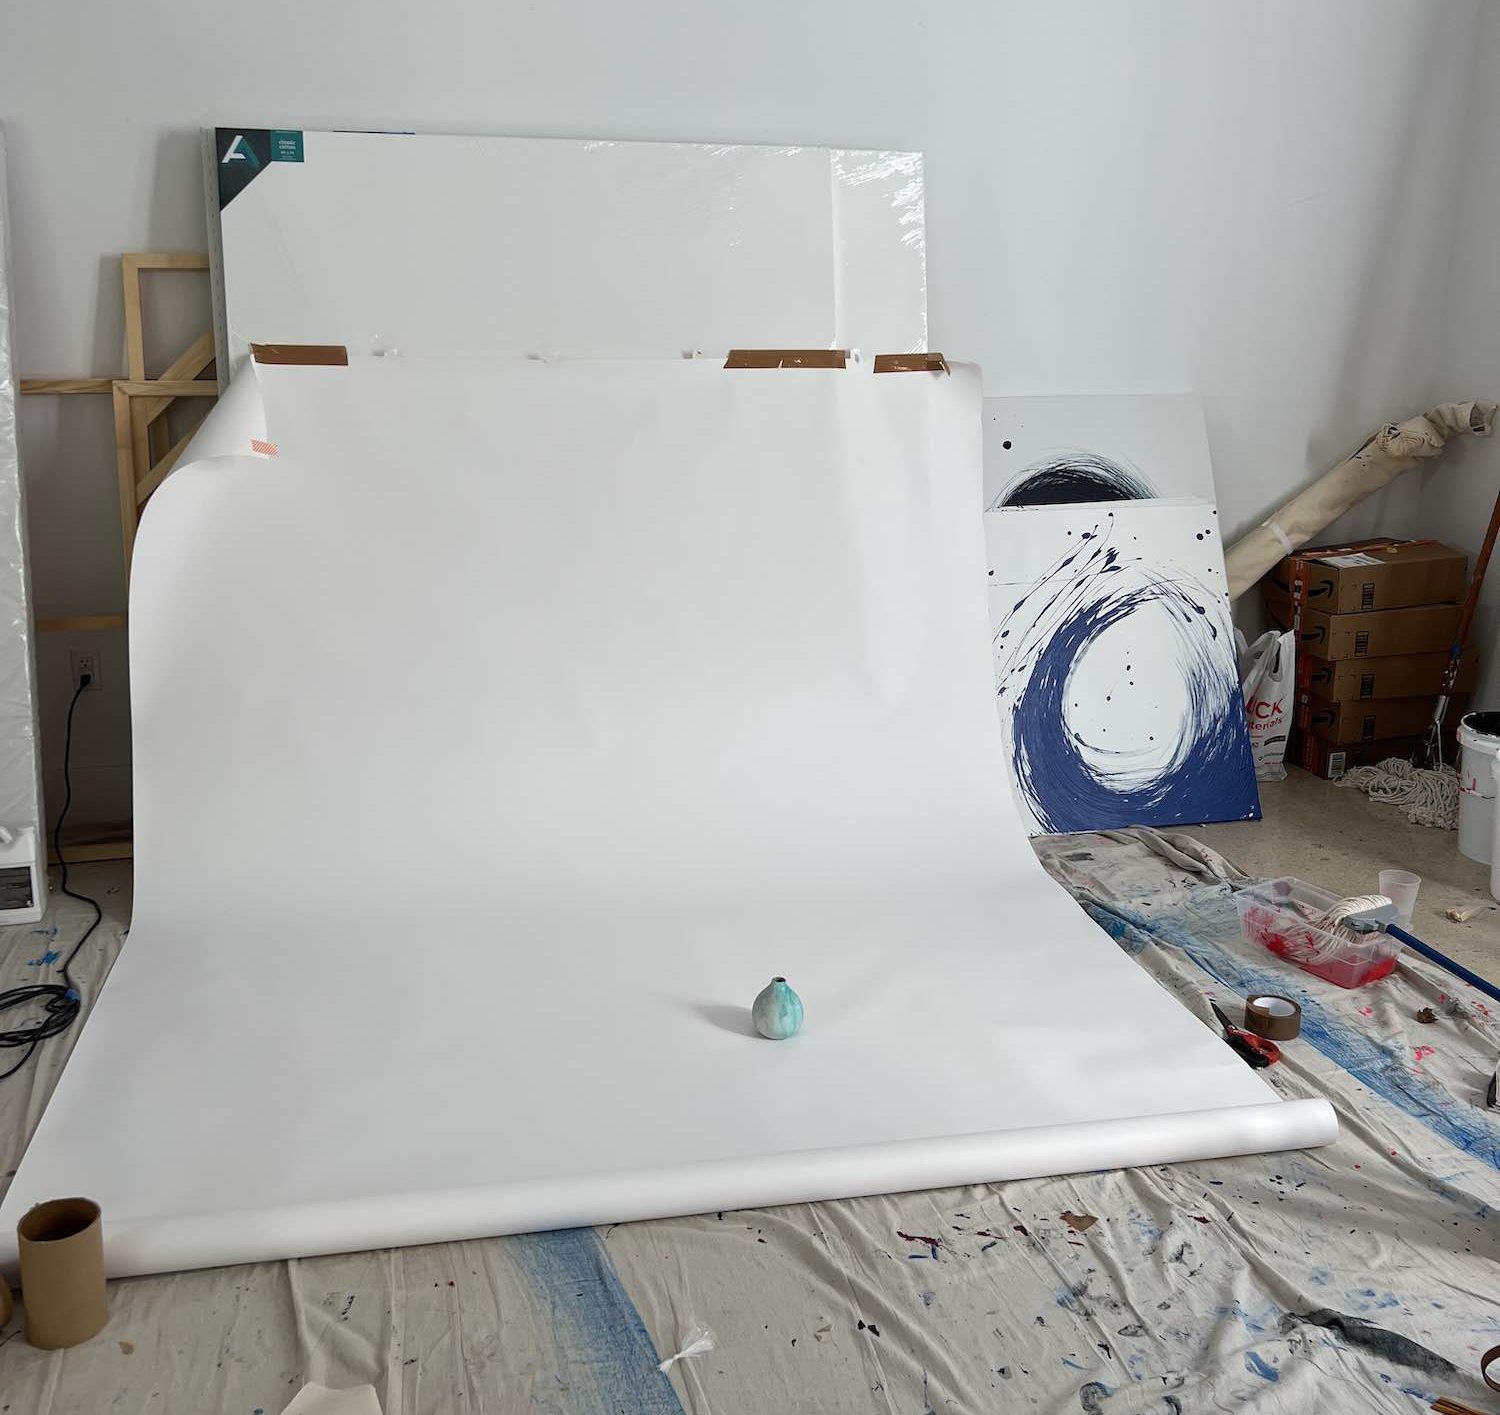
I’ll work with a vase I’ve created in my art studio.
I’ve discussed the importance of using a white background for most product images. For this shoot, instead of a professional backdrop, I’ve used standard white seamless paper. The quality of the paper wasn’t great, and it had several crinkles.
I offset these deficiencies by using natural lighting to push the shadows to the left of the vase. I could have used artificial lighting if natural light was inferior or if I wanted to remove the shadows.
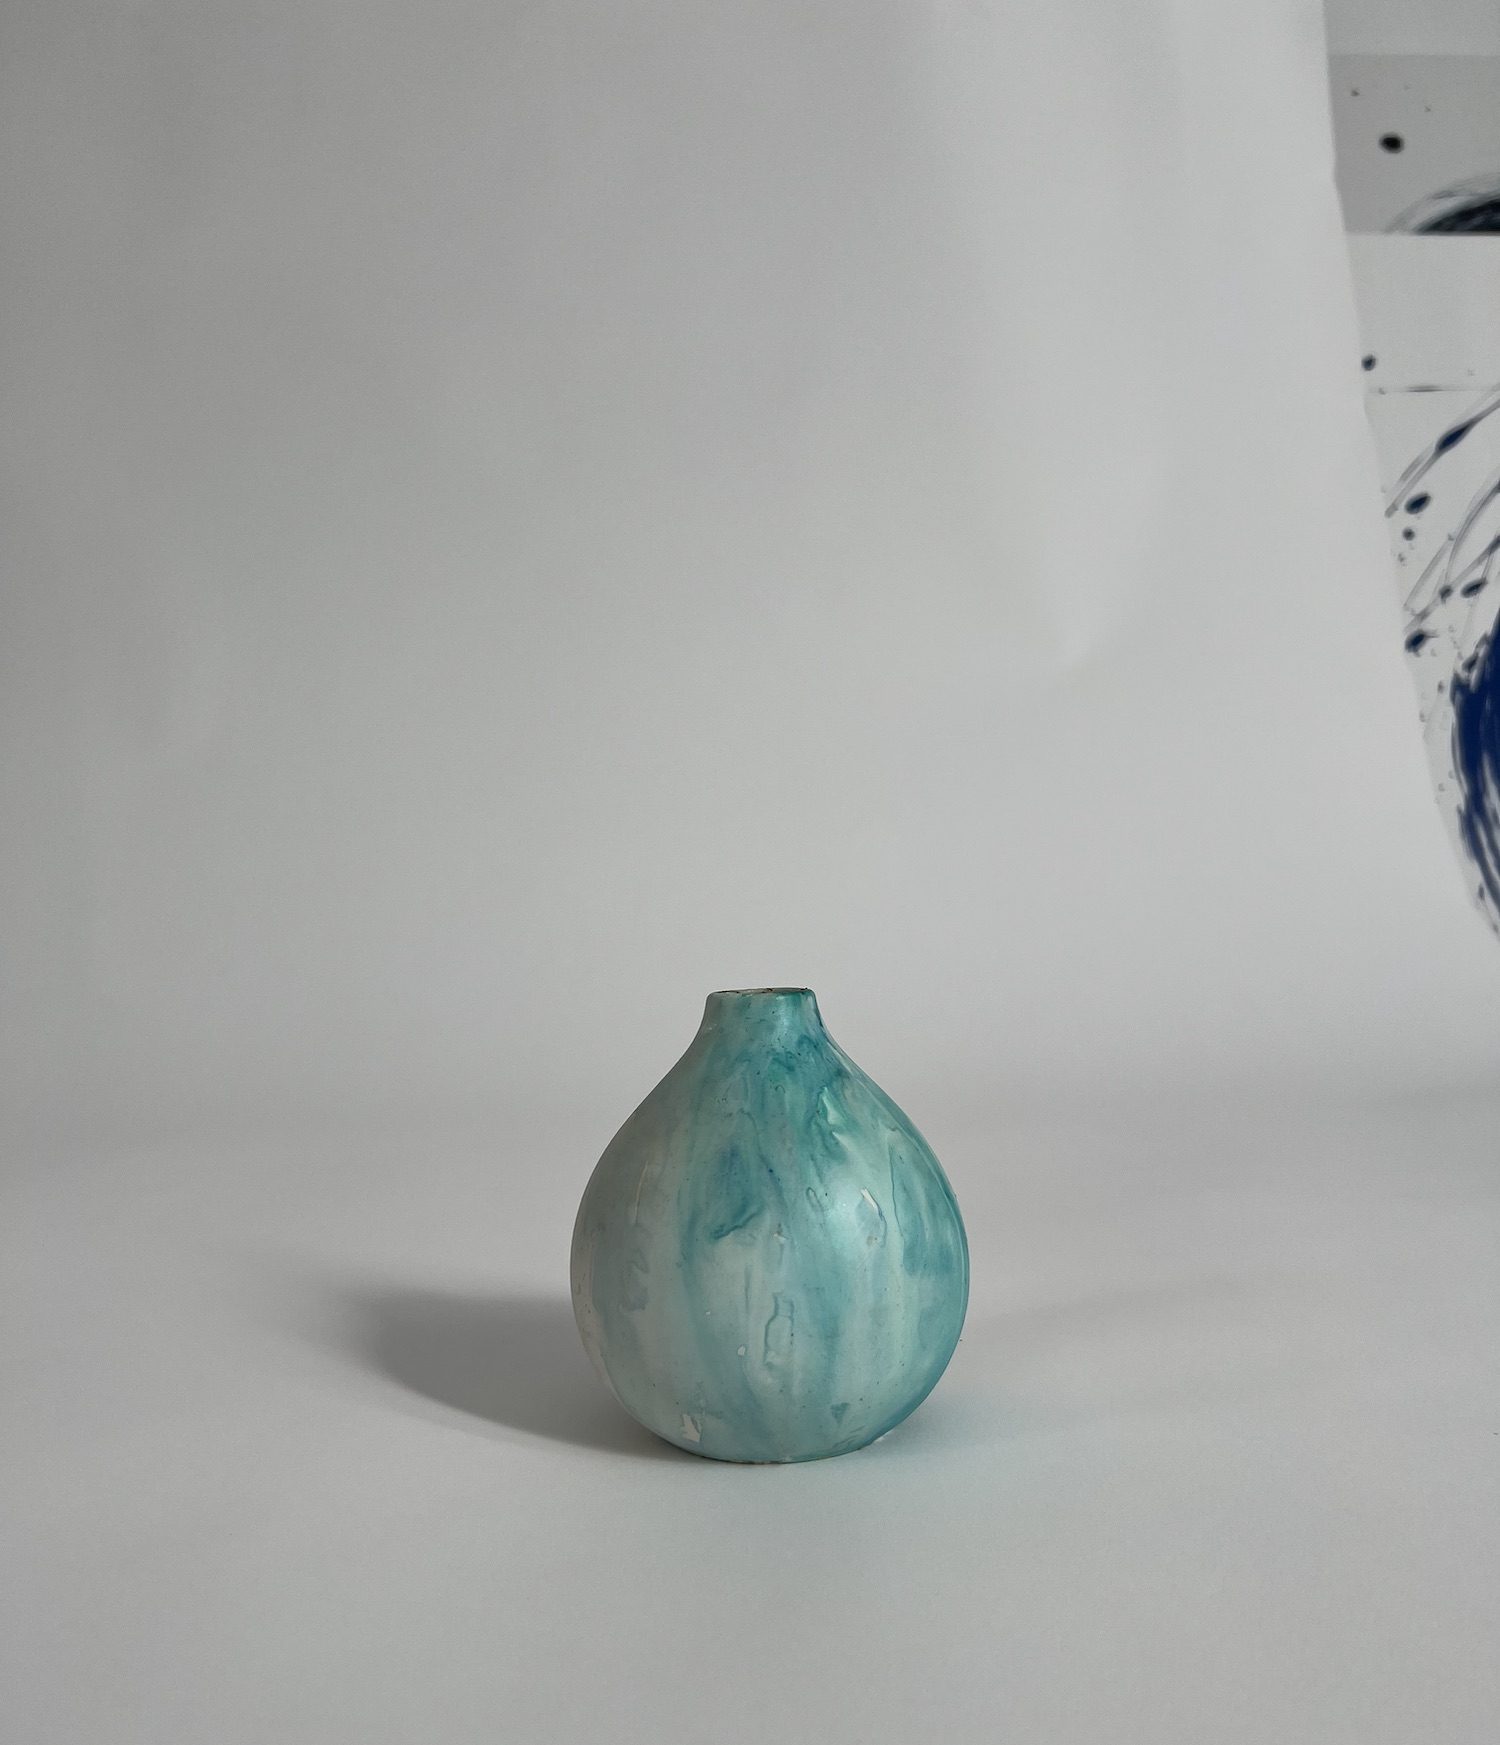
I didn’t worry much about the image’s composition since I wanted it to resemble what’s typical on the Amazon Marketplace or an independent ecommerce store, with the item being front-and-center, displaying as much info as possible.
I pulled back the view of the shot for an eye-level viewpoint from a 45-degree angle. Using my iPhone and my studio tripod, I captured a bland image, perfect for demonstrating editing on a mobile device.
—
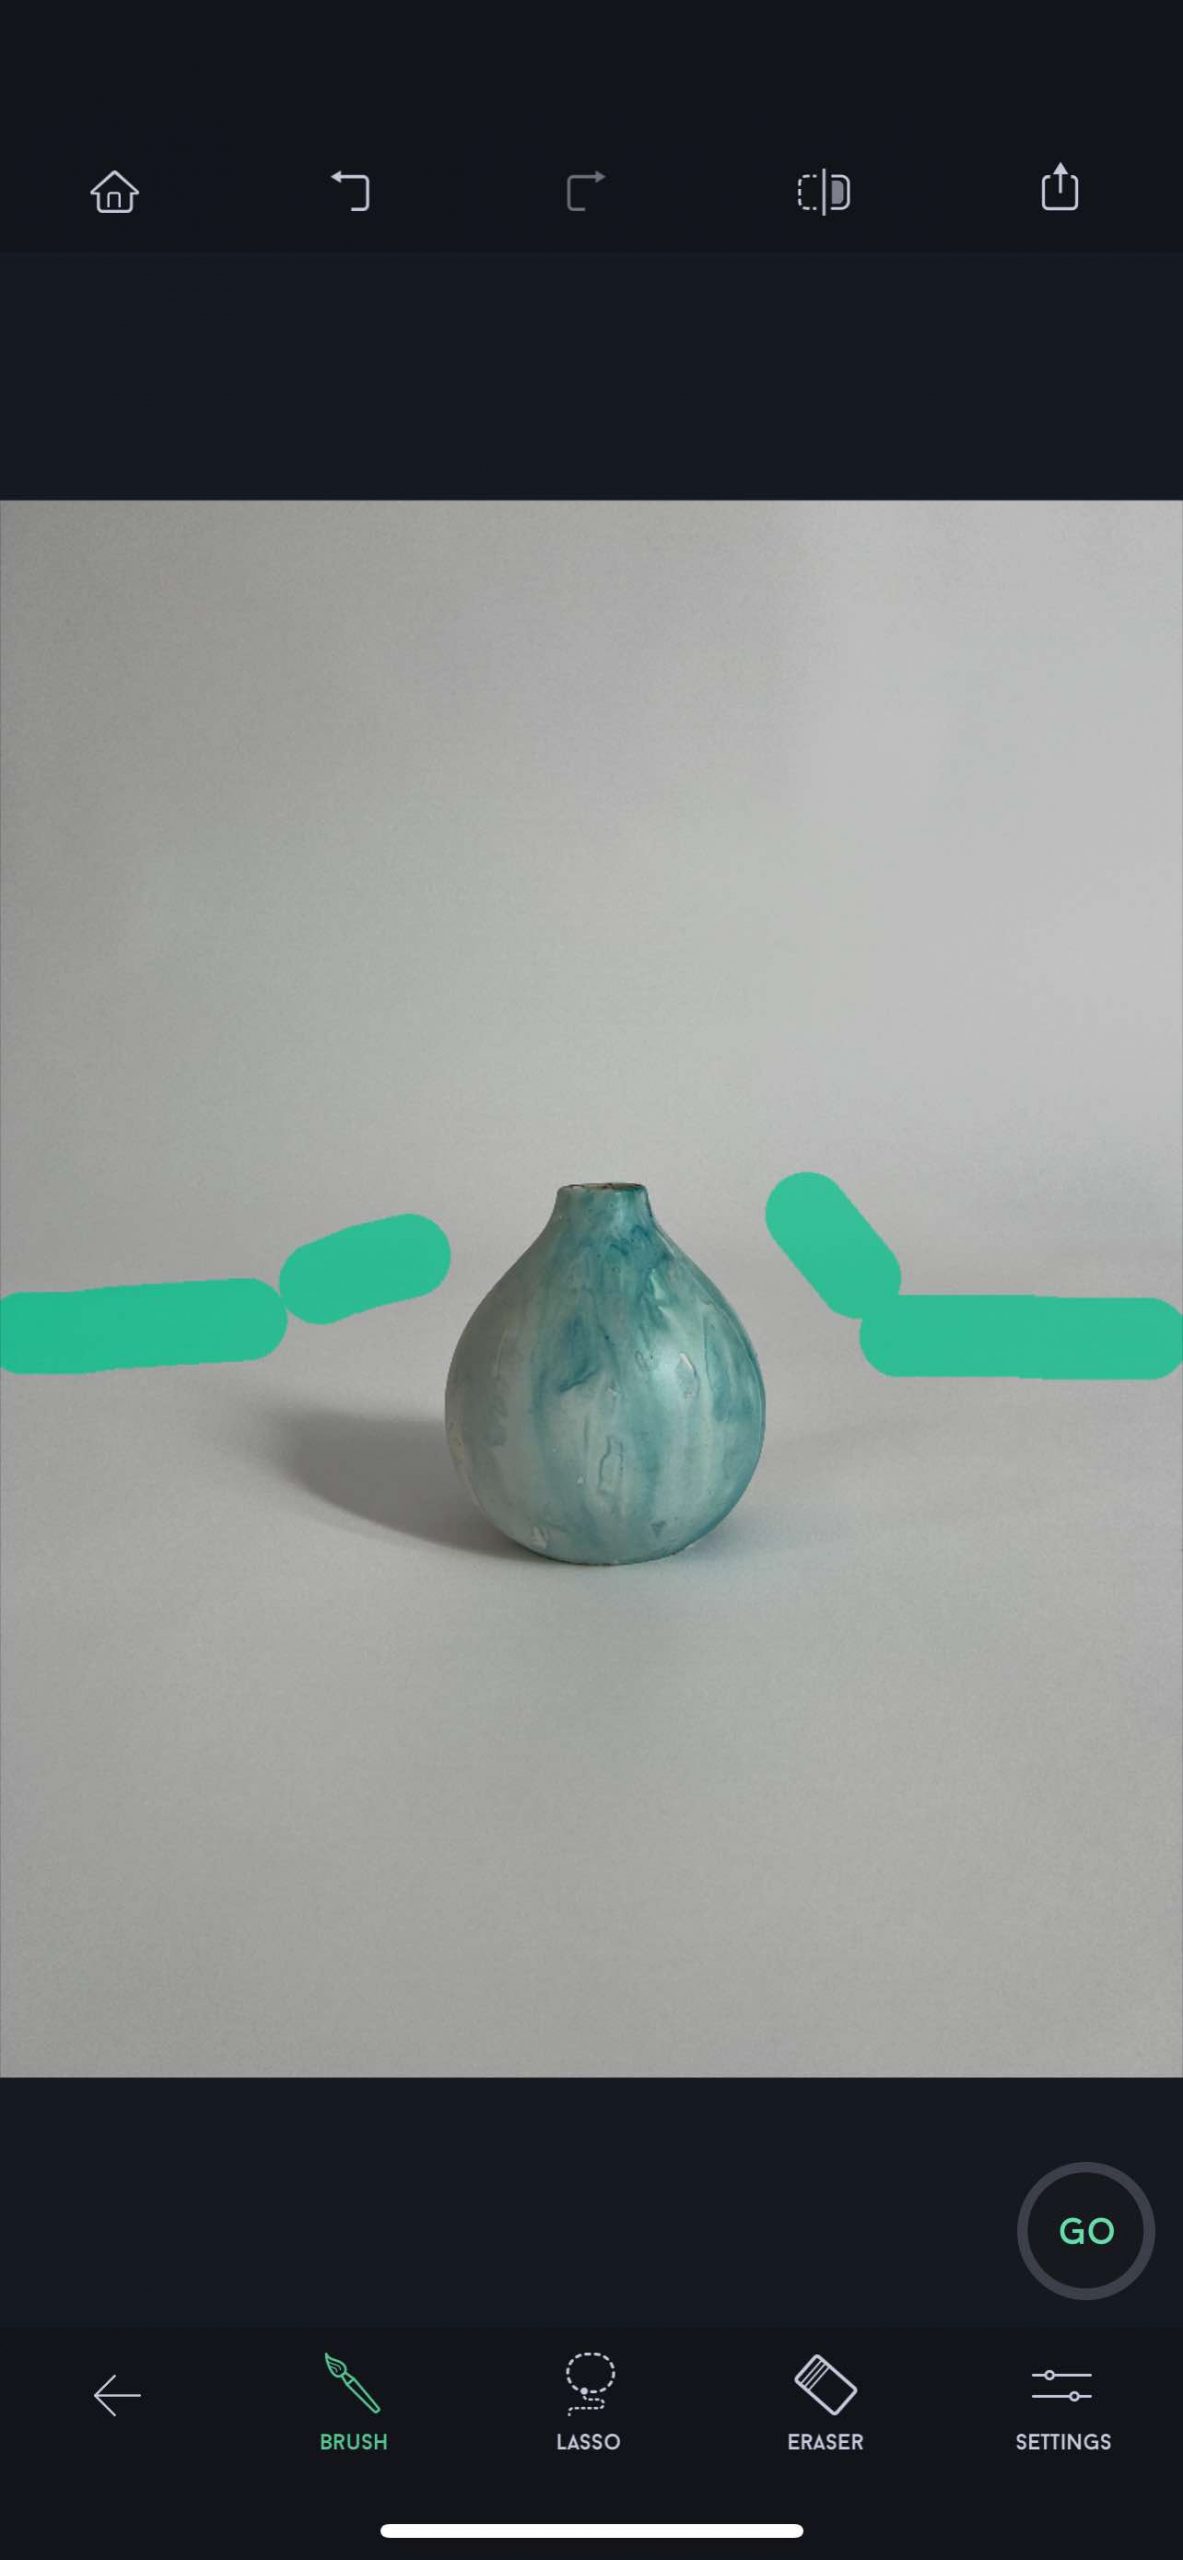
I started the editing process by removing the extraneous objects in the top-right corner (which I’ve marked in green below) using Touch ReTouch’s brush tool.
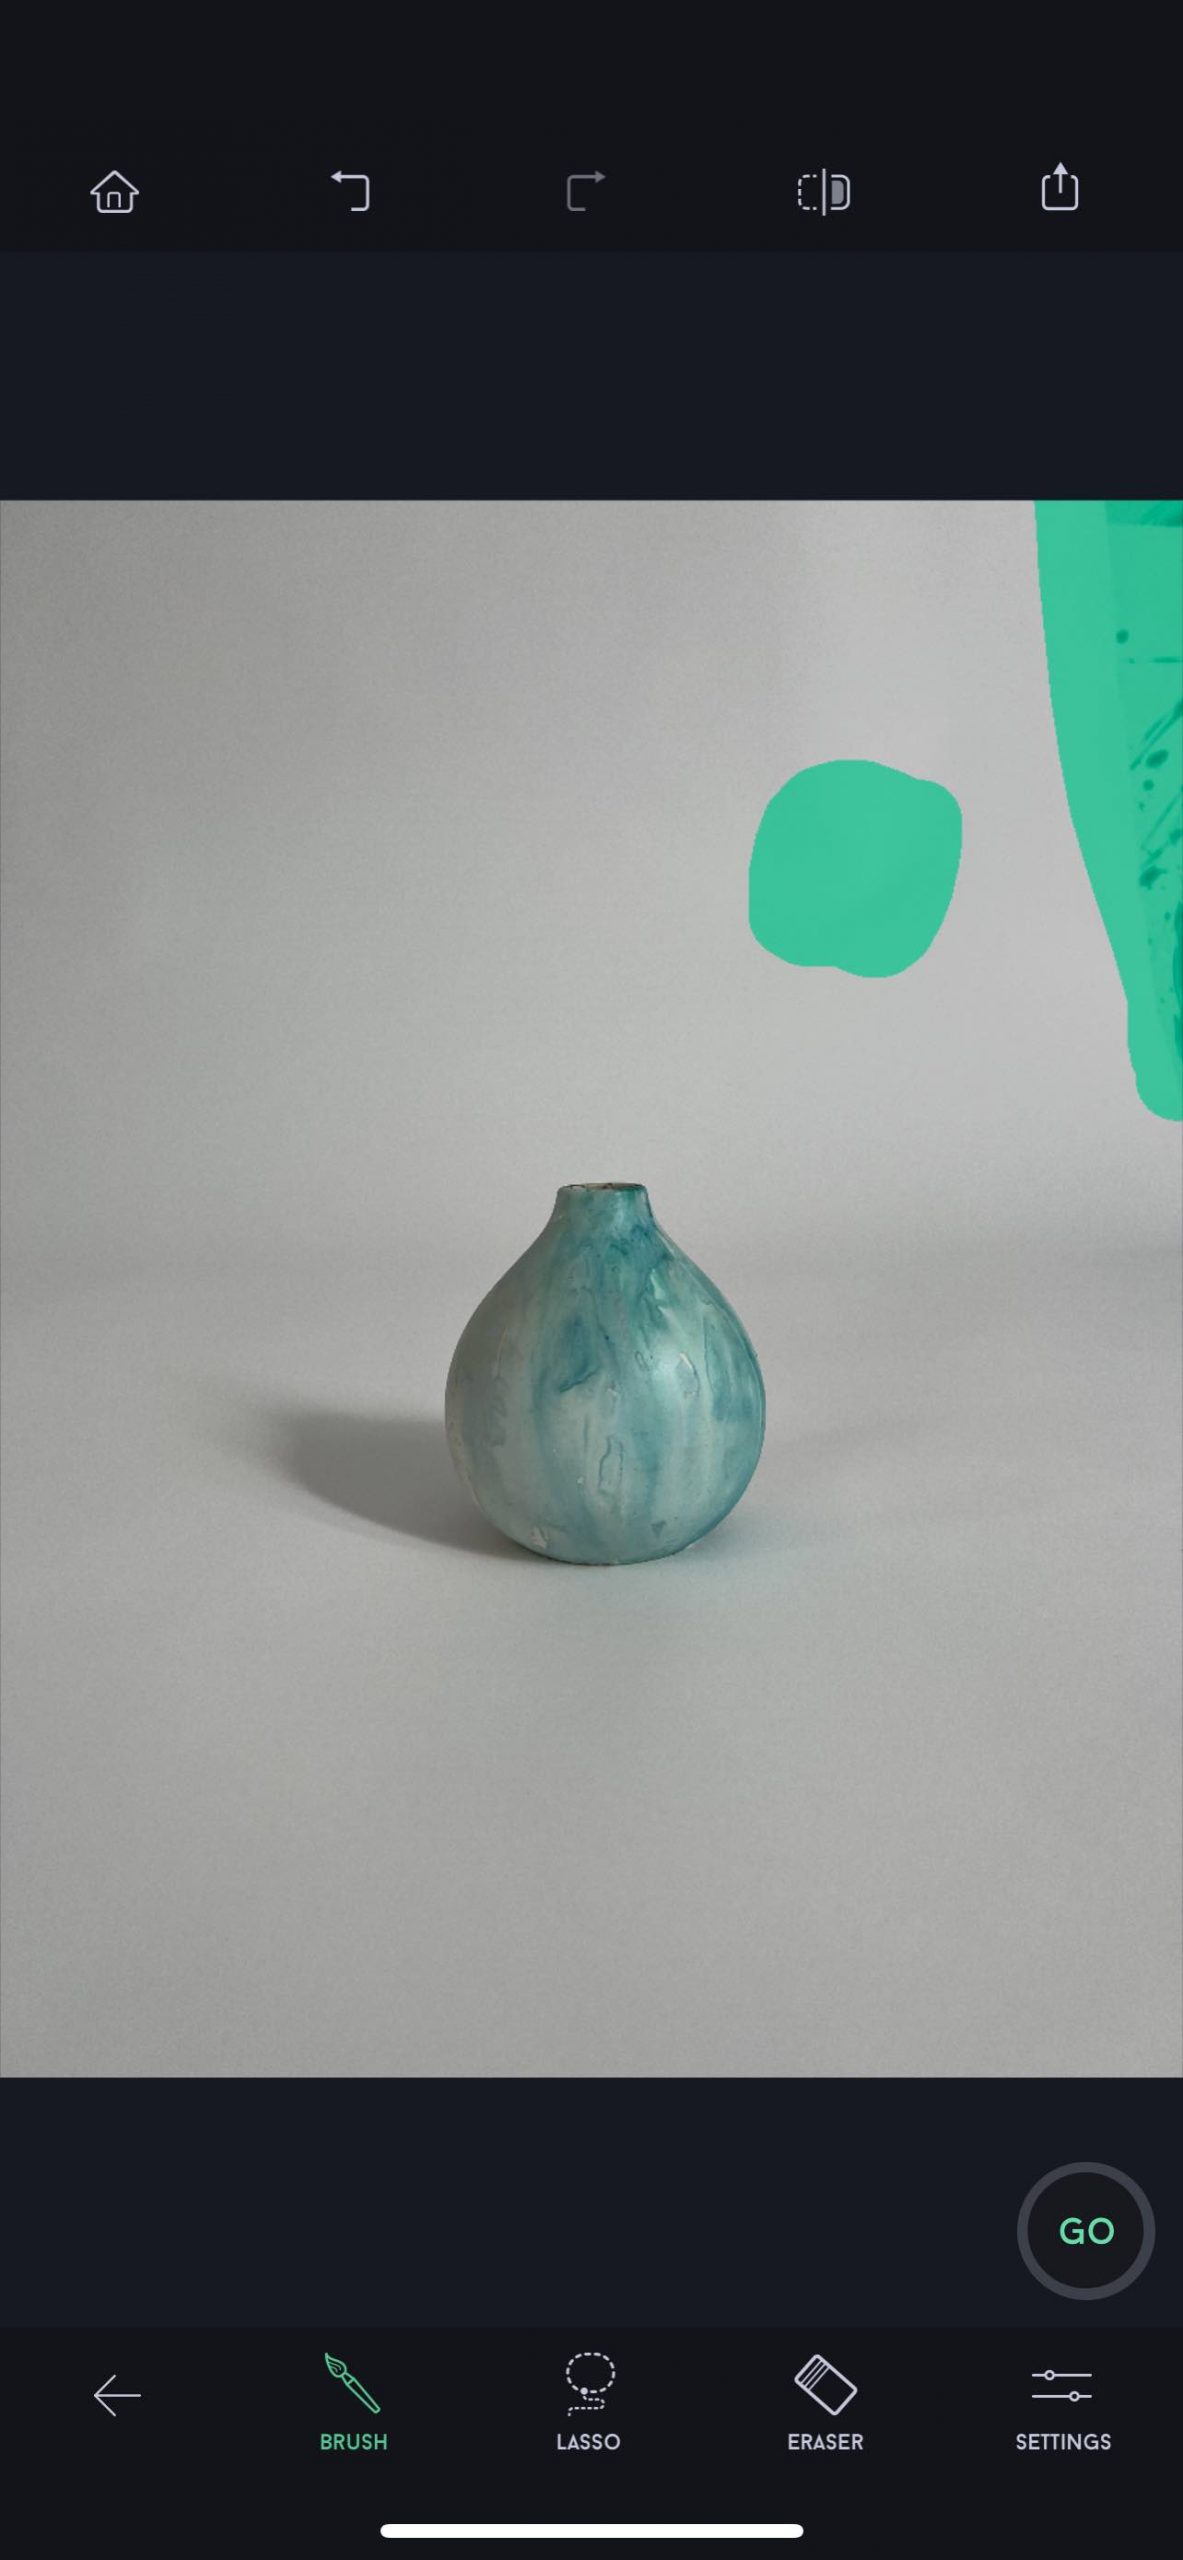
Remove the extraneous objects in the top-right corner (marked in green) with the Touch ReTouch’s brush tool.
—
I then removed the background shadows created by the horizon of the image (again, marked in green below), leaving only the shadow from the vase itself. To do this, I again used Touch ReTouch’s brush tool.
—
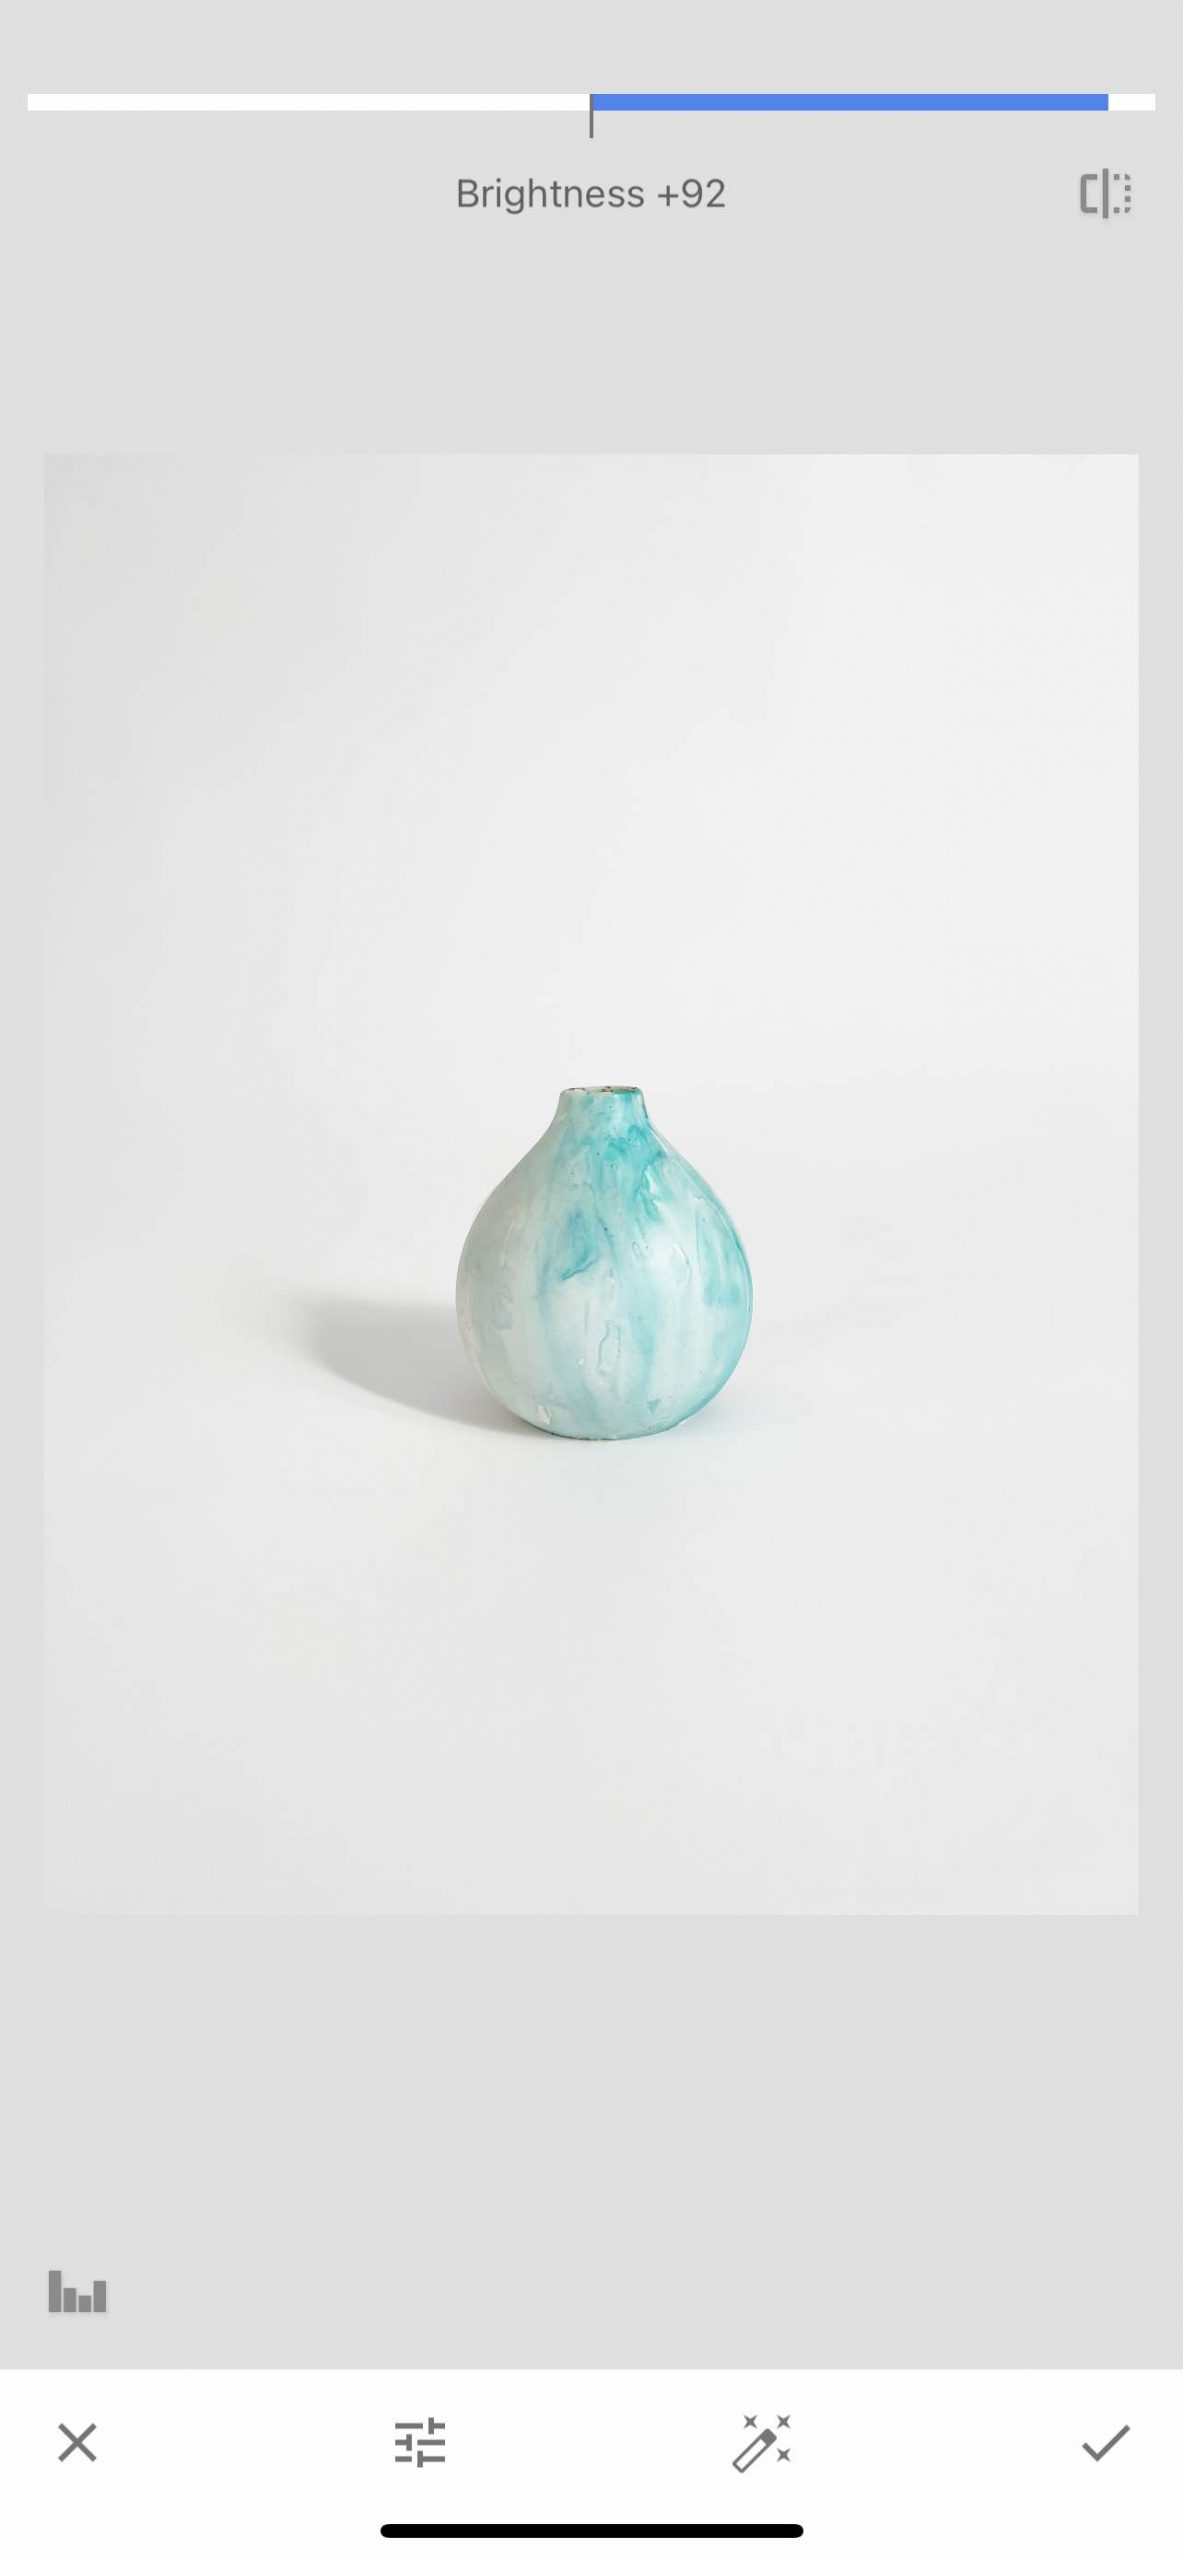
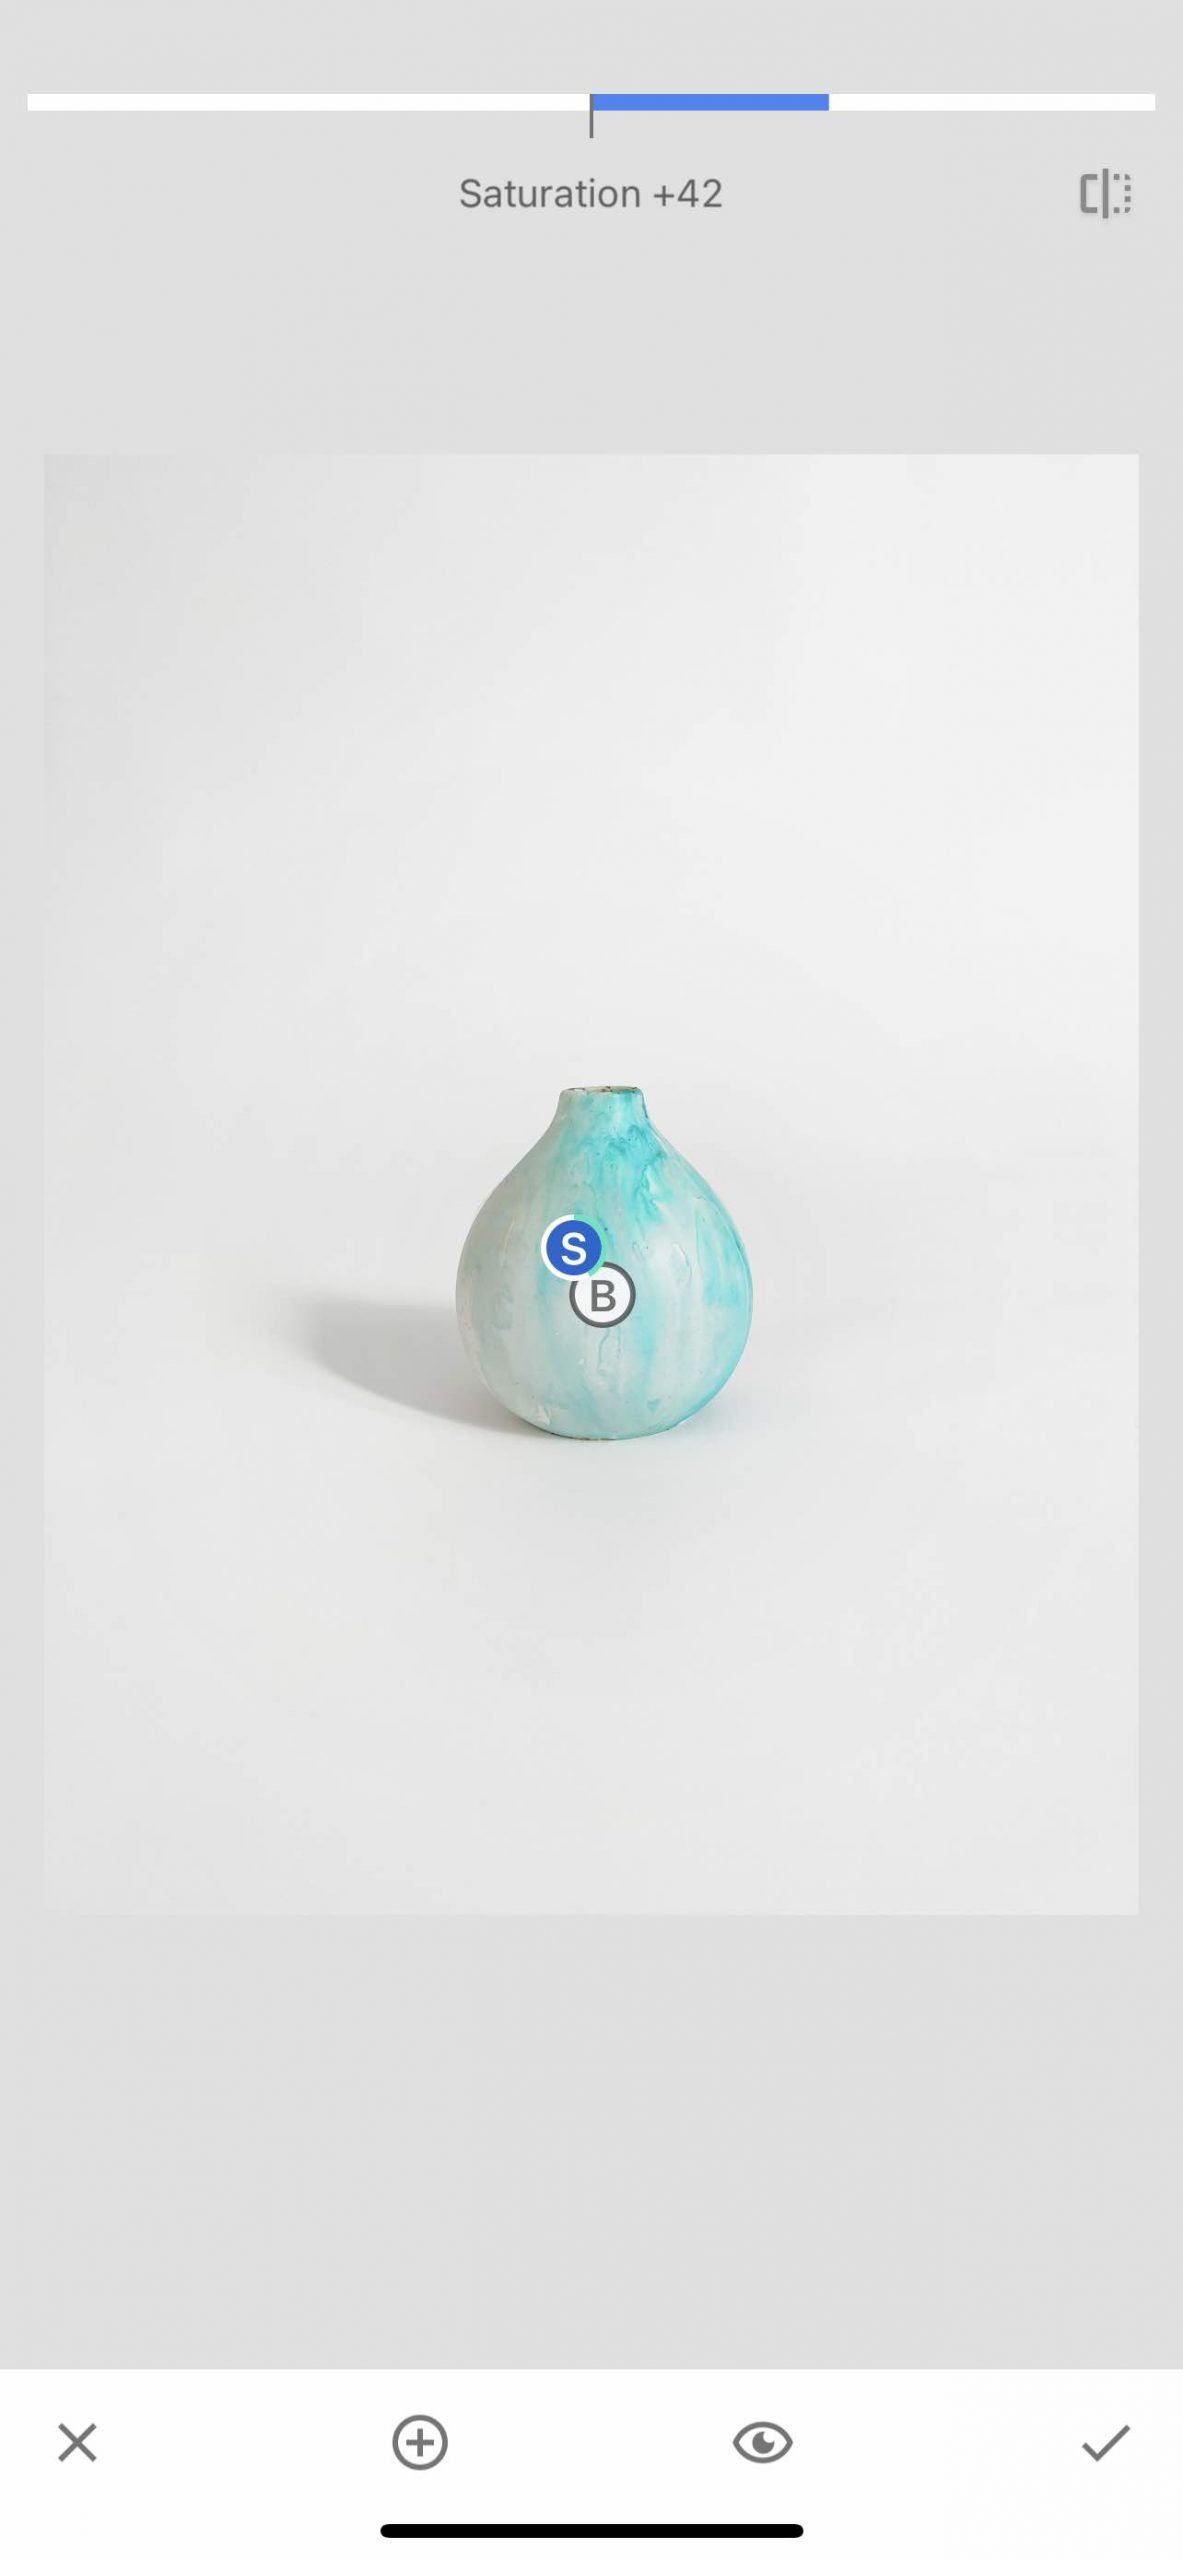
Having sorted the shadows, I fixed the image’s brightness and color levels. I used Snapseed to increase the brightness to +92. This instantly made the vase more appealing.
—
But the image still wasn’t perfect. The color wasn’t right. So using Snapseed, I adjusted the saturation to +42 and added a bit of contrast. That made the entire image pop. I showed it to a friend, who said she would buy my vase based on the photo!
—
I then cropped the final image using my iPhone’s native editing tools. I made sure the lines of the shadow drew viewers’ eyes into the center of the vase. Finally, I offset the composition by leaving additional white space above the vase, increasing its appeal.
I could have used Adobe Photoshop from a desktop computer to do all of this. But my goal was to demonstrate how to achieve terrific results with a smartphone alone. Plus, switching back and forth between computer-based software and mobile apps on a single image gets unnecessarily complicated.
Optimizing
I finished the whole process by changing the photo’s file name from the generic IMG_3880 to carolyn-mara-blue-tie-dye-swirl-vase — which is search-engine friendly. After ensuring its file format was a JPEG, I posted the image to my website, where I added alt text to ensure accessibility for visually-handicapped shoppers and for max exposure on Google.
This entire process took about 20 minutes. It illustrates the ease for both new and experienced merchants of creating quality product photos using only a smartphone.

