Contest marketing is a powerful tool for engaging customers and prospects, collecting valuable preference data, and boosting ecommerce sales. What’s more, thanks to easy-to-use applications, creating an online sweepstakes takes just minutes.
When it comes to how they spend time online or even to how they interact with businesses, shoppers have many choices. Many feel like they are inundated with marketing messages. With this oft-cited information overload in mind, it is important for ecommerce marketers to create easily distributable, relevant content so that potential customers want to view, read, and engage.
Creating an online sweepstakes a subset of content marketing that encourages your audience to interact with your business in exchange for an intrinsic reward. Drilling down even further, online sweepstakes conducted on Facebook, can attract many new likes, collect important data about shoppers, and even lead directly to sales.
There are many good tools to help business owners and marketers create Facebook sweepstakes. One of these tools is Woobox. Here is how you can quickly and easily create a Woobox-powered sweepstakes.
Step 1: Prepare Your Offer
This may seem obvious, but begin by knowing what your sweepstakes will offer and when you will run it.
Create two graphics, each 810 pixels wide, and no more than 1,200 pixels high and 400KB in size. The first of these graphics will appear on the sweepstakes’ landing page. It should help to explain the sweepstakes offer and encourage visitors to enter. The second graphic will show up after someone has entered the sweepstakes. It should serve to confirm that the entry was successful, and, perhaps, thank the viewer for participating.
At this step, you will also want to know what your sweepstakes terms and conditions will be.
Step 2: Create a New Sweepstakes Offer
Assuming that you have already created a Woobox account, for which you are probably paying $29.00 or $49.00 a month, you should head to the Woobox dashboard. In the upper right corner of the dashboard, you’ll find a relatively large, green button that reads, “Create a New Offer.” Clicking this button opens a drop-down menu of possible promotions, including sweepstakes. Click the sweepstakes link to open the general settings form.
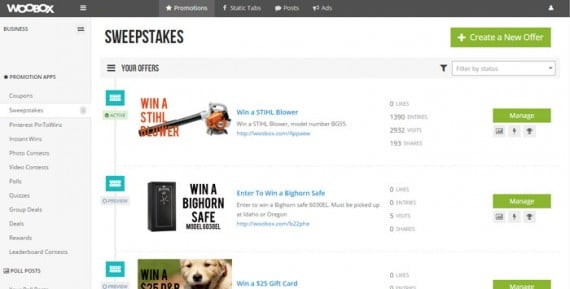
Look for the new offer button in the upper right corner of the Woobox dashboard.
The sweepstakes’ general settings form has six sections to help you both describe and configure your offer. Many of the fields, like title and description are fairly obvious, a few are less so.
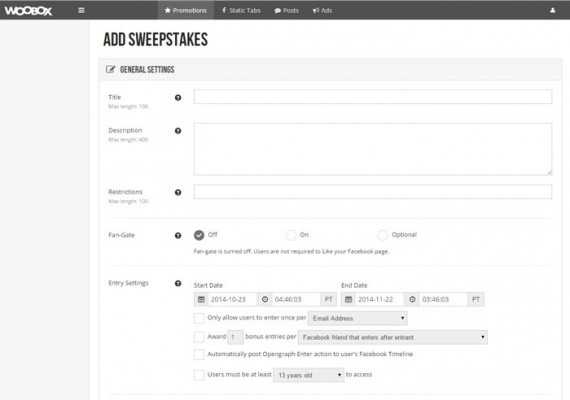
The general settings section is a basic form with six sections.
The fan-gate option can be used to increase Facebook likes. When turned on, anyone who wants to enter the sweepstakes, must like your Facebook page. Shoppers who have already liked your Facebook won’t see the fan-gate, but anyone who has not yet committed to your business on Facebook will. The fan-gate can also be set to “optional” so that shoppers may like your business’ Facebook page, but are not required to do so.
It is worth mentioning that Facebook has recently changed its policy about fan-gates and requiring or even incentivizing page likes. Thus after November 5, 2014, fan-gates may not longer be required, so that “optional” will soon be your only fan-gate option.

The entry section allows for additional configuration.
Under the Entry Settings section, you will specify the sweepstakes’ start and end date, and you have a couple of additional configuration options.
The second option allows you to give a user one or more bonus entries for encouraging Facebook friends to enter or sharing links to the contest.
Another interesting option is to automatically post about the entry on the user’s Facebook timeline. For this to work, the user will need to authorize the Woobox app, which may deter some folks from entering. However, having the contest show up on the user’s timeline could dramatically broaden the sweepstakes’ reach.
Click the “Save Changes” button at the bottom of the page to save your work.
Step 3: Customize the Sweepstakes
With the sweepstakes form open, look for the “Customize” link in the page’s left side navigation. This will open a new section of the sweepstakes form.
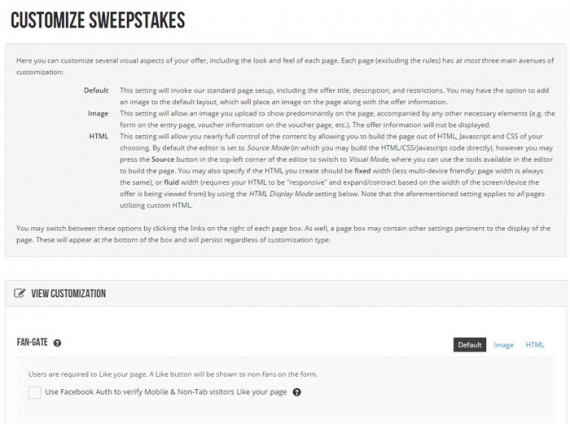
Woobox allows for basic image uploads and the option to use your own CSS and JavaScript.
At a minimum, you will want to upload the entry page image and the post-entry page image that you created in step one. You should also enter your sweepstakes’ terms and conditions in the rules section.
Optionally, you could upload a custom fan-gate image. Be sure to save your changes. The save button is at the bottom of the section.
Deeper in the customize section, you can also add your own cascading style sheet and JavaScript to the sweepstakes form. Or, under the “Form Fields” section, you could ask for additional customer information.
Although there is more that you could do, you don’t have to. Your Woobox-powered, Facebook sweepstakes is ready to go.
Making the Most of Your Sweepstakes
A good sweepstakes offer could help to collect new likes, customer data, and sales. But these things won’t necessarily happen automatically.
To get new likes, you will need to promote the sweepstakes. This could include, for example, emailing the offer to your list. Shoppers who subscribe to your emails, but who are not yet your fans, could convert. Also, consider promoting the sweepstakes with ads on Facebook or even with pay-per-click advertising. One retailer in the northwest U.S. is using Pandora to help drive traffic to an upcoming sweepstakes, as an example.
Next, data will be collected as folks enter the sweepstakes. When the contest is over, you should have a nice list of customer names and email address. What’s more, these customers will be segmented relative to your overall email list.
As an example, if you ran a sweepstakes for hiking boots, you would know that these customers are presumably interested in hiking boots. If your offer was for fly-fishing equipment, everyone who entered is probably interested in fly fishing. Assuming that you wrote your terms and conditions to include it, you should now be able to email market to these customers with offers you know will interest them.
Finally, consider sending everyone who entered the contest a coupon code for the item or product category featured in your sweepstakes. The email might begin by thanking participants for the entering, telling them who the winner was or winners were, and then making the aforementioned coupon code offer.

