Marketing attribution is the process of identifying sources or channels that led to a desired outcome, such as a sale or a subscription. Attribution can become complicated when multiple channels contribute.
For example, a consumer may first click a link on Facebook to view a product on an ecommerce site. She could revisit that product page from an email promotion. Finally, she may click an organic search listing, assess the product, and consummate the purchase. Deciding which of those sources — Facebook, email, organic search — is responsible for the sale is attribution.
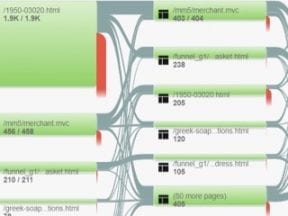
Google Analytics offers attribution modeling at Conversions > Attribution > Model Comparison Tool. There are a handful of models to select from. You can compare models to establish the effectiveness of each source.
In this post, I’ll describe attribution modeling in Google Analytics.

Google Analytics’ attribution modeling tools are at Conversions > Attribution > Model Comparison Tool.
Default Attribution Models
“Last Interaction” is the most common model. It attributes the entire conversion to the last touch. In the example above, a consumer first visited a website from Facebook, then from email, and, finally, from an organic search listing, when she completed the purchase. Last Interaction would attribute the entire sale to the organic search listing. This model tells you what source closed the deal. It helps establish the messaging or promotion that convinced the consumer to purchase.
“First Interaction” assigns 100 percent of the purchase to the first source that brought the user to the website. In the example above, the first source is Facebook. First Interaction is helpful in brand awareness.
“Linear” attribution assigns equal weighting to all touch points. In our example, Linear attribution would allocate 33 percent to each of Facebook, email, and organic search. This model is helpful when calculating return on investment as it gives value to each contributing source.
“Time Decay” attribution is similar to Linear, where all sources receive credit. However, with Time Decay the sources that are closest to the time of sale would receive a higher percentage. This is helpful if tracking the time of the conversion is important. For example, a merchant with a weekend sale could use Time Decay as it would credit the sources on, say, Friday, versus those from, say, Monday.
“Position Based” takes all sources into account. However, it assigns 40 percent to the first and last interaction and splitting 20 percent among the remaining sources. This model is similar to Linear attribution, but it presumes the first and last touch points are most important.
“Last Non-Direct Click” excludes direct traffic from getting credit.
“Last Google Ads Click” attribution assigns value only to Google Ads.
Custom Attribution
If those are not enough, you can create up to 10 custom attribution models. Marketers with Google’s Analytics 360 can use data-driven attribution, which makes it easier to create custom models based on data from Google Analytics. Otherwise, you can export the data from Google Analytics and run your own models in statistical platforms such as SAS or SPSS Statistics.
There are many reasons to create custom attribution models, including:
- Unique weighting for specific sources. You ran a model outside of Google Analytics and realized a given source consistently produced, say, 60 percent of the value.
- Timing. You have a specific timetable for the attribution window. For example, you may wish to assign value only from the last five days.
- Special cases. You may want to assign higher or lower values to specific keywords, channels, or sources. Or you may want to exclude certain sources.
- Altering the default models. For example, you may want to change the values or order in “Position Based” attribution. For the “Time Decay” model, you may want to assign the highest value to the first source.
Regardless of the reason, follow these steps in Google Analytics to create a custom attribution model.
- Click Conversion > Attribution > Model Comparison Tool. From there, select “Create new custom model” beneath the “Last Interaction” dropdown menu.
- Name the model and select the “Baseline Model” before changing its weight.
- As desired, set the “Lookback Window,” “Adjust credit based on user engagement,” and “Apply custom credit rules.”
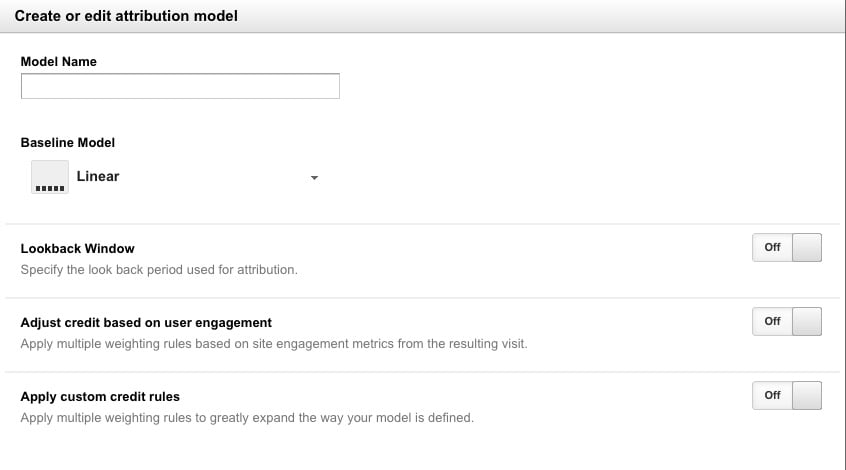
Name the model and select the “Baseline Model” before changing its weight. As desired, set the “Lookback Window,” “Adjust credit based on user engagement,” and “Apply custom credit rules.”
Consistency
Identify the purpose of your attribution model and keep it consistent over time. For example, if you use attribution to establish ROI of each source, do not use “Last Interaction” in April and “Position Based” in May. Done correctly, attribution can optimize campaigns, keywords, and sources to improve performance.