Websites sometimes break without their owners being aware. This can include errors when shoppers are browsing or checking out, which can cause serious abandonment. Identifying and correcting the errors that shoppers encounter is key to maintaining conversions.
In this post, I’ll explain how to use Google Analytics to identify breaks and errors on websites.
Setting Up Reporting
Event Tracking (Behavior > Events) in Google Analytics is the section to list website errors, such as:
- 400, 401, 403, and 404, and 500 error pages;
- Form validation errors.
We’ve addressed error page reporting, at “Locating 404s with Google Analytics.”
The key is to make sure error pages have Google Analytics tracking code so you can monitor, in Google Analytics, how frequently they are occurring.
Form Validation Errors
Validation errors occur when a form on a page — typically a login, signup, or checkout — encounters an entry that is not valid or a required field is empty. Examples include:
- Missing email address or incorrect email format;
- Incorrect user name or password;
- Missing or improper shipping or billing address;
- Missing or improper phone number;
- Credit card information missing or formatted incorrectly;
- Payment processing errors.
To detect validation errors, insert the following JavaScript on the form page:
ga('send', {
 hitType: 'event',
 eventCategory: 'Website',
 eventAction: 'Form Validation Error',
 eventLabel: '{Enter Error Text Here}'
 });
Replace {Enter Error Text Here} with the actual error message displayed on the website.
After the JavaScript is inserted, use Real-Time reporting in Google Analytics to test it. Purposely create form errors and then view Real-Time reporting (Real-Time > Events), to confirm detection.
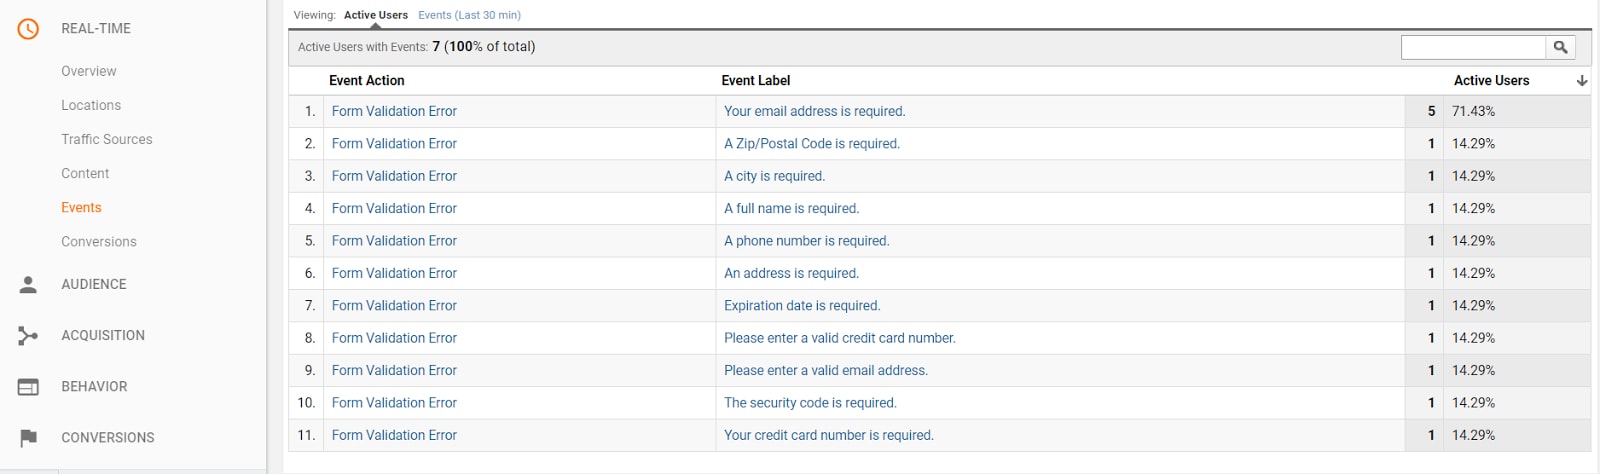
Create an error on a web page and then go to Real-Time > Events to confirm Google Analytics has detected it.
Using the Data
Once you’ve confirmed in Real-Time, review the actual errors by going to Behavior > Events > Top Events and filter by the event label you used. The event label should be the message that users see on the front-end of the site.
- Click on the “Ecommerce” tab to report “Ecommerce Conversion Rate” by error. Pages that are deep in the checkout process typically have very high conversion rates — close to 100 percent. Thus, conversion rates on error pages that are, say, 80 percent, or 60 percent, represent high abandonment, as the conversions would ordinarily be much higher.
- Secondary dimension by “Page” if you have multiple checkout pages, to identify which pages are experiencing the errors. Look for final checkout pages, such as the payment page or the order review page. If many errors appear on those pages, investigate the root causes and then fix. They could be true problems with the site or simply poor communication to shoppers, causing them to abandon.
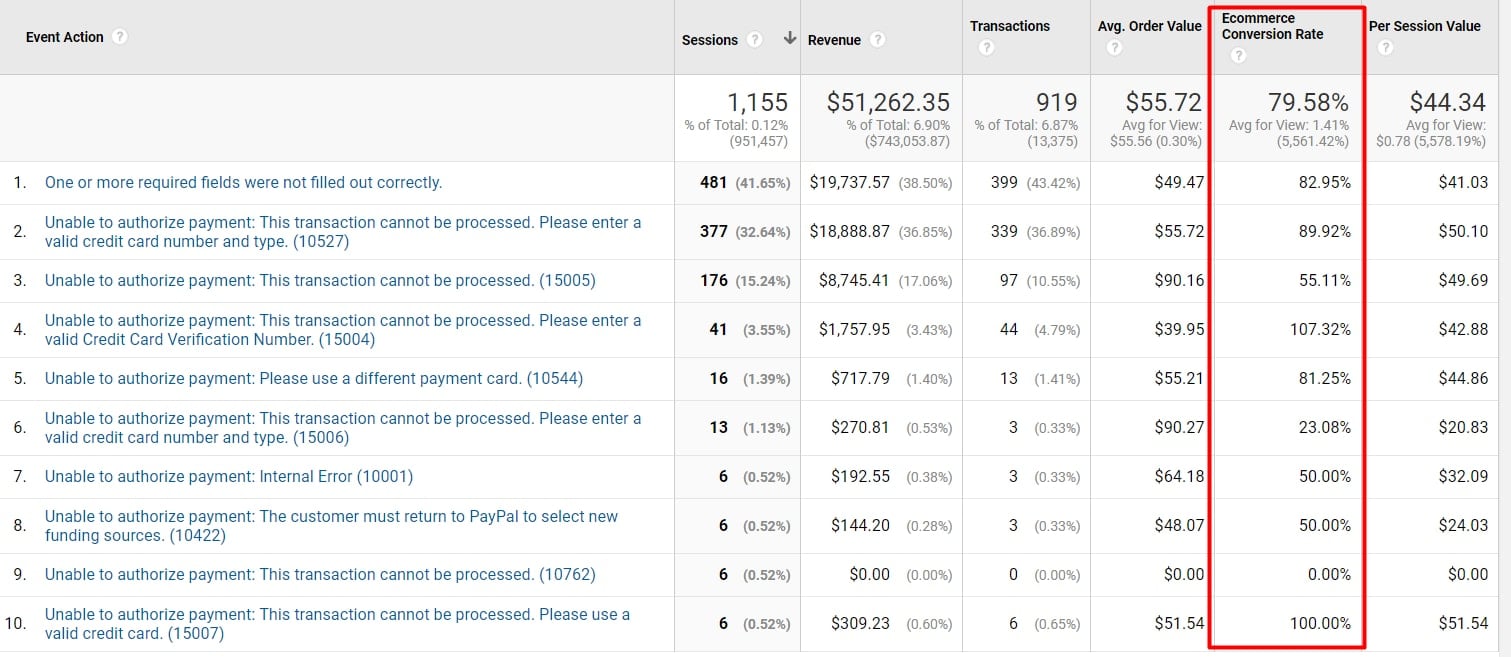
Report form validation errors and conversion rates to identify which errors are causing checkout abandonment.
—
- Secondary dimension by “Device Category” to determine if the errors are showing up on desktop, tablet, or mobile devices.
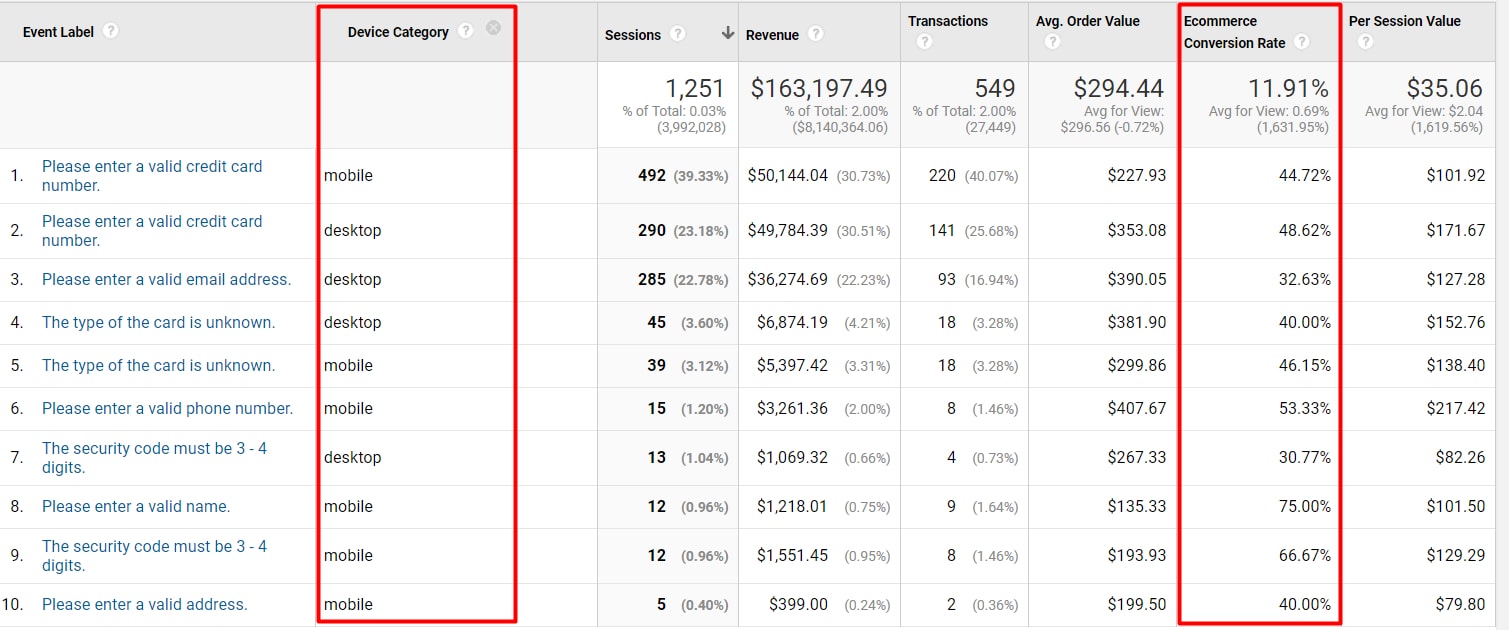
Report errors by device to determine if the error is on desktop, tablet, or mobile.
The error data in Google Analytics can be powerful. Use it to identify quick fixes or opportunities for improved communication that will increase conversions. After several weeks of focusing on website errors, add error reporting to Google Analytics dashboards or Data Studio reports, to review daily or weekly.