Not every visitor to an ecommerce site converts, and not every customer comes back to buy more. But, don’t fret, with remarketing on Facebook there’s a way to get more sales for little cost.
Facebook remarketing is fantastic, and critical, for ecommerce businesses. With Facebook remarketing, you can show relevant messaging to those who are familiar with your site — be it website visitors, email list members, or combination of both. You’ll pay a low cost-per-acquisition — think five times lower — than other remarketing options. And the ad can stay up all the time. If I could only pick one medium to remarket with, it would be Facebook, hands down.
Better yet, on Facebook you can add targeted interest and demographic data. If you know your customers are likely fans of IKEA, for example, you can add that targeting on top of your site visitors, since it’s Facebook. Again, the power of Facebook amplifies the targeting abilities you have, especially with remarketing.
Setting Up Facebook Remarketing
In this article, I’ll explain how to set up Facebook remarketing. This will be my fastest walk through yet, because I’ll build on my previous articles. I will assume that you have the Facebook pixel added to your site, which you can easily do with Google Tag Manager, and that you’re familiar with how to set up a custom audience on Facebook.
For a custom audience, choose to target people who visited your site up from as little as 1 day ago, to as many as 180 days.
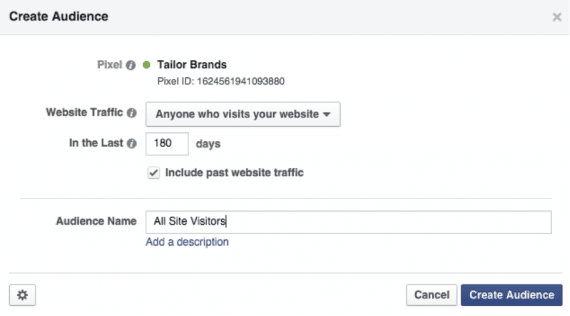
Creating a custom audience for your website visitors is the first step.
Let’s leave the audience at 180 days and call it “All Site Visitors.”
For this example, I’ll assume that your offers haven’t changed much, nor has the site. You want your potential customer to land somewhere familiar. If you redesign your site tomorrow, everyone from yesterday may be confused when they visit from a remarketing ad. This is something that’s often overlooked in a remarketing campaign, but it’s worth remembering.
Now that you’ve created your audience, go ahead and create your ads. Go to Ads.facebook.com and click on the green “Create Ad.” You’ll see a list of objectives. For this example, we’ll select “Increase conversions on your website.”
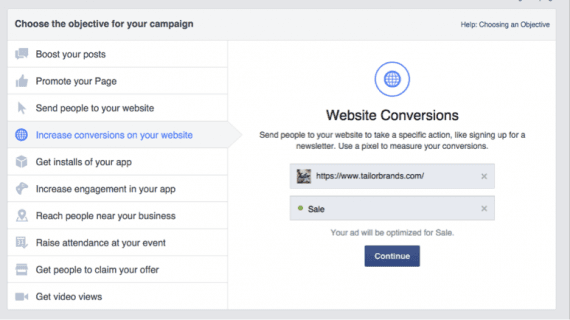
After creating your audience, create your ads and objectives.
Enter your site’s URL, and choose the conversion you want to track. For this example, let’s track the sale conversion. Click “Continue” and move to set up your targeting.
First, a primer of what to prepare for in terms of pixels. If you have a custom audience pixel, that is the only pixel you’ll need for your site. You can now push events like cart additions, email signups, and even purchases (with values) through the custom audience pixel. It’s a move by Facebook to help speed up pixel firing, reduce page clutter, and to learn more about the websites it is sending traffic to. We still use a conversion pixel at Tailor Brands, my employer. But if you’re just getting set up, use a custom-audience-pixel-only installation.
After you hit continue, the ad set targeting options will appear. Add the website custom audience we made. Simply search for “All Web Site” and it should appear. Select it, and you’ll see the audience definition meter change to “Your audience is defined.”
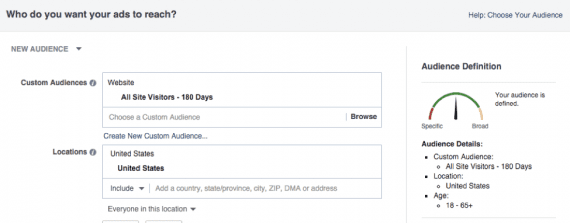
Ad targeting options for your custom audience.
We’re at a crossroads now. You can choose to leave the targeting as is, with just site visitors, the default age, and country. If you want to cast a broad net, this is fine. But a better option is to look at your Facebook page insights to adjust the demographics, as well as your internal data, to add some interests.
For the sake of this demo, I’ve whittled down the demographics and added some interests and advanced connection settings. Now let’s set up pricing.
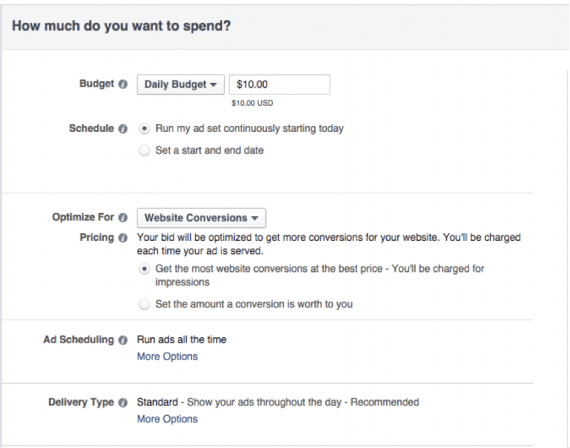
A budget of $15 to $20 per day will likely generate traction.
You can set the budget at whatever you’d like, but use at least $15 to $20 per day if you want some traction. When it comes to “Optimize For,” leave it on “Website Conversions” and let Facebook choose the bid. If you find your campaign is not delivering, set the bids manually. If that doesn’t work, you can always bid for clicks.
Don’t gloss over the ads. Get creative! Try carousel ads: they’re fantastic for multiple products. Or try a single image spread across.

Creativity with your ads is key. Carousel ads are helpful for multiple products, for example.
Once everything looks good, click the green “Place Order” button at the bottom right, and that’s it. You’ve now created a Facebook remarking campaign. It will absolutely pay off.
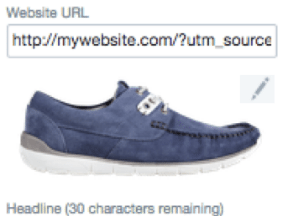
But remember, you still need to add UTM tags. Head into Facebook’s power editor: Go all the way to the ads you just created, click edit, and scroll down to “Tracking.” Add your UTM code in the “URL tags” section like below, and you’ll be good to go.
While it should be done in moderation and with enough actionable data, you should always test ads, adjust the targeting, change the bids, and more. I’ll often run multiple retargeting campaigns with different ads and targeting settings that operate exclusively of each other, just to get results faster. Remember to stay active with your campaign and never “set it and forget it.”
Are you currently using Facebook remarketing for your efforts? How is it working? Let me know in the comments below.