Fraudulent transactions can occur for most any ecommerce company. Larger companies can invest in sophisticated fraud protection services. But smaller merchants sometimes attempt to detect fraud themselves.
Back in 2014 we addressed do-it-yourself fraud detection. The article, from columnist Erica Tevis, owner of an online gift store, has helped many smaller merchants.
But Google Analytics can help detect fraud, too. I’ve used it for my own niche ecommerce site (selling imported food products), which occasionally encounters fraudulent orders.
In this article, I’ll explain how to use Google Analytics to examine three characteristics of suspect transactions, to help detect fraud.
Use Google Analytics to Identify Fraudulent Orders
Characteristic 1: The transaction was not recorded in Google Analytics. If you suspect fraud, see if the transaction was reported in Google Analytics. If not, it could be that the purchaser is using a browser add-on or he disabled JavaScript to block the sessions and transactions in Google Analytics.
To find a transaction in Google Analytics, go to “Conversions > Ecommerce > Sales Performance” and view the list of Transaction IDs.
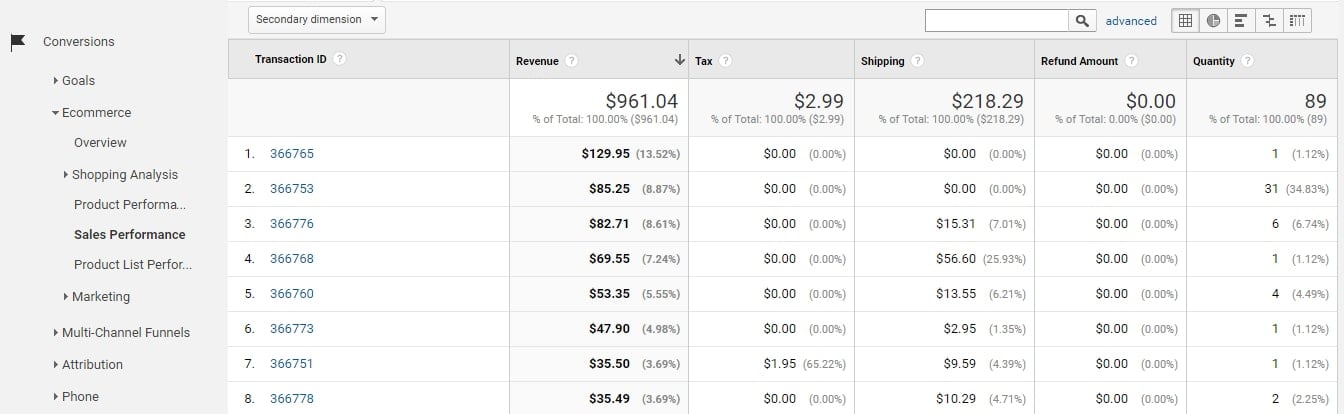
Go to “Conversions > Ecommerce > Sales Performance” to view Transaction IDs. Click image to enlarge.
Select a date range that should include the suspect order. If you see potential transaction matches, enter the Transaction ID in the search box for more details.

If you see potential transaction matches, enter the Transaction ID in the search box for more details. Click image to enlarge.
Characteristic 2: The geo-location of the transaction does not match the billing address. Follow the instructions above to find the transaction in Google Analytics. If it is present, click on the Transaction ID to display the products in the order, then click on “Secondary Dimension” and enter “Country,” “Region,” and “City” to identify where the purchaser was located.
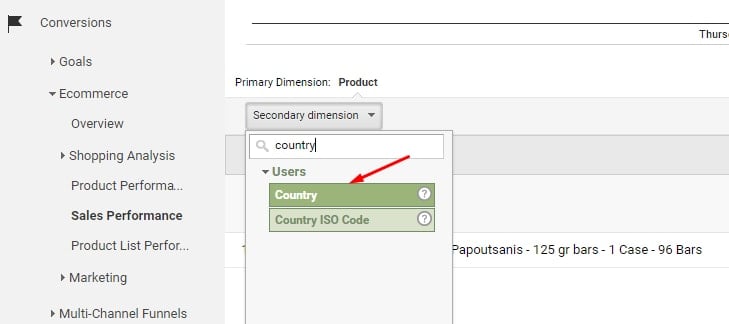
Selecting country of the transaction can identify the location of the purchase, to match against the billing address he provided.
—
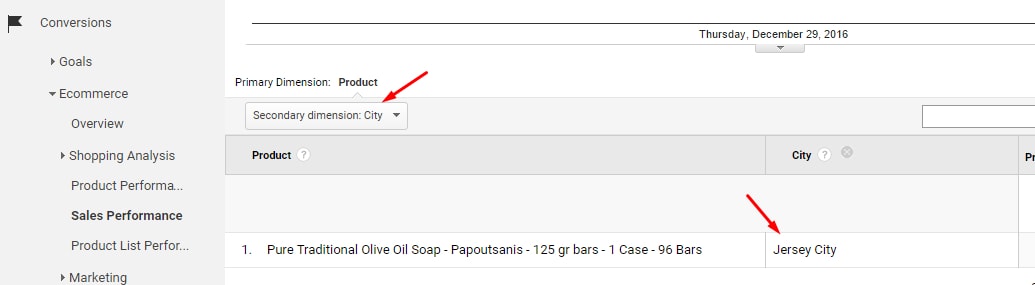
Example results when “City” is Selected as the Secondary Dimension. Click image to enlarge.
Google Analytics uses IP addresses to identify geo-location. It is not precise. But it can provide clues to the actual location of the purchaser at the time of the transaction.
People frequently purchase gifts, so that their billing address is different from the shipping address(es) in the order. That’s why it’s important to compare the billing address, not the shipping address, to the Google Analytics geo-location.
Erica Tevis, in her aforementioned article, stated that expedited delivery requests can be suspect. Couple expedited delivery requests with a geo-location in Google Analytics not matching the billing address and you may want to flag the order.
Geo-location information in Google Analytics that is “(not set)” could also be a suspect. In Google Analytics, “(not set)” means the location of the IP address cannot be identified. But“(not set)” could also be a legitimate sale. So “(not set)” alone should not be the sole determining factor.
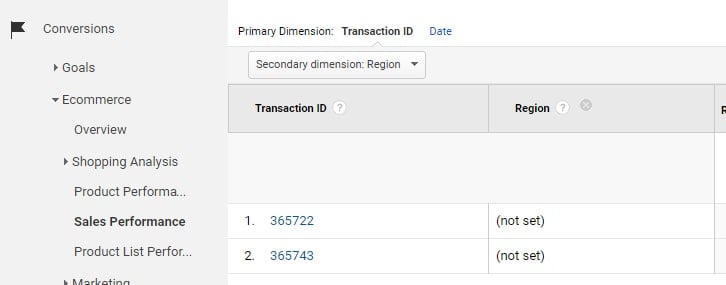
These transaction IDs with “(not set)” as the Region are, in fact, legitimate.
Characteristic 3: Purchaser spent much time on the website — especially on the payment page. If you find a suspect transaction, create an advanced segment for that Transaction ID, as follows.
First, click on “All Users” at the top-center of the reports to open the advanced segments window.
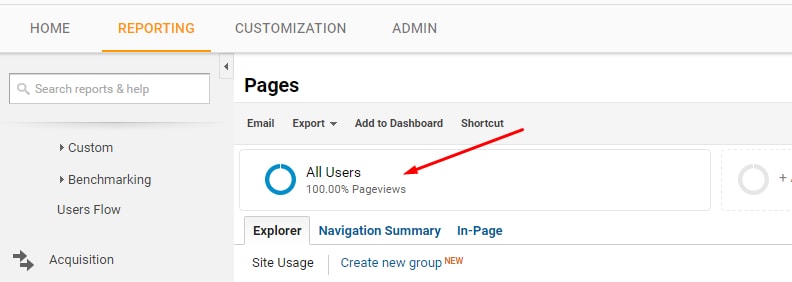
Click on “All Users” at the top-center of the reports to open advanced segments.
Next, click on “New Segment,” give it a name (such as the Transaction ID) and click on “Conditions” on the left-hand side. Select “Transaction ID” for the Filter and enter the Transaction ID in the box, then save.
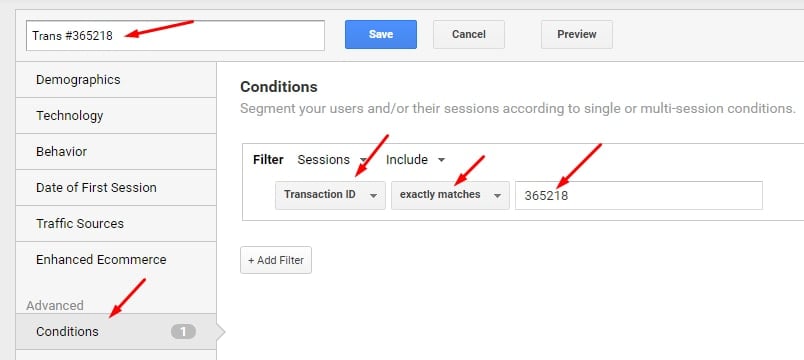
Select “Transaction ID” for the Filter and enter the Transaction ID in the box, then save.
There are two locations to view a user’s activity.
- User report. This is a new report that shows all sequential steps and timing of the session(s) for a user. Find this report under “Audience > User Explorer.” Click on a “Client Id” in the list.

To see the sequential steps and timing for each user, go to “Audience > User Explorer.”
You can see how the user arrived on the site. In the example below, the user was on a desktop device and arrived via paid search. Click on the arrow next to the time for the beginning of the session for more details.
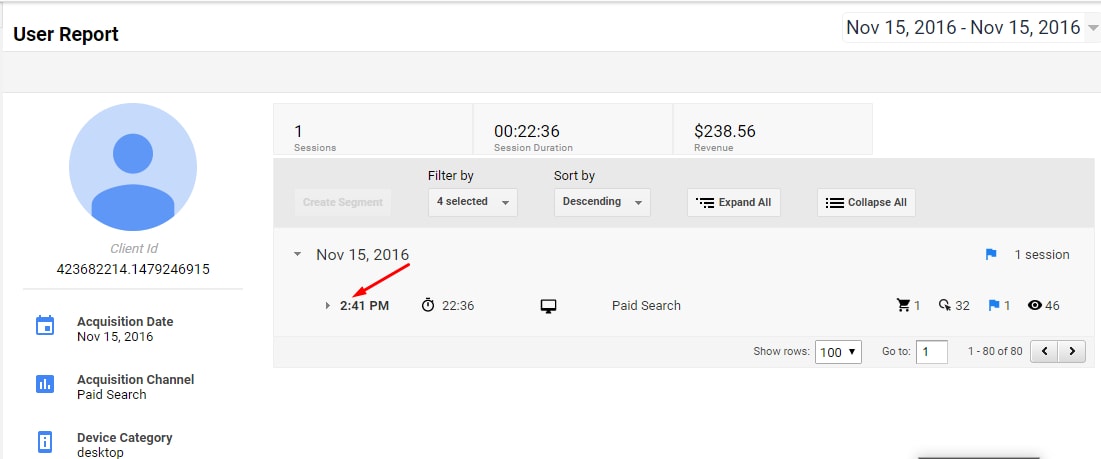
Click on the arrow next to the time for the beginning of the session for more details.
—
You will see all the actions taken in the session in descending order of timeframe.
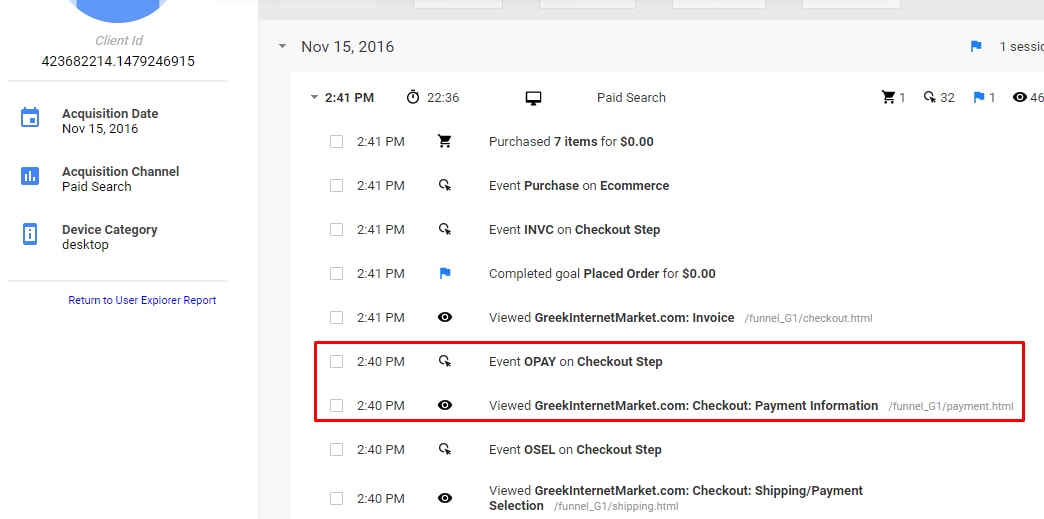
You will see all the actions taken in the session in descending order of timeframe.
In this transaction, which was fraudulent, the person spent 22:36 (22 minutes, 36 seconds) on the website, which is much longer than a typical purchaser. He did not spend a lot of time – only one minute — on the payment page, however, which is highlighted above. If he had spent much time on the payment page, that could indicate he was trying to enter a credit card numerous times.
Looking down the session details, I see that the user spent three minutes on the customer information page, which is where purchasers enter the shipping and payment addresses. Three minutes is excessive.

The purchaser spent three minutes, an abnormally long period, on the customer information page, which is where users enter their shipping and payment addresses.
- Content report. This is the second option for viewing users’ activity. Go to “Behavior > Site Content > All Pages” to view all pages that were visited in the session. I have highlighted, below, the address page, which this person spent 3:30 on. I also highlighted that he had two page views for the payment page, indicating that he had trouble on that page and it reloaded once.
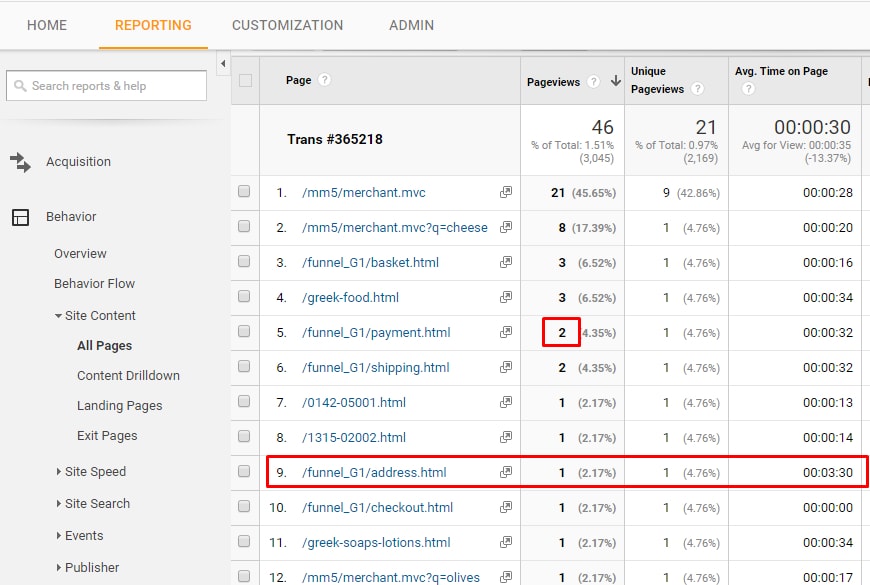
Go to “Behavior > Site Content > All Pages” to view all pages that were touched in the session. Click image to enlarge.
The data from these two reports — User and Content — was not convincing that the user was a fraudster. But the reports are worthwhile to see the details of the suspect transaction.