
404 error pages are bad. On the list of “Bad Things on Your Site,” 404s easily crack the top five. Yet site owners frequently have no idea how often 404s occur on their sites, much less monitor and address them.
Can you answer the following questions?
- How many visitors to your site last month landed on a 404 error page?
- Where did they come from that caused the 404?
- Was the 404 they saw due to an old, defunct URL, or a URL that simply never existed?
If you don’t know the answers, then you likely have some easy corrections for improving your site.
Do You Have a Graceful 404?
We have all been to sites where a bad link results in a default server message that looks like the one below. I like to enter a clearly fictitious URL — i.e., “site.com/foobar” — on any new site I’m working on to see what the result is.
Example of a standard 404 page.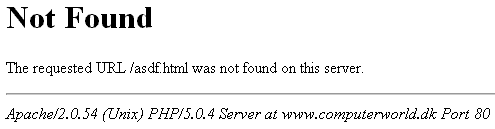
404s are bad for two reasons.
-
Uncertainty. Visitors gets an unpleasant and cryptic message rather than an assurance that they are on your site, some explanation of what might have gone wrong, and a recommendation for what they should do next.
-
Not tracked. Google Analytics doesn’t capture any data about this page, because it doesn’t include the Google Analytics page tag.
The good news is that most web servers and content management systems can be configured to support a graceful 404 page — one that identifies the website and offers navigation options for visitors. It’s worth taking advantage of those capabilities for both of the reasons described above.
Sending 404 Data to Google Analytics
There are a number of ways that graceful 404 pages can be configured. To get the most out of Google Analytics, I like to set the page up the following way.
-
Use the actual URL. Configure the 404 content to render on the actual URL where the visitor experienced the issue, as opposed to having the error page redirect to a 404 page, such as “site.com/pagenotfound.html.” Google Analytics uses the URL of the page being visited, and knowing the precise URL that generated the 404 is valuable.
-
Set the
<title>tag to a single, constant value. This could be, for instance, “<title>This Page Cannot Be Found — “Your Site Name”</title>.” This title can be anything, as long as it is only used for the 404 experience. What this approach sets up is a simple way to identify all 404 page views, while also readily accessing the specific pages and sources of those links.
Accessing the Data in Google Analytics
Google Analytics does not include a standard report for 404 traffic because every site is different. But, it is a straightforward process to create a custom report that will show not only how many visits to your site experience a 404, but also where that traffic originates.
The image below shows a basic custom report setup for 404s. You can copy this configuration by visiting this link and then updating the “Filters” section to match your site’s 404 page title.
A basic custom report setup for 404s Enlarge This Image
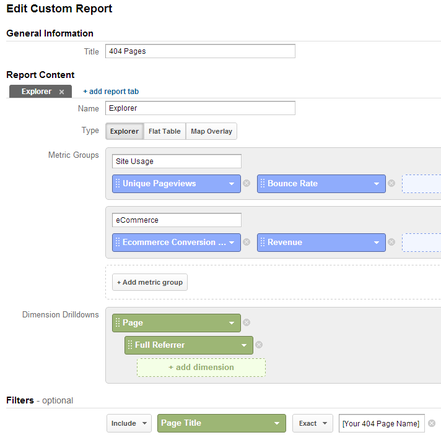
Using this Data
This report can now be used for several purposes. Initially, of course, you will simply want to see how often visitors to your site are winding up on non-existent pages, and what those pages are. But, simply knowing what the pages are does not immediately lead to a fix.
By drilling into the data for the top 404s, you can determine the source of the bad link and, if appropriate, correct it.
-
Click the “Secondary dimension” button and then choose “Previous Page Path.” Start typing the word “Previous” and the selection will quickly filter down to that as the only option. This will show a more detailed view of your 404 pages, and any entry where the second column is not populated with “entrance” is an internal link on your site. In a sense, this is an alternative to a “link crawler” for your site that identifies broken links — because it actually identifies broken links sorted by how often visitors click on each bad link. It can be time-consuming to manually fix each bad link. So this is a good way to prioritize which ones to fix first.
-
Once you have identified the links on your site that need to be fixed, click the “x” next to “Previous Page Path” and then click “Secondary dimension” again and choose “Full Referrer.” This will show a similarly more detailed view, but will now show all of the external links to your site that are pointing to bad URLs. In some cases, you can contact the site owners to have them addressed. In others, you may want to create a page with the bad URL to handle that traffic more gracefully.
If the URL is for a page that used to exist, especially if it is a product page, you may want to replace it with a notice to visitors that the page they are looking for does not exist. Then, recommend what other pages or products could meet their needs.
You can create a custom alert based on the report to notify you if the overall traffic to 404s suddenly increases. More often than not, this will be because a page with external links pointing to it went away or an erroneous link was included in outbound marketing. Either way, the faster the issue is identified, the faster it can be addressed.
Summary
Identifying 404s and their sources, as well as an on-going process for monitoring the occurrences of 404s, is worth the effort. These pages represent visitors who are trying to enter your site, with a possibility of purchasing.


