Manage Subscriptions · Subscribe Now · F.A.Q.'s
HOME · Tuesday, May 13, 2008
By: Brian Getting
Comments: 25
In the conclusion of our two-part video tutorial on CSS layout and design, we will take the layout we created in the beginning of this tutorial and begin to apply graphics and other visual stylings to it, in order to achieve the look we are going for.
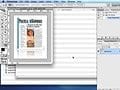
In Part Two, we will be looking at how to identify the basic graphic elements we need. From slicing the images out of our original Photoshop document to optimizing the images in Photoshop to applying the images correctly to our page, we do it all in this tutorial.
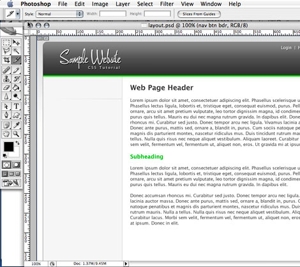
We start by breaking our Photoshop document down into the basic graphic elements we need to achieve our design goals, and then proceed to optimize each graphic element. Once created, we apply graphics to our page using a variety of CSS techniques that can be intimidating to designers. By the end of this tutorial, we will have quickly made a basic web page using HTML and CSS that almost exactly matches our original Photoshop document.
Please feel free to download and review the additional files provided below.
Software Used: Adobe Photoshop CS2, TextMate
Additional Files: CSS_layout.zip
Click the image below to launch the tutorial. 
This video tutorial requires Flash Player version 8 or above. Please forward us your ideas for additional video tutorials, via our Contact Us form.
Blinklist | Del.icio.us | Furl | Ma.gnolia | Newsvine | Spurl | Reddit | Technorati
Published on Wednesday, June 20, 2007
Great tutorial... keep them coming.
Posted by: Guillermo
Thursday, June 21, 2007
This tutorial was a great help. I knew how to do, but not as good when it come to SEO and this tutorial taught me that. I hope in future to see more of these tutorials.
Thanks.
Posted by: akram
Saturday, June 23, 2007
It was very easy to learn and understand how to create webpages in Photoshop. This tutorial encouraged me to implement CSS Design in my website with confidence.
Posted by: Rejane
Wednesday, June 27, 2007
Oooh yyyyyyyyyyyyyyess!! Part two alreaddy is there =]. It really helped me man tnks!
Posted by: Elec
Saturday, June 30, 2007
Again..great work, Brian. These tuts are gold!
Posted by: Brendan
Monday, July 02, 2007
This was the first time I looked at your video tutorials. These tutorials are fantastic! Brian is a great teacher and look forward to more of these!
Posted by: mql
Monday, July 09, 2007
Wow, loved this tutorial, both parts, plus the Rounded Corner one. So glad I found this site.
Already hit the RSS feed, so I can keep in touch!
Posted by: Annie
Friday, August 10, 2007
Doesn't work with Firefox.
Posted by: visik
Wednesday, September 12, 2007
Interesting, it seems to render and work just fine for me on FireFox 2.0.0.1 working on Mac OS 10.4.10. I'm wonder if there are issues on an earlier version or on one for another platform. I've tested in Firefox, Safari, Camino, and IE so far, and it appears to work well for me.
If you are having problems, can you email me a screenshot? Thanks. bgetting[at]practicalecommerce[dot]com
Posted by: Brian Getting
Wednesday, September 12, 2007
Thank you so much Brian. This was an awesome, A+ break-down (I'm use to formatting w/ tables, but feel eager to try css layout instead). Do you have a website w/ more video tutorials?
Posted by: Kate
Monday, September 17, 2007
Great tutorial. You have a nice easy way of explaining the topic. The video was very easy to follow. Have you considered making a series of training videos that offer more css tips?
Posted by: Tony
Monday, October 15, 2007
Excellent Job! Thank you, your presentation was clear and easy to understand,
thanks you once again.
Posted by: john
Thursday, November 15, 2007
Hi, Brian
About your tutorial . . .
Is it possible to use it as a template to create a site to myself ?
Also, why are the fonts become so big at IE browser ?
Thanks, gil
Posted by: gil
Saturday, November 24, 2007
Using the information in this tutorial, you could build a template rather easily.
The reason that IE displays larger fonts is two-fold. The first is that you need to use slightly larger fonts on Windows browsers because Windows is not very good at rendering fonts. Even native applications display choppy, non anti-aliased text so it is a good idea not to go too small with the fonts on Windows. The second reason is that most Windows users do not have the font "Lucida Grande", which is the font that I use. The secondary font in the font-set is Tahoma, which is a Windows font. It is a larger font, and when Windows defaults back to Tahoma you see the differences that you see.
Posted by: Brian Getting
Saturday, November 24, 2007
Hi, Brian
Tks for the quick reply, I implemented some modifications based on your post, look the sample I did at the link :
http://www.sandranunes.com/template/index.html
gil
Posted by: gil
Sunday, November 25, 2007
You just blew my mind! I still feel like nobody knows how to do this stuff - haha. Every time I do the search about replacing table-layout sites with CSS layouts, I hear, "yes, better, great!" but the only examples I found off the bat were always extremely plain, simple column variations. This kind of detail starting with psd graphics is ideal! bravo.
Posted by: Brian B
Sunday, January 06, 2008
I never thought CSS would be that easy. Thanks a lot.
Posted by: rakel
Friday, January 18, 2008
Very helpful. Thank you very much!!
Posted by: Pham
Wednesday, January 23, 2008
Very cool tutorial, helped me a lot..thanks !
Posted by: radu
Thursday, February 07, 2008
I'm a newbie in web design, and this tutorial cleared some things up about html and css. It's not hard as it looks, thanks to you. Keep up the good work!
Greetings from Croatia! :)
Posted by: dama
Wednesday, March 12, 2008
Thankyou Brian for these clear and concise tutorials. This is the only tutorial I have been able to follow and understand without feeling at a loss.
I have always used psd to tables in the past and I am glad I can convert to the css side.
Best wishes
Gavin
Posted by: Gavin Richmond
Saturday, March 29, 2008
This is so great. I've had some things in my head that I didn't know how to implement for my web design class. I appreciate your help very much.
Posted by: John Henry
Wednesday, April 02, 2008
Absolutely great!!! Thank you! It wasn't too fast paced! It was perfect for learning the basic overview yet not getting hung up on the little things!!! 5 stars!!!!!!
Posted by: Jordan P
Monday, April 21, 2008
Copyright 2007 Confluence Distribution, Inc. and Practical eCommerce.
All Rights Reserved.
Thanks for this very useful tutorial. The presentation was clear and easy to understand. Your step by step process made it very easy to follow along and build my own sample CSS page. I plan to implement what I learned today into my own sites. Thanks again.
Posted by: David
Thursday, June 21, 2007