
Adobe Photoshop is an incredibly powerful program that allows you to do professional grade image manipulations and adjustments. Whether you want to work with product images or design website layouts, Photoshop has the tools you need to get the job done. However, Photoshop is so powerful that approaching it as a beginner can seem daunting.
If you have wanted to learn Photoshop but haven’t known where to start, here are ten things to learn in Photoshop to become familiar with the program.
Brushes
Brushes are a foundational tool in Photoshop. Not only are brushes easy to use, the Brush Tool options translate to a number of other tools in Photoshop. Learning to use the Brush Tool will give you a foundational understanding of other tools in Photoshop, like the Eraser and the Clone Stamp.
There are three basic things beginners should learn about the Brush Tool. First, learn how to use different brushes. Second, learn to adjust the size and hardness of brushes from the Brush Tool drop down menu. Finally, learn how to adjust brush opacity and brush flow.
Brushes are the primary tool that you will use for most of your editing.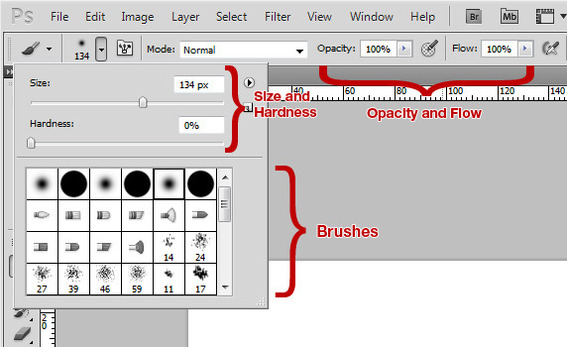
Selection Tools
There are a number of ways to make selections in Photoshop. Some of them are very complicated. The two selection tools every beginner should know are the Marquee Tool and the Lasso Tool. The Marquee Tool allows you to select using rectangles, ellipses, or one-pixel rows and columns. The Lasso Tool allows you to freehand draw around areas you wish to select with the Lasso Tool, Polygonal Lasso Tool, or the Magnetic Lasso Tool.
Selections allow you to work within a specific area of an image without affecting the rest of the image. Selections are also a simple way to isolate parts of an image and remove image backgrounds.
[ The selection tools allow you to select areas of varying shape for focused editing.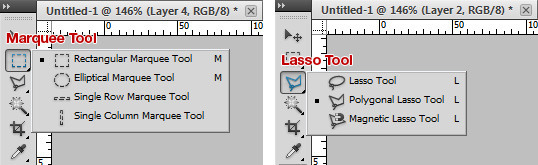
Layers
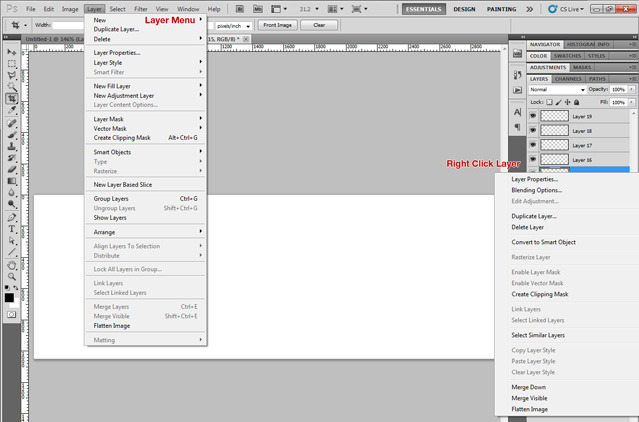
Layers allow you to choose the order in which images display and let you keep parts of your project separate and more accessible. Learn how to work using layers, keeping parts of your project organized in a logical hierarchy. Learn how to toggle layer visibility and editability using the eyeball and lock icons. Also learn how to duplicate, merge, and group layers with the Layers menu or by right clicking on selected layers.
Layers allow you to overlap images safely, and provide greater control over your design and layout. Enlarge This Image
Blending Modes
Once you feel comfortable with layers, begin exploring Blending Modes. You can change a layer’s Blending Mode to have it affect the layers visible beneath it. Understanding Blending Modes give you access to a number of advanced image editing effects.
One way to learn different Blending Modes is to sample the different Blending Modes using a single color layer above a layer containing an image.
Blending Modes change the behavior of layered images and affect the appearance of lower images. Enlarge This Image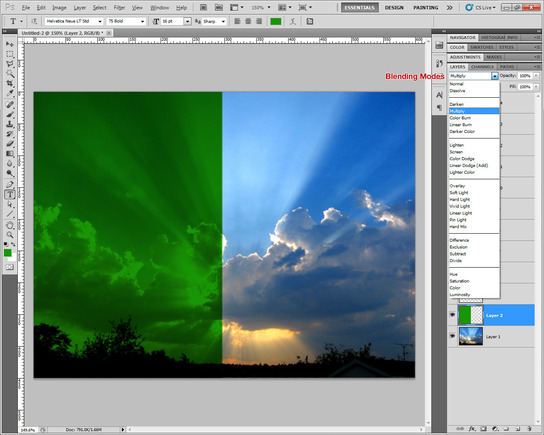
Transform Tools
The Transform Tools provide some of the simplest ways to manipulate and resize images. The Transform Tool I use most often is the Free Transform tool, which combines the functionality of the Scale, Rotate, Skew, and Distort tools. When using the Free Transform tool, experiment using the Alt, Shift, and Ctrl keys while transforming the image. You may also want to learn how to use the Scale, Rotate, Skew, and Distort tools independently as well.
The Transform Tools allow you to resize, rotate, and distort images. Enlarge This Image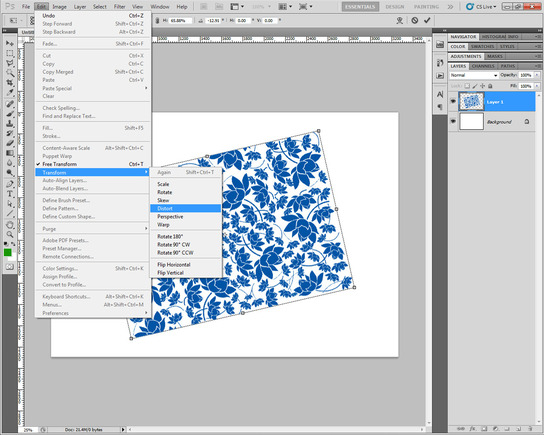
Masking
Masking uses the Brush Tool or the Selection Tools to isolate portions of an image. The important part about masking is it leaves the original image completely intact, allowing you to easily make changes later. A Layer Mask is a gray scale map on top of a layer that displays the layer where the map is white and hides the layer where the map is black.
Masking allows you to selectively render parts of your image invisible. Enlarge This Image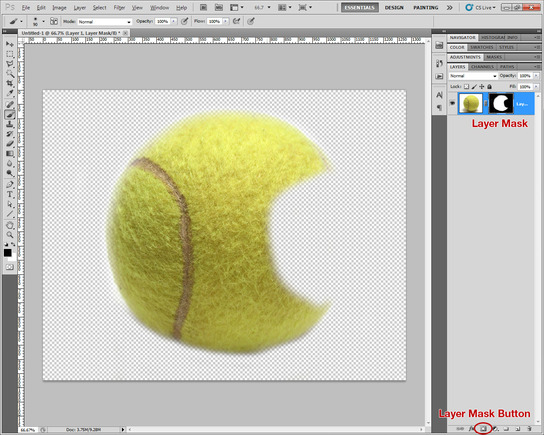
Image Adjustments
There are a number of options available under the Image Adjustments menu. Take the time to experiment with each one and learn what it does. I would especially recommend looking at Brightness/Contrast, Levels, Curves, and Hue/Saturation.
The Image Adjustments menu lets you change things like contrast and color balance to improve the overall appearance of your image. Enlarge This Image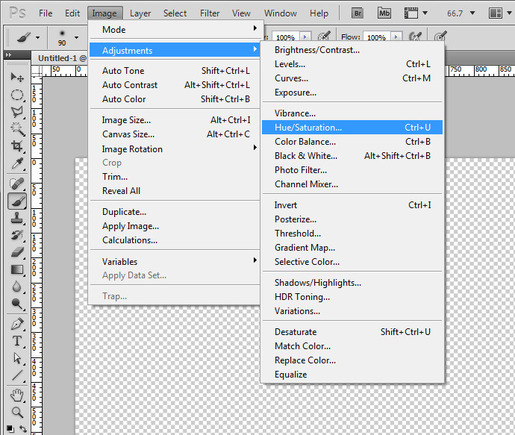
Layer Styles
If you want to add a drop shadow to an image or make text glow, look no farther than Layer Styles. At first glance, Layer Styles might seem more complicated than they actually are. For the most part, Layer Styles deal with five things: Shadows, Glows, Contours, Overlays, and Strokes. Similar to Blending Modes, a good way to learn Layer Styles is to create a simple, colored box on your canvas and try applying different Layer Styles to it.
To access Layer Styles, double click on a layer’s thumbnail or use the “fx” icon at the bottom of the Layers panel.
The Clone Stamp Tool copies copies part of your canvas for image retouching. Enlarge This Image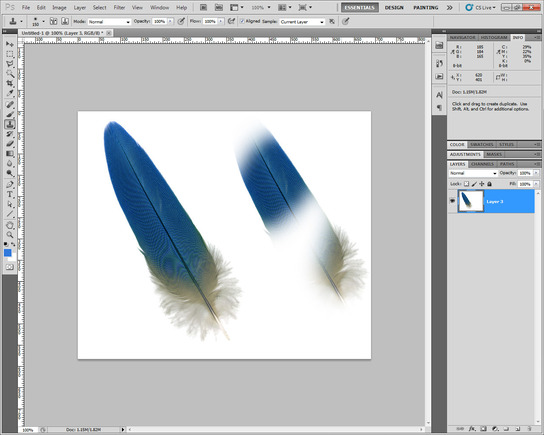
Clone Stamp
The Clone Stamp Tool is slightly more advanced than some of the other beginner tools, but it’s also one of the most fun to learn for the first time. The Clone Stamp Tool allows you to paint using a sampled area of your canvas. The Clone Stamp Tool also uses many of the same adjustment options as the Brush Tool and should be somewhat familiar once you are comfortable with brushes. Mastering the Clone Stamp Tool allows you to do advanced image retouching and manipulation.
The Clone Stamp Tool copies copies part of your canvas for image retouching. Enlarge This Image
(Use the Alt key to sample an area from the canvas before Clone Stamping)
Filters
I will admit that I rarely use Photoshop Filters. However, I believe every beginner should experiment with Filters if only so they can gain an understanding of what Photoshop is capable of. Additionally, some Filters, like the Render and Blur Filters, can be used in advanced techniques later on in your Photoshop career.
Take some time running through the different Filters from Photoshop’s Filter drop down menu. My advice would be pick an image and try out each of the Filters on it.
Filters re-render your image in a variety of styles. Enlarge This Image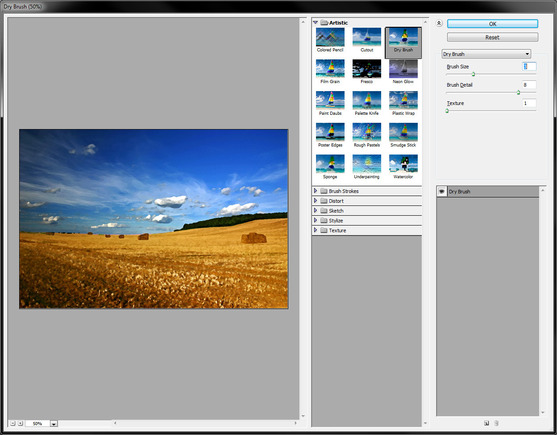
Use the Program
The list compiled here by no means exhausts the capabilities of Photoshop. Instead, these are some simple skills to help get your foot in the door. Find a task in Photoshop you could see yourself doing a lot, like editing a product image or doing image retouching and experiment with the tools listed here. You can also look up video guides for each of the tools here before better familiarizing yourself with them. Ultimately, the best way to know the program is to actually spend time using it. So open up Photoshop and try these tools for yourself.


